Frugal Fun Projects - Ribbon
Beaded Bracelet

Learn how to make this easy ribbon beaded bracelet with the easy instructions below. Some ribbon and a few beads
easily become a unique and interesting bracelet.
Frugal Fun Projects: Easy Ribbon Beaded Bracelet Materials and Tools:
- Base ribbon 5/8 to 3/4 inch wide (length depends on the length of the bracelet - see the Easy Ribbon Beaded Bracelet Pattern for a chart of
lengths) - should be sturdy such as grosgrain ribbon or ribbon webbing
- Lining ribbon - same as base ribbon. It can be a lighter weight ribbon but should be the same width as
the base ribbon - or you can choose not to include a lining ribbon
- Middle ribbon - 1/8 to 1/4 inch smaller width than base ribbon
- Top ribbon - 1/8 to 1/4 inch smaller width than middle ribbon
- Beads
- Thread
- Needle
- Ruler
- Scissors
- Fabric glue
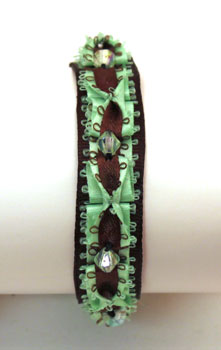
For this bracelet, I used a 5/8 inch dark brown grosgrain ribbon for the base ribbon and the lining ribbon.
The middle ribbon is a mint green satin of 1/2 inch width including its edge loops. The top ribbon is a
dark brown satin that is 3/8 inch wide with its edge loops. Faceted mint green beads decorate the ribbon.
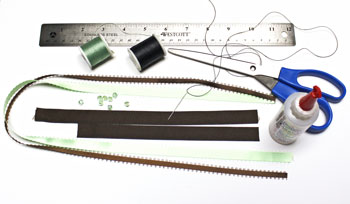
The Steps for How to Make the Frugal Fun Projects: Easy Ribbon Beaded Bracelet:
Print the Easy Ribbon Beaded Bracelet Pattern
for a chart of lengths and hints about the stitches and loops.
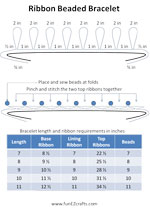
This bracelet is the 8-inch version.
The base ribbon of dark brown grosgrain ribbon is 9 1/2 inches long. The mint green middle ribbon and dark
brown top ribbon are 25 1/2 inches plus a little extra (1/4 to 1/2 inch) just for insurance. It's easy to cut
off any extra.
Match the ends of the three ribbons. Center the middle and top ribbons over the base ribbon.
Begin sewing the ribbons together with a simple running stitch. (Find information about stitches in our
free how-to-sew-stitches e-book.)
I used black heavy-duty craft thread to sew the ribbons together — because I had it. All-purpose thread is
just fine.
Stitch perfection is not necessary as these stitches will be hidden.
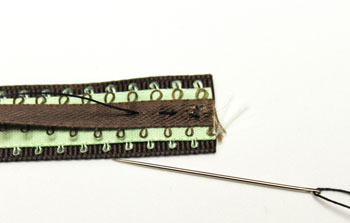
Turn under the ends of the ribbons by 3/4 inch.
Sew the layers together.
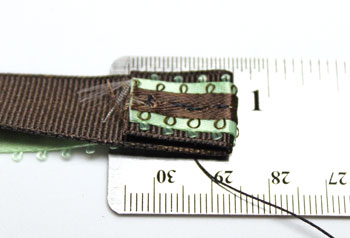
Make two anchor stitches across the center of the ribbons 1/2 inch from the folded end of ribbons.
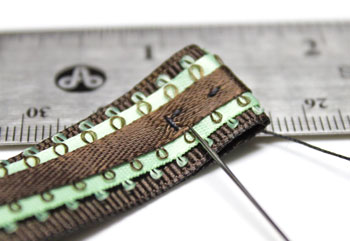
Measure two inches of the middle and top ribbons.
Bring the two-inch mark back to the edge of the sewn ribbon.
This makes a 1-inch loop.
Add two anchor stitches to hold the loop in place.
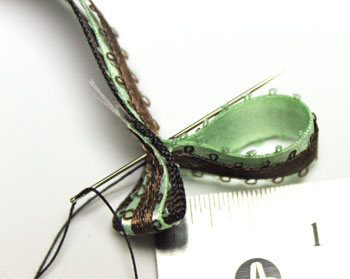
Stitch along the center of the ribbons for 1-inch. (These stitches will be hidden.)
Add two anchor stitches across the center at the 1-inch mark.
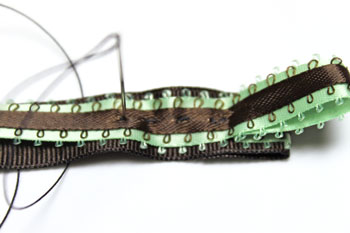
Measure two inches of middle and top ribbon and make the second loop.
Add anchor stitches to hold the loop in place.
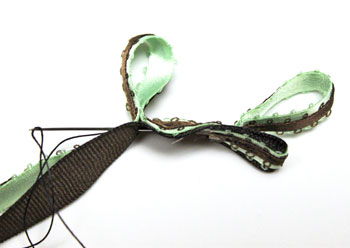
Continue sewing and making loops until the last loop is made.
This ribbon beaded bracelet is 8 inches and has 8 loops. The other bracelet lengths determine the number of
loops to make.
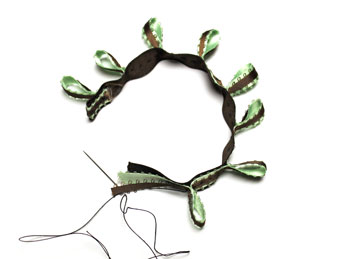
Sew 1/2 inch beyond the last loop.
Fold under the ribbon and sew through all of the layers.
Trim the ribbon ends to have 3/4 inch folded under.
Secure the thread, knot and trim.
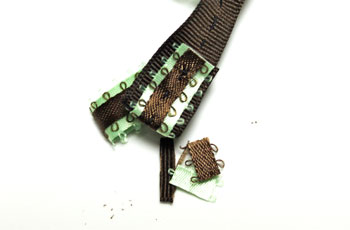
An 8-inch bracelet requires 8 beads.
Prepare the needle and thread for the beads. I used craft thread for the beads but all-purpose thread works just
fine.
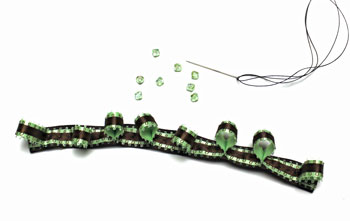
At one end, fold the end loop in half. Attach the edge fold to the end of the bracelet.
Make small stitches as this area will be somewhat visible.
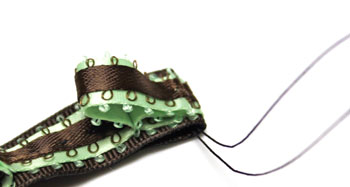
At the other edge of the folded loop begin to attach the first bead.
Fold the second loop such that its edge is under the other side of the bead.
Sew both loops' edges when attaching the bead.
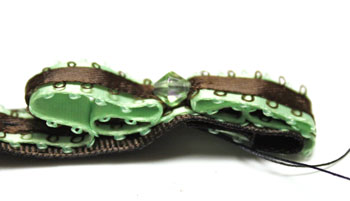
Continue adding the beads.
Fold the loops in half and attach each bead over the folded edges of two loops.
Sew the last bead to the folded edge of the last loop at the end of the bracelet.
Add extra stitches, if possible, through the bead.
This bead acts as part of the closure.
Secure the thread, knot and trim.
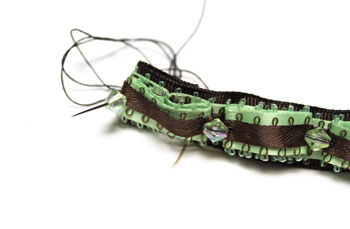
This view shows all the beads added, but the ribbon beaded bracelet is not yet complete.
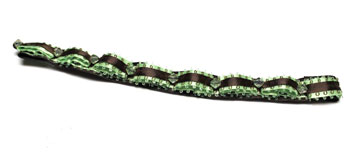
For this next step, I used mint green thread to match the green ribbon. This area will be visible.
The stitches should be tiny.
At the middle of the folded loop, pinch the edges of the uppermost layer of middle and top ribbons together.
Add three small stitches to secure the ribbon edges.
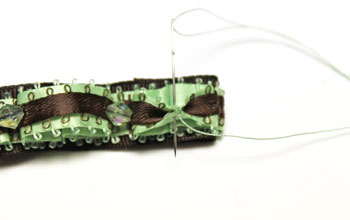
Continue pinching and sewing the top of the ribbon loops until all loops are sewn.
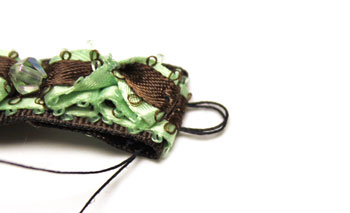
On the end of the bracelet opposite the end bead, make a loop of thread for the closure. (Jewelry fasteners
would be better - I just didn't have any.)
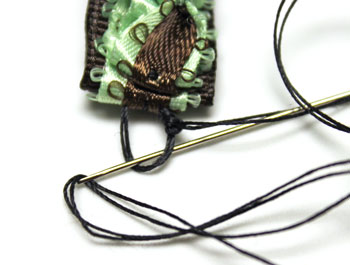
Add a buttonhole stitch around the loop of thread. A buttonhole stitch is just a blanket stitch around the
thread with the stitches pushed tightly together.
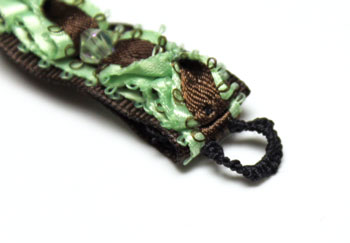
The buttonhole stitch adds strength as it finishes the thread loop.
Add the lining ribbon with fabric glue.
The lining ribbon for this bracelet is the same as the base ribbon, a dark brown grosgrain ribbon.
The initial length is 8 inches for an 8-inch bracelet.
Trim a small amount from one or both ends to prevent the lining ribbon from showing.
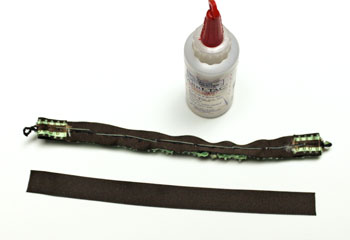
The lining ribbon finishes the inside of the bracelet, but it's not really necessary if you prefer to leave it
out.
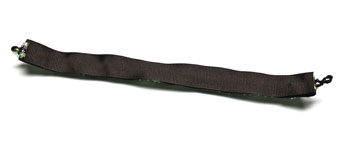
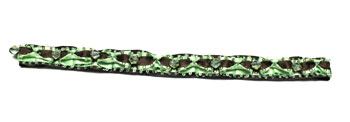
The finished easy ribbon beaded bracelet shows a fun and interesting design.
With your choices of ribbon and beads, you will have a unique bracelet.
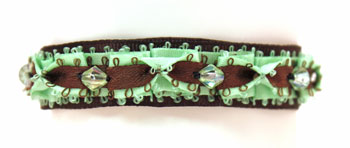
The next bracelet is just as interesting and has a totally different look.
I used a 3/4 inch cotton webbing ribbon for the base. The webbing was thick, but soft. I chose not to add a
lining ribbon.
The blue and white gingham ribbon for the middle ribbon is 5/8 inches wide.
The red with white dots top ribbon is a 3/8 inch wide grosgrain ribbon.
The beads are small and round with a pearlescent sheen.
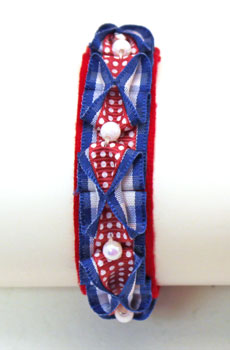
The next view shows the thread loop closures around the end beads.
HINT: For this closure, the thread loop must be twisted around the bead. Two twists easily hold
the bracelet ends together. A jewelry closure, however, would be easier.
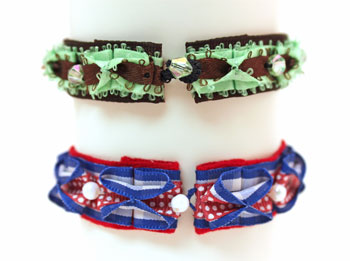
The easy ribbon beaded bracelet requires a small amount of ribbon, a few beads and a little time
to make. The finished bracelet provides unique wearable art for yourself, for family or for friends.
Enjoy!
You can have fun making one bracelet, or have fun making several. This easy ribbon beaded bracelet provides a
great way to display school colors at sporting events too.


| 


