Easy Christmas Crafts: Ombre Squares Christmas Tree
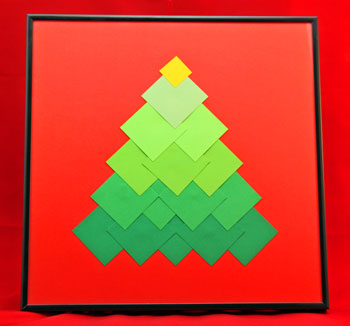
Use five graduated colors of green paper squares with a smaller yellow square on top for the star to make this Ombre Squares Christmas Tree.
If you want, add fun decorations to the tree as well.
If you want, add fun decorations to the tree as well.
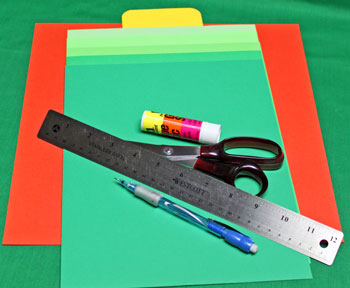
Easy Christmas Crafts: Ombre Squares Christmas Tree Materials and Tools:
Paper - five graduated colors - green or the color of your choice
Paper for star - yellow (or color of your choice)
Background paper - one 12x12 sheet
Ruler
Glue
Scissors
Pencil
12x12 scrapbook frame - optional (not shown)
Paper for star - yellow (or color of your choice)
Background paper - one 12x12 sheet
Ruler
Glue
Scissors
Pencil
12x12 scrapbook frame - optional (not shown)
Take a look at the simple materials and tools.
The Steps for How to Make the Easy Christmas Crafts: Ombre Squares Christmas Tree:
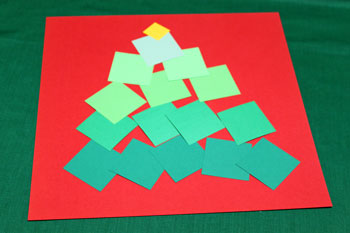
Cut all of the squares.
Each "tree" square is 2 inches by 2 inches.
The "star" square is 1 inch by 1 inch.
For the tree, cut 5 squares of the darkest color, 4 of the next shade, then 3, then 2, then 1 of the lightest color.
Each "tree" square is 2 inches by 2 inches.
The "star" square is 1 inch by 1 inch.
For the tree, cut 5 squares of the darkest color, 4 of the next shade, then 3, then 2, then 1 of the lightest color.
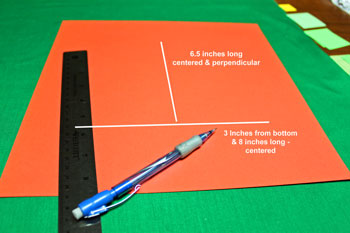
Use a pencil and lightly mark the background.
Measure up 3 inches from the bottom edge.
Center and draw an 8-inch line horizontally across the page.
Center and draw a 6.5-inch line vertically from the horizontal line.
These lines will be hidden, but they help position the squares.
Measure up 3 inches from the bottom edge.
Center and draw an 8-inch line horizontally across the page.
Center and draw a 6.5-inch line vertically from the horizontal line.
These lines will be hidden, but they help position the squares.
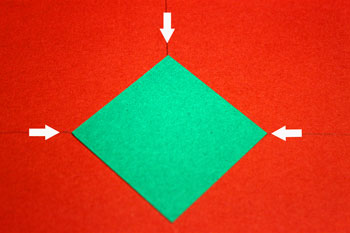
Position the first of the five darkest squares.
Three of the square's corners should match to the horizontal and vertical lines.
Add glue to hold the square.
For a dimensional effect, just put glue under the center of the square.
Three of the square's corners should match to the horizontal and vertical lines.
Add glue to hold the square.
For a dimensional effect, just put glue under the center of the square.
Add the next two of the darkest colored squares.
Match the points across the horizontal line.
Use the ruler to help line up the points since the end of the pencil line is hidden.
Glue those shapes to the background.
Match the points across the horizontal line.
Use the ruler to help line up the points since the end of the pencil line is hidden.
Glue those shapes to the background.
Add the last two squares of the darkest color.
These two squares should overlay the first three squares.
The points should be on a horizontal line.
Use the ruler as a straight edge to position the squares.
Add glue to hold the squares to the background.
These two squares should overlay the first three squares.
The points should be on a horizontal line.
Use the ruler as a straight edge to position the squares.
Add glue to hold the squares to the background.
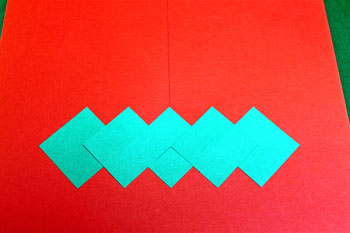
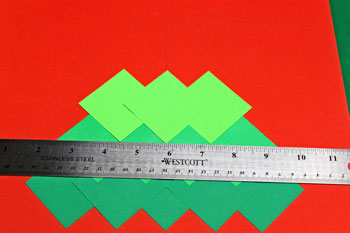
Position the ruler across the points of the first row.
Add the second row with their bottom points touching the ruler.
The four squares should be centered across the vertical line.
Counting from the left, the first and third squares' points should touch, and the second and fourth squares' points should touch.
Use the ruler to make sure those points are on a straight line horizontally.
Glue the squares to the background.
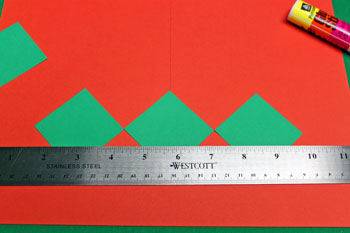
Place the ruler along the horizontal line of the previous row.
Position the next three squares with their bottom points touching the ruler.
The first and third squares' points should touch at the vertical line under the middle square.
The middle square should be centered across the line.
Glue these squares to the background.
Position the next three squares with their bottom points touching the ruler.
The first and third squares' points should touch at the vertical line under the middle square.
The middle square should be centered across the line.
Glue these squares to the background.
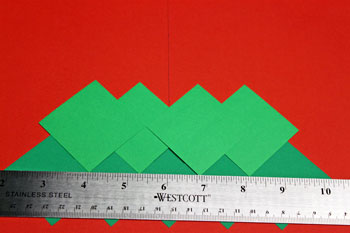
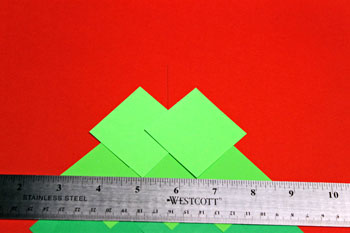
Add the next row with just two squares.
Place the ruler along the horizontal line formed by the three squares' points.
Position the two squares with their points touching the ruler.
Overlap the two squares such that their crossing point is the vertical center line.
Use the ruler to check that their horizontal points are in a straight line.
Glue the shapes to the background.
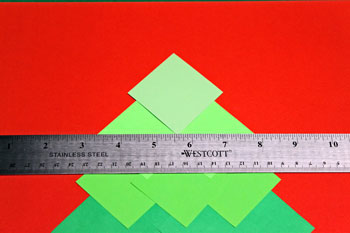
Add the lightest color square over the previous two squares.
The single square's bottom point should touch the invisible line across the middle of the two squares.
The lightest square should be centered across the background.
Glue the square to the background.
The single square's bottom point should touch the invisible line across the middle of the two squares.
The lightest square should be centered across the background.
Glue the square to the background.
Add the small square for the "star" to the top of the ombre squares Christmas tree.
The small square should be centered across the background and overlap the lightest colored square.
Glue the small square to the background.
The small square should be centered across the background and overlap the lightest colored square.
Glue the small square to the background.
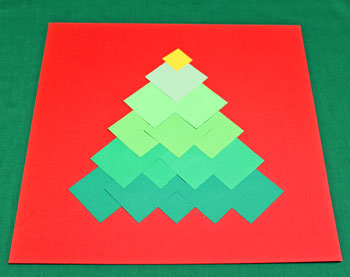
Add an inexpensive 12x12 scrapbook frame to display the Christmas tree.
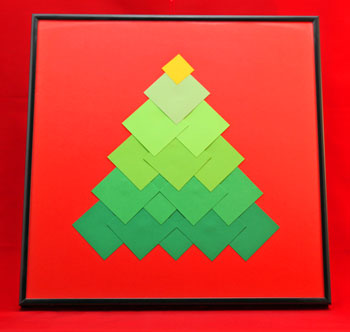
Just some squares of paper can be a simple yet eye-catching decoration for the holidays.
Be creative with the colors you choose and have fun!
The Ombre Squares Christmas Tree can be a pretty addition during the holidays in an office, in a foyer or anywhere for a fun yet unobtrusive festive symbol.
Be creative with the colors you choose and have fun!
The Ombre Squares Christmas Tree can be a pretty addition during the holidays in an office, in a foyer or anywhere for a fun yet unobtrusive festive symbol.


funEZcrafts
Welcome
Come on in and stay awhile...

funEZcrafts
Welcome
Come on in and stay awhile...