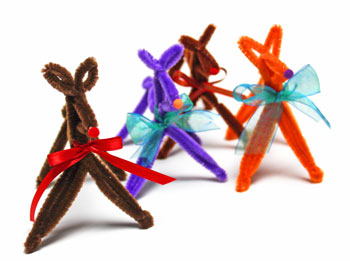
Easy Christmas Crafts: Chenille Wire Reindeer
Simple materials and tools make this fun little chenille wire reindeer.
Give him a red nose like Rudolph or a natural color like Santa's other reindeer.
Or, use purple and orange!
Give him a red nose like Rudolph or a natural color like Santa's other reindeer.
Or, use purple and orange!
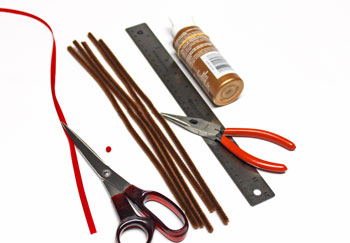
Easy Christmas Crafts: Chenille Wire Reindeer Materials and Tools:
Chenille wires - five, each 12 inches long
Ribbon
Small pom-pom
Glue
Ruler
Scissors
Needle nose pliers
Ribbon
Small pom-pom
Glue
Ruler
Scissors
Needle nose pliers
Take a look at the simple materials and tools shown here.
The Steps for How to Make the Easy Christmas Crafts: Chenille Wire Reindeer:
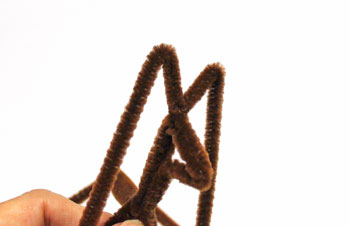
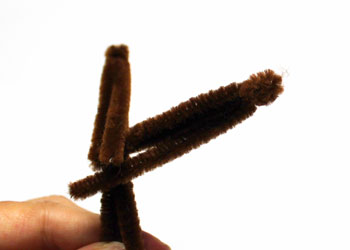
Make the first bend at 2 1/4 inches from one end of two of the chenille wires.
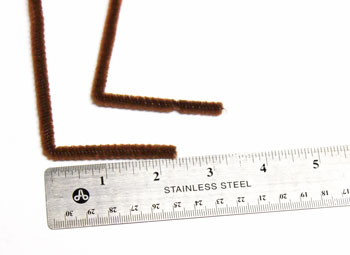
Twist the two wires together at the bend.
Hint: At each wire twist instruction, twist just enough to hold the wires together. Too many twists will use too much wire and not have enough length to finish the shape.
Hint: At each wire twist instruction, twist just enough to hold the wires together. Too many twists will use too much wire and not have enough length to finish the shape.
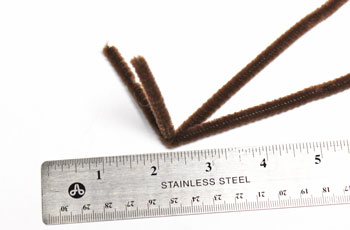
Make the second bend and twist at 2 1/4 inches from the first bend.
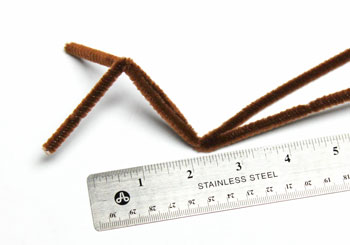
Make the third bend and twist at 1 1/2 inches from the second bend.
Make the fourth bend and twist 1-inch from the third bend.

Make the fifth bend and twist 3/4 inch from the fourth bend.
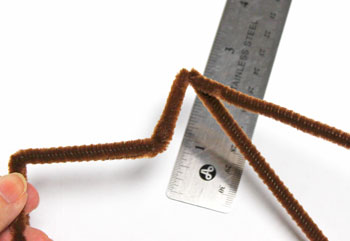
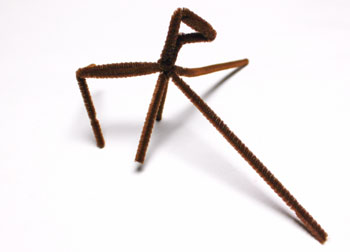
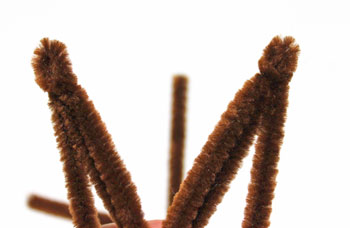
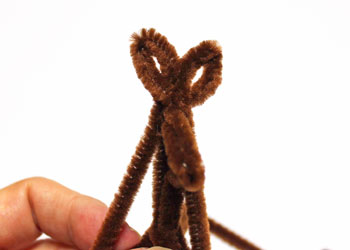
Hold the wires to form a small triangle for the head and to form the neck.
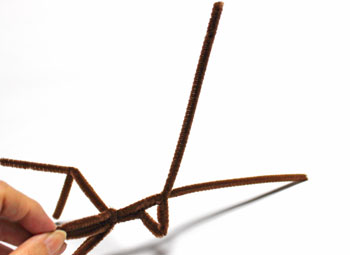
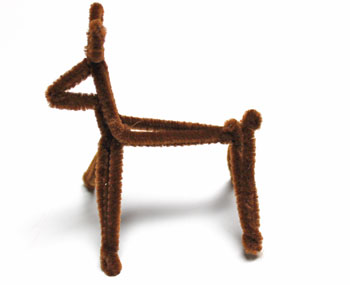
At the base of the neck, twist the two wires together for the front legs.
At the base of the neck, twist the two wires together for the front legs.
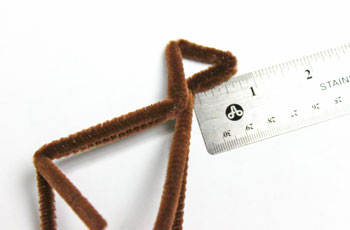
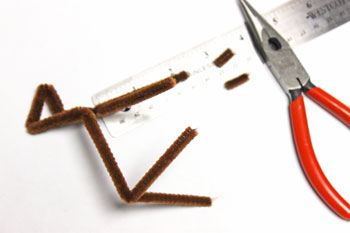
Measure the front legs at 2 1/4 inches from the wire twist.
Trim any wire in excess of 2 1/4 inches.
Trim any wire in excess of 2 1/4 inches.
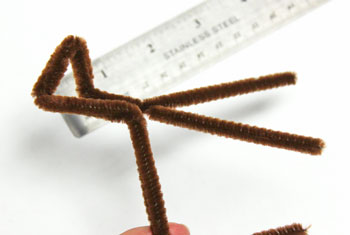
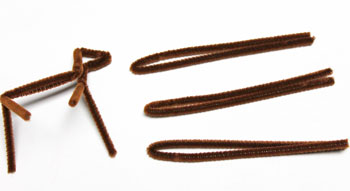
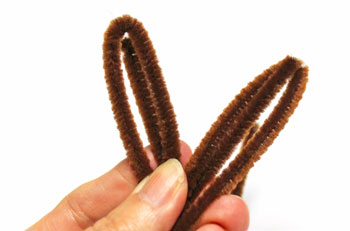
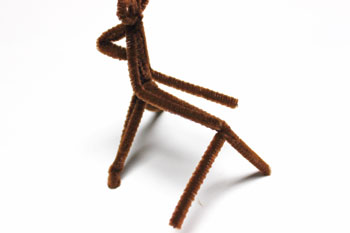
Fold the remaining three chenille wires in half.
Wrap one of the chenille wires around the base of the neck wires and the wires that form the front legs.
Pull snugly and twist the wires together. This holds the neck and legs together.
Pull snugly and twist the wires together. This holds the neck and legs together.
Pull the two ends of the wire down the front legs.
Fold one wire end around one of the legs and the second wire end around the other front wire leg.
Fold one wire end around one of the legs and the second wire end around the other front wire leg.
Twist the wires together 1/4 inch from the ends of the legs to form the hooves.
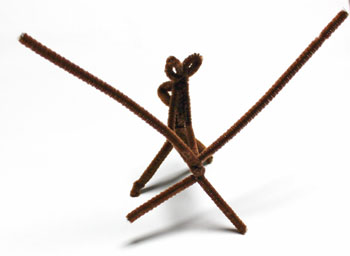
Wrap the ends of the wire over the back behind the neck.
Use the needle nose pliers to crimp and hide any pointed wire ends.
Use the needle nose pliers to crimp and hide any pointed wire ends.
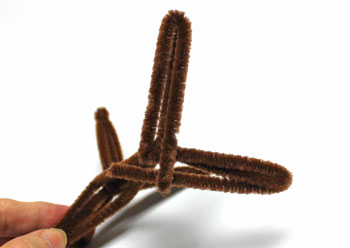
Insert one of the remaining chenille wires through the top of the triangle for the head.
Pull snugly and twist the wires together.
Pull snugly and twist the wires together.
Fold each side of the wire at 5/8 inch from the twist to form the ears.
Make a twist in the wire at the base of the ear and open the formed loop.
Press the wire ends along the neck and down the back.
Use the last chenille wire to twist around the wire ends and the back of the shape at the hips.
Fold each wire end around each of the legs.
Twist the wires at 1/4 inch from the ends of the legs to form the hooves.
Pull the ends of the wires above the back and twist together.
Use the needle nose pliers to roll the ends of the wire to form the tail.
Use the needle nose pliers to roll the ends of the wire to form the tail.
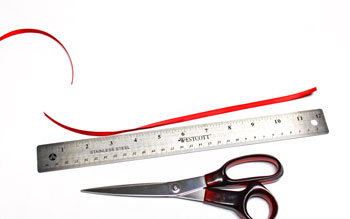
Cut a piece of ribbon 12 inches long.
Tie the ribbon into a bow around the chenille wire reindeer's neck.
Trim the ends of the ribbon at an angle.
Trim the ends of the ribbon at an angle.
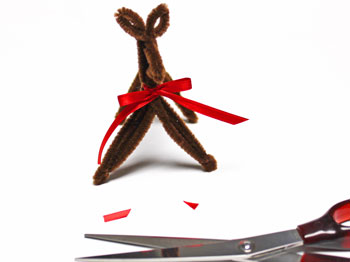
Glue the small pom-pom for a nose to the front point of the triangle head.
Note: I didn't wait for the glue to dry before taking the picture - the white tacky glue will dry clear.
Note: I didn't wait for the glue to dry before taking the picture - the white tacky glue will dry clear.
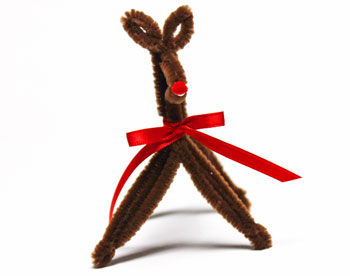
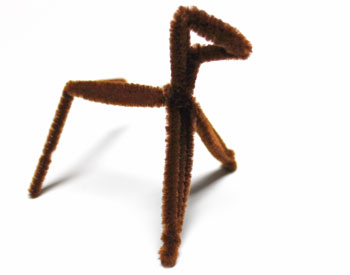
The Chenille Wire Reindeer is finished and ready to guard a candy dish or to become one of several reindeer to pull Santa's sleigh.
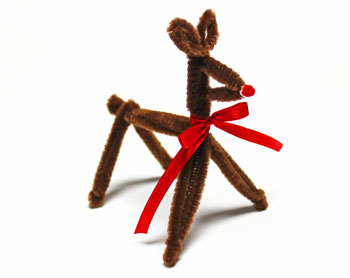
Inexpensive materials and tools become a fun three dimensional decoration that can stand alone or be one of many.
Too, you can add a yarn loop under the ribbon to hang the little decoration on a tree.
Have fun!
The Chenille Wire Reindeer is a fun project for the young in years and the young at heart.
Too, you can add a yarn loop under the ribbon to hang the little decoration on a tree.
Have fun!
The Chenille Wire Reindeer is a fun project for the young in years and the young at heart.


funEZcrafts
Welcome
Come on in and stay awhile...

funEZcrafts
Welcome
Come on in and stay awhile...