Easy Angel Crafts: Woven Paper Angel
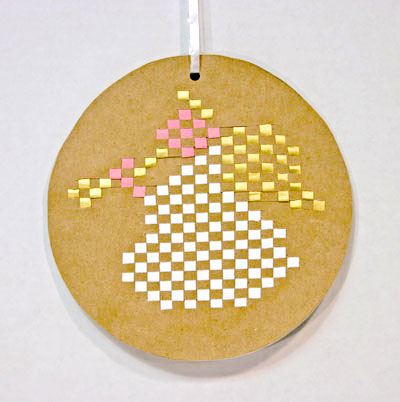
Using craft paper (or grocery bags) and strips of paper, a simple basket weave technique produces this pretty Easy Angel Crafts Woven Paper Angel to hang from a window or to place on a table.
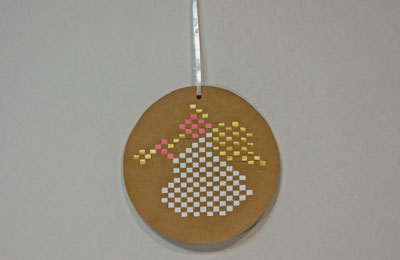
With the easy steps, the Easy Angel Crafts Woven Paper Angel blowing her celestial trumpet becomes a decoration for your home, an accent to a gift package or a gift by itself.
With the easy steps, the Easy Angel Crafts Woven Paper Angel blowing her celestial trumpet becomes a decoration for your home, an accent to a gift package or a gift by itself.
Let's look at the materials and the steps for how to make the simple woven paper angel:
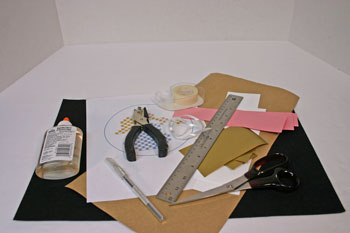
Easy Angel Crafts: Woven Paper Angel Materials and Tools:
Craft paper, paper grocery bag or other paper that is strong enough to hold woven pattern (two pieces roughly 8 inches by 6 inches)
Paper in three colors of your choice (This angel used gold wrapping paper for halo, trumpet and wings, white paper for robe and pink construction paper for hand and face.)
Ribbon - 1/4 inch by 12 inches
Tape
Glue
Ruler
Scissors
Craft knife or sharp kitchen knife
Hole punch (or just use scissors to cut the hole for the ribbon loop)
Pencil and round object to mark circle (not shown)
Woven paper angel pattern (click here for the Easy Angel Crafts Woven Paper Angel pattern)
The Steps for How to Make the Easy Angel Crafts: Woven Paper Angel:
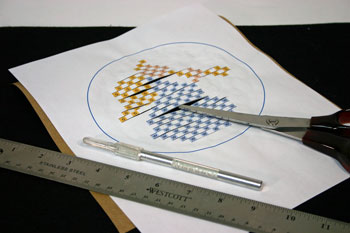
Print two copies of the Easy Angel Crafts Woven Paper Angel pattern - one to glue and one to use as reference when the glued pattern becomes difficult to follow due to the woven strips overlapping the pattern.
Glue one of the patterns to the craft paper. Allow glue time to dry. (Heated air such as a hair dryer speeds the drying time.)
Glue one of the patterns to the craft paper. Allow glue time to dry. (Heated air such as a hair dryer speeds the drying time.)

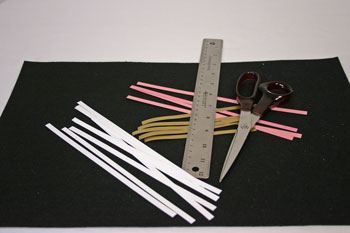
While the glue is drying, cut the strips of paper from the three colors of paper.
Though not necessary, a rotary cutter and self-healing mat make this task easier.
A straight line paper shredder makes quick work of the strips as well.
Or, an office paper cutter, if sharp, easily cuts the paper into strips.
The width of the strips should be slightly less than the width of the colored blocks shown on the pattern - between 1/8 and 1/4 inch wide.
Narrow strips make a slimmer angel and wider strips make a larger angel.
When the glue has dried, cut across the Easy Angel Crafts Woven Paper Angel pattern on the horizontal lines.
Note: If you cut wider paper strips for weaving, make the horizontal cuts longer.
Note: If you cut wider paper strips for weaving, make the horizontal cuts longer.
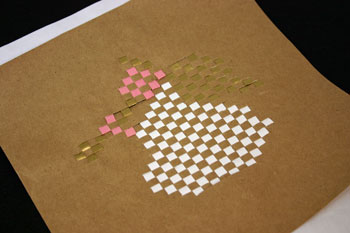
Begin weaving the strips of paper under the pattern's color. Below, the gold paper is woven through the horizontal cut under the golden "G's" in the halo area of the pattern.

Add the longest strips in the middle of the robe area and work outward.
Continue the weaving for the face (in this case, pink), hand (pink), wing (gold), halo (gold) and trumpet (gold).
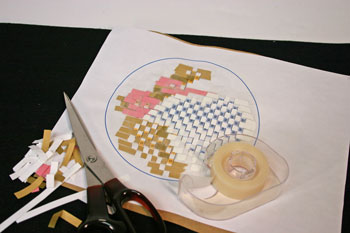
At the edges of the woven design, you may need to extend the horizontal cut lines using the craft knife or other sharp knife.
Be careful to cut only the necessary lines and only the extra length needed.
Use the second printed Easy Angel Crafts Woven Paper Angel pattern as reference as you get close to the edges.
Continue the weaving for the face (in this case, pink), hand (pink), wing (gold), halo (gold) and trumpet (gold).
At the edges of the woven design, you may need to extend the horizontal cut lines using the craft knife or other sharp knife.
Be careful to cut only the necessary lines and only the extra length needed.
Use the second printed Easy Angel Crafts Woven Paper Angel pattern as reference as you get close to the edges.
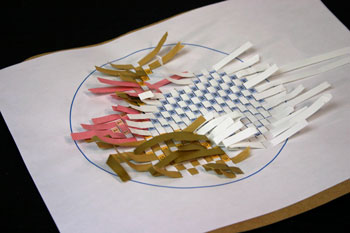
On the opposite side, the Easy Angel Crafts Woven Paper Angel takes shape from the woven strips of paper.
Note that the finished side of the angel is a mirror image of the pattern.
Note that the finished side of the angel is a mirror image of the pattern.
The strips of paper must be secured by taping them to the back side of the Easy Angel Crafts Woven Paper Angel.

Trim any excess ends of the paper strips before taping them to the shape.
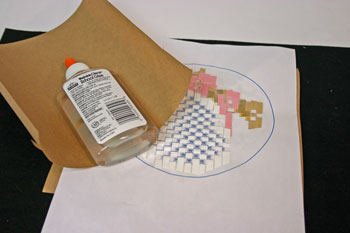
Glue the second piece of craft paper to the back of the Easy Angel Crafts Woven Paper Angel.
This paper can be different if you prefer. For example, thinner paper such as a piece of 8 1/2 by 11 inches printer paper can be used instead.
This paper can be different if you prefer. For example, thinner paper such as a piece of 8 1/2 by 11 inches printer paper can be used instead.
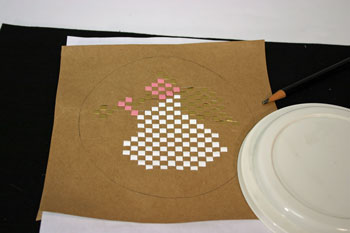
After the glue dries, use a round object slightly larger than the angel design to form a circle.
Center the round object over the woven paper angel, and with a pencil, lightly draw around the circular object.
Center the round object over the woven paper angel, and with a pencil, lightly draw around the circular object.
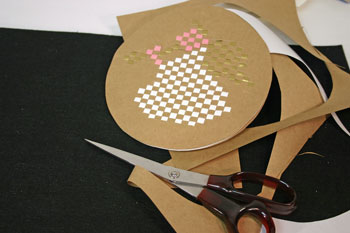
Using scissors, cut around the Easy Angel Crafts Woven Paper Angel just inside the circular pencil line.
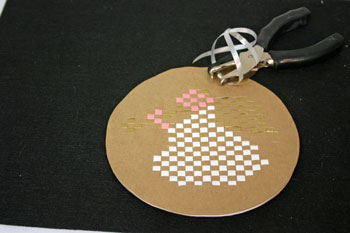
With a hole punch (or just use scissors), make a hole for the ribbon loop just above the middle of the halo.
Thread the ribbon through the hole and place a knot in the ends of the ribbon to form the loop.
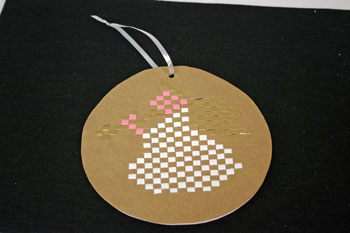
This pretty Easy Angel Crafts Woven Paper Angel blows her trumpet hanging on a wall, but she could just as easily decorate a table or accent a wrapped gift anytime of the year.
The woven paper angel project is easy to do.
Have fun!
The only difficult part, and only in patience not in the task, is keeping the woven strips in line. Don't worry about perfection, and your Easy Angel Crafts Woven Paper Angel will turn out beautifully.
Have fun!
The only difficult part, and only in patience not in the task, is keeping the woven strips in line. Don't worry about perfection, and your Easy Angel Crafts Woven Paper Angel will turn out beautifully.


funEZcrafts
Welcome
Come on in and stay awhile...

funEZcrafts
Welcome
Come on in and stay awhile...