Easy Christmas Crafts: Folded Paper Circles Christmas Tree
Just paper and scissors turn into a fun little three-dimensional Folded Paper Circles Christmas Tree. Make several and mix and match the colors.
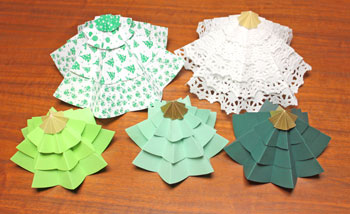
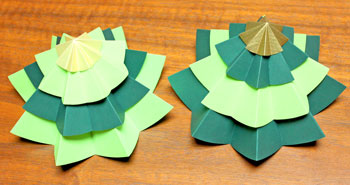
Take a look at these three little trees. Later, they become a variety of different trees.
Take a look at these three little trees. Later, they become a variety of different trees.
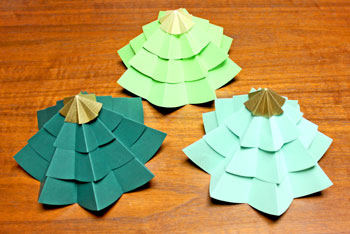
An advantage of these little trees is they easily store flat and can be revived for next year's holiday season.
Let's make the pale green version.
Let's make the pale green version.
Easy Christmas Crafts: Folded Paper Circles Christmas Tree Materials and Tools:
Paper - I used 20-pound (pale green), 24-pound (lime green) and lightweight cardstock (dark green)
Topper paper - I used gold vellum and metallic gold wrapping paper
Scissors
Pencil
Pattern - Folded Paper Circles Christmas Tree pattern (click to open Adobe PDF)
Topper paper - I used gold vellum and metallic gold wrapping paper
Scissors
Pencil
Pattern - Folded Paper Circles Christmas Tree pattern (click to open Adobe PDF)
Take a look at the simple materials and tools.

The Steps for How to Make the Easy Christmas Crafts: Folded Paper Circles Christmas Tree:
Print both pages of the Folded Paper Circles Christmas Tree pattern.
Cut out the shapes.
Cut out the shapes.
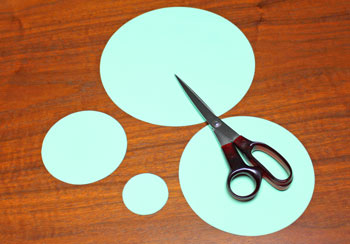
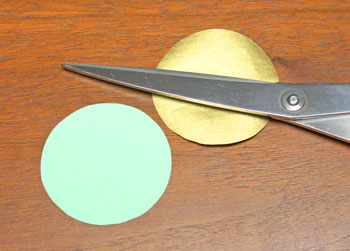
Cut around the gold circle.
Set aside the smallest printed circle. It will not be used as part of the tree shape.
Set aside the smallest printed circle. It will not be used as part of the tree shape.
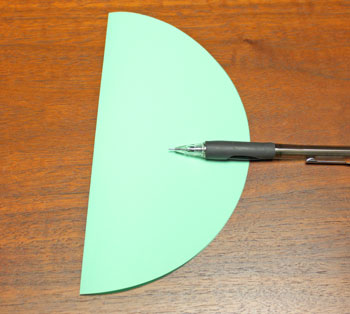
Begin folding the largest circle.
First, fold the circle in half.
First, fold the circle in half.
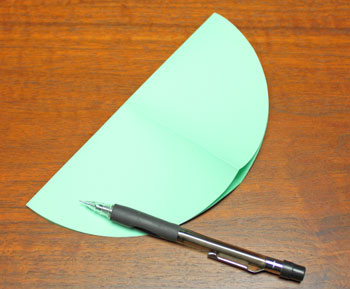
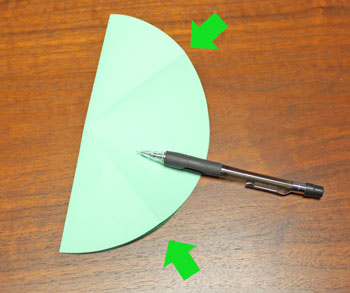
Open the circle and make a third fold in half.
Match the first two folds (see green arrows).
Match the first two folds (see green arrows).
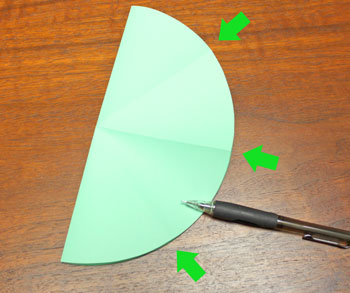
Open the circle and make a fourth fold in half.
Match the earlier folds (see green arrows).
Match the earlier folds (see green arrows).
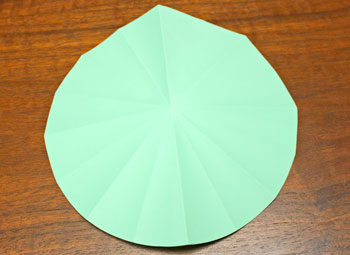
Crease the paper circle with eight outer folds and eight inner folds.
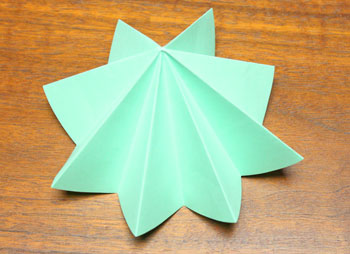
Use the same process to fold the three other paper circles.
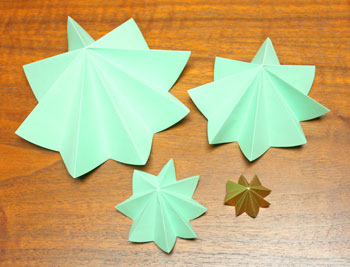
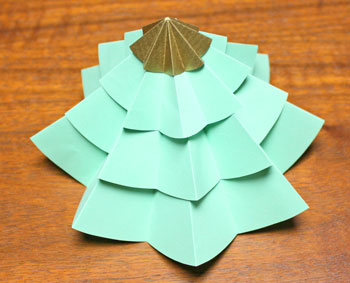
Stack the folded paper circles in decreasing size.
The basic Folded Paper Circles Christmas Tree is finished and ready to display or to add "ornaments" for sparkle.
The basic Folded Paper Circles Christmas Tree is finished and ready to display or to add "ornaments" for sparkle.
Several examples are shown here.
Let's take a look.
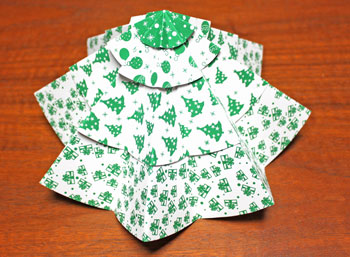
This next version was made using 12x12 lightweight card stock in four different prints.
I used a compass to make 12-inch, 8-inch, 4-inch and 2-inch circles.
This next version was made using 12x12 lightweight card stock in four different prints.
I used a compass to make 12-inch, 8-inch, 4-inch and 2-inch circles.
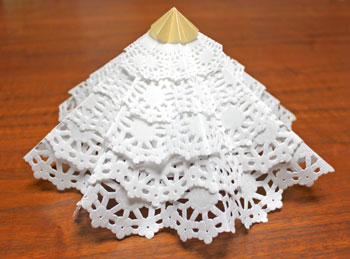
For this next version, minimal cutting was required - just the 2-inch gold vellum circle on top.
The rest of the tree was made from doilies - 12-inch, 10-inch, 8-inch, 6-inch and 4-inch.
The rest of the tree was made from doilies - 12-inch, 10-inch, 8-inch, 6-inch and 4-inch.
Here's where those three different colors of trees turn into a variety.
Mix and match their colors.
Mix and match their colors.
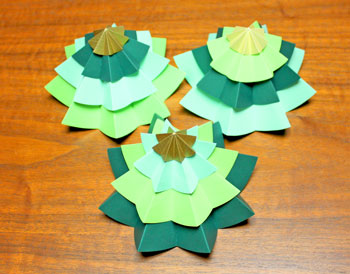
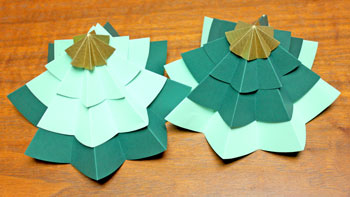
This example shows mixing and matching just two different colors.
Here's another version of mixing and matching two colors.
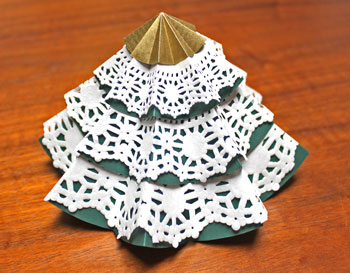
This last example could just be my favorite.
It's the dark green version made from one piece of 12x12 lightweight card stock in the 8-inch, 6-inch and 4-inch circles like the pattern.
But, each layer is covered with a comparable-sized doily.
The top layer is a 2-inch circle of gold wrapping paper.
It's the dark green version made from one piece of 12x12 lightweight card stock in the 8-inch, 6-inch and 4-inch circles like the pattern.
But, each layer is covered with a comparable-sized doily.
The top layer is a 2-inch circle of gold wrapping paper.
A few paper circles folded just right turn into a forest of little trees.
Use a compass or round nesting bowls to make different sized trees.
Add beads, sequins or hole-punch circles as "ornaments" if you want decorated trees.
Most of all, have fun!
The Folded Paper Circles Christmas Tree is a fun project and the results can be trees for tablescapes, desks, small spaces, hospitals, nursing homes-the places are many.

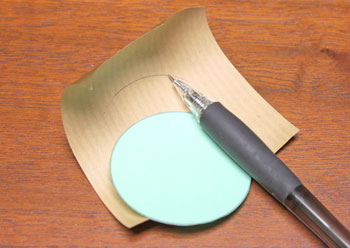
Draw around the smallest circle on the back of the gold paper.
Open the circle and made a second fold in half perpendicular to the first fold.
Continue opening the circle and folding in half until the circle is divided into sixteen equal pie shapes.

funEZcrafts
Welcome
Come on in and stay awhile...

funEZcrafts
Welcome
Come on in and stay awhile...