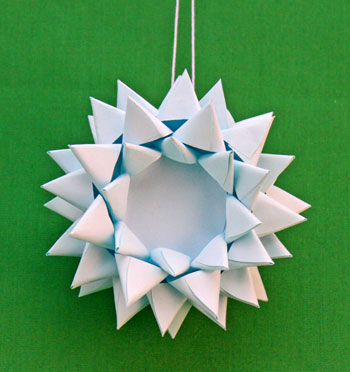
Easy Christmas Crafts: Paper Chrysanthemum Ornament
Made with a piece of paper, some glue and some time, this little paper chrysanthemum ornament looks pretty on a tree, added to a package or just displayed as a fun decoration any time of the year.
Use different papers to make a variety of these fun little ornaments.
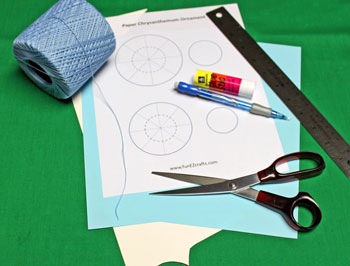
Easy Christmas Crafts: Paper Chrysanthemum Ornament Materials and Tools:
Paper - 8 1/2 by 11-inch makes one ornament (not cardstock)
Small piece of poster board, chip board or cardstock for backing
Yarn - 10 inches long
Glue
Ruler
Pencil
Scissors
Pattern - Paper Chrysanthemum Ornament
Small piece of poster board, chip board or cardstock for backing
Yarn - 10 inches long
Glue
Ruler
Pencil
Scissors
Pattern - Paper Chrysanthemum Ornament
Take a look at the simple materials and tools shown here.
The Steps for How to Make the Easy Christmas Crafts: Paper Chrysanthemum Ornament:
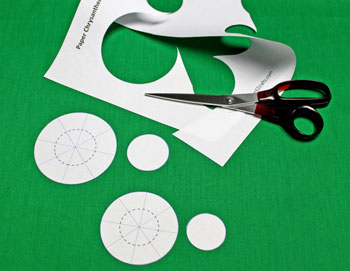
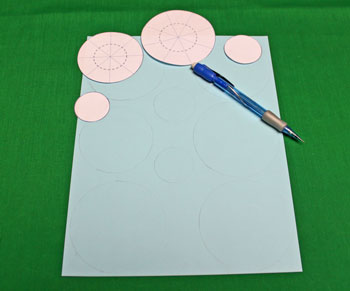
Print the Paper Chrysanthemum Ornament pattern.
Cut around each of the four pattern pieces.
Cut around each of the four pattern pieces.
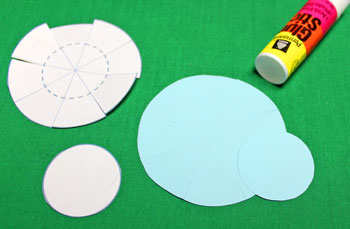
Trace around the largest plain circle pattern on the poster board (or chip board, or cardstock).
Cut around the poster board circle.
Cut around the poster board circle.
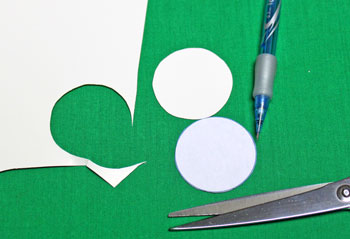
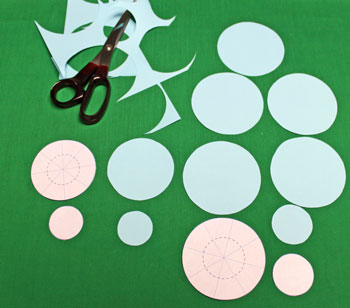
Position and trace around the pattern pieces on the paper for five of the largest circle and one each of the remaining circles.
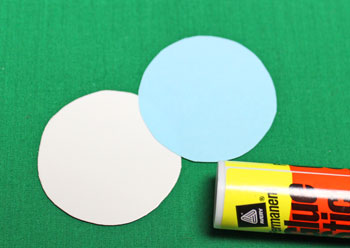
Cut around each of the circles.
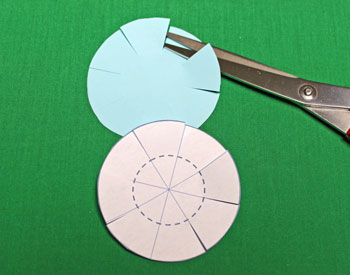
Hold the small marked circle pattern firmly against the paper.
Cut along each of the eight lines from the outer edge of the circle to the dotted line of the inner circle.
Cut along each of the eight lines from the outer edge of the circle to the dotted line of the inner circle.
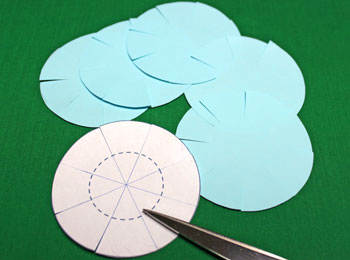
Stack the five large circles together.
Hold the large marked circle firmly over the stacked group of circles.
Cut along each of the eight lines from the outer edge of the circle to the inner dotted line circle.
Hold the large marked circle firmly over the stacked group of circles.
Cut along each of the eight lines from the outer edge of the circle to the inner dotted line circle.
Glue the large plain circle of paper to the poster board backing circle.
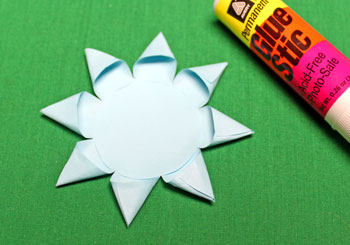
Begin curling the edges along one of the largest circles.
The goal is to overlap and glue the edges. I find that curling all eight sections first makes the gluing step go faster.
The goal is to overlap and glue the edges. I find that curling all eight sections first makes the gluing step go faster.
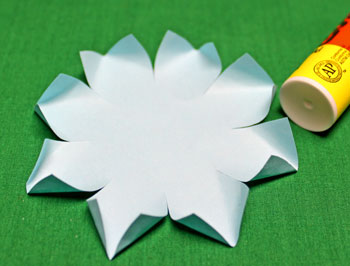
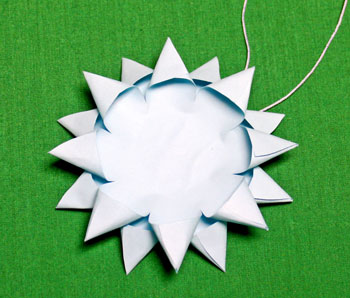
Overlap and glue the edges to form eight points around the large circle.
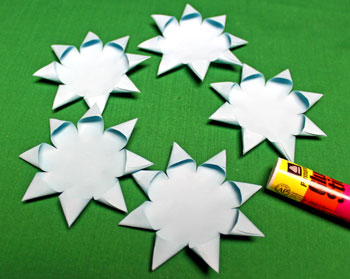
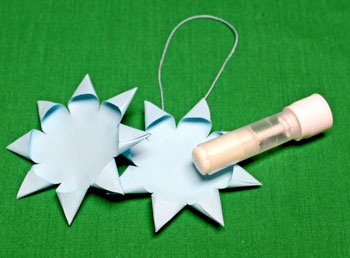
Perform the curling, overlapping and gluing steps for the other four large circles.
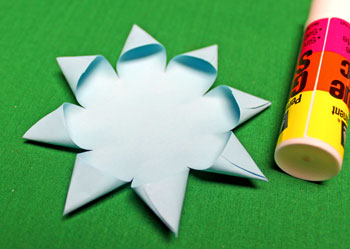
Glue the small, unmarked circle inside the center of the small cut circle.
This small circle adds stability and also hides the "back" of the paper if you use paper that is not the same on both sides.
Note: this inner circle could be a different color to simulate the inner portion of the flower.
This small circle adds stability and also hides the "back" of the paper if you use paper that is not the same on both sides.
Note: this inner circle could be a different color to simulate the inner portion of the flower.
Curl, overlap and glue the points of the small circle like the earlier steps.
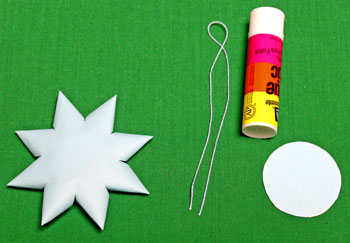
Measure and cut the yarn to 10 inches.

Fold the yarn in half.
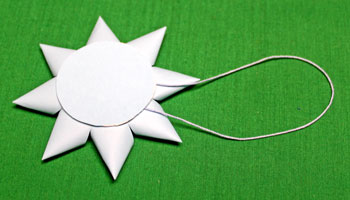
The cut ends will be sandwiched between the poster board backing circle and the bottom large circle.
The cut ends will be sandwiched between the poster board backing circle and the bottom large circle.
Glue the poster board circle with the decorative paper facing outward to the center back of one of large pieces.
Make sure the yarn ends are held firmly in the glue.
Make sure the yarn ends are held firmly in the glue.
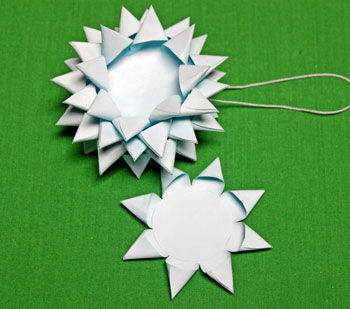
Begin gluing the five large pieces together.
Add glue inside the bottom piece.
Add glue inside the bottom piece.
Stack the back of the second large piece on the first.
Center the two pieces and alternate their points.
Center the two pieces and alternate their points.
Continue adding and gluing the large pieces one on top of another.
The small piece is the last to be added.
The small piece is the last to be added.
Glue the small piece to the center of the larger pieces.
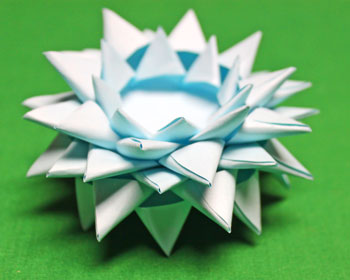
Make sure the points alternate from one layer to the next.
Adjust the points if necessary before the glue sets.
Adjust the points if necessary before the glue sets.
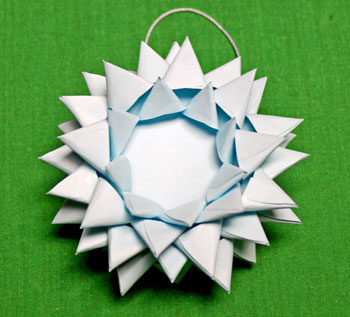
The pretty little paper chrysanthemum ornament is finished and ready to display.
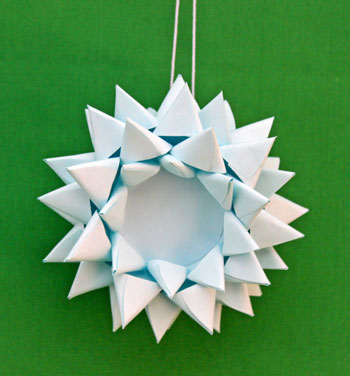
It takes a little time, not a lot but more than a couple of minutes, to make this pretty little decoration. But, it's worth it.
Just some paper, glue and yarn easily turn into inexpensive, fun and easy decorations that can be used any time of the year.
Make them as ornaments or add them to packages. You can omit the yarn for the packages or include it with an explanation that it's an additional little gift.
Have fun!
The inexpensive and Paper Chrysanthemum Ornament can be an enjoyable project for all ages.


funEZcrafts
Welcome
Come on in and stay awhile...

funEZcrafts
Welcome
Come on in and stay awhile...