Easy Paper Crafts: Vellum Ornament
Each of the four patterns uses one piece of 8 1/2 by 11 inches vellum and a short piece of yarn to become a simple and pretty three-dimensional vellum ornament.
These vellum ornaments can add to holiday decorations or be used for parties such as bridal or baby showers.
They would also be pretty hanging in a garden for a casual summer's evening.
Here's one:
These vellum ornaments can add to holiday decorations or be used for parties such as bridal or baby showers.
They would also be pretty hanging in a garden for a casual summer's evening.
Here's one:

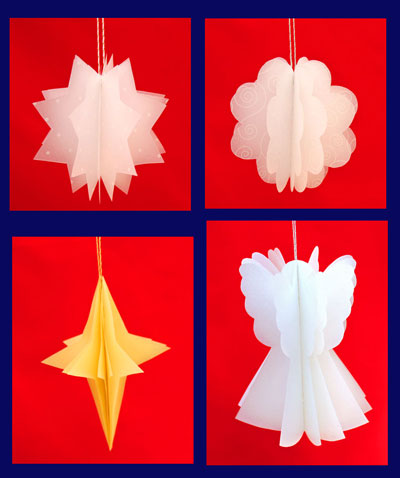
Take a look at the three other patterns plus an angel.
The angel uses the pattern from the Folded Paper Angel project and requires two sheets of vellum.
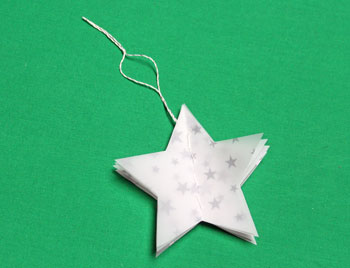
The five-point star shown above used vellum decorated with silver stars, also five-pointed.
Below, the eight-point star used a sheet of vellum decorated with equidistant dots.
The scalloped ornament used vellum with a scroll-work design.
The four-point star used gold vellum, and the angel used silver vellum.
The angel uses the pattern from the Folded Paper Angel project and requires two sheets of vellum.
The five-point star shown above used vellum decorated with silver stars, also five-pointed.
Below, the eight-point star used a sheet of vellum decorated with equidistant dots.
The scalloped ornament used vellum with a scroll-work design.
The four-point star used gold vellum, and the angel used silver vellum.
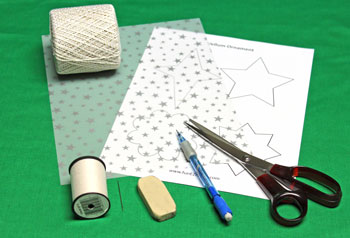
Easy Paper Crafts: Vellum Ornament Materials and Tools:
Vellum - one sheet 8 1/2 x 11 inches (two, if making angel)
Yarn or narrow ribbon - 8 to 10 inches long
Needle
Thread
Scissors
Pencil
Eraser
Vellum Ornament Pattern
Yarn or narrow ribbon - 8 to 10 inches long
Needle
Thread
Scissors
Pencil
Eraser
Vellum Ornament Pattern
Take a look at the simple materials and tools.
The Steps for How to Make the Easy Paper Crafts: Vellum Ornament Pattern:
Print the Vellum Ornament pattern.
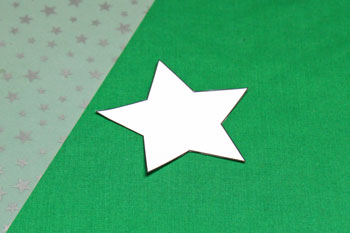
Cut around the pattern shape for the design you want to make.
Cut around the pattern shape for the design you want to make.
Use a pencil to draw around the pattern six times for six different shapes.
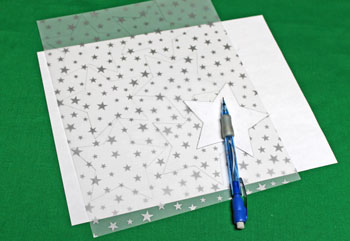
Cut each of the six shapes.
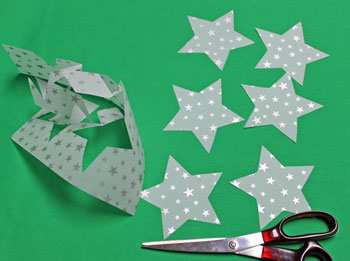
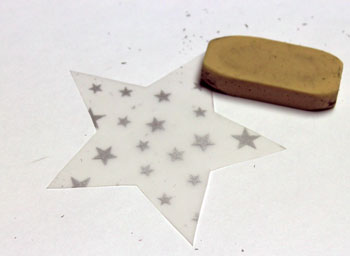
Erase any pencil marks remaining around the cut shapes.
Hint: a piece of plain white paper placed behind the shape makes the pencil marks easier to see and to erase.
Hint: a piece of plain white paper placed behind the shape makes the pencil marks easier to see and to erase.
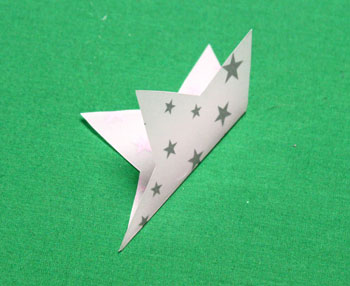
Fold the shape in half.
Each side should be a mirror image of the other.
Each side should be a mirror image of the other.
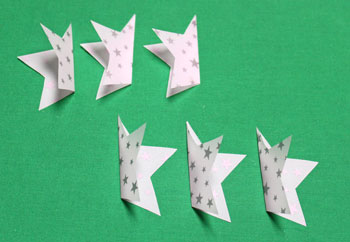
Erase and fold all six shapes.
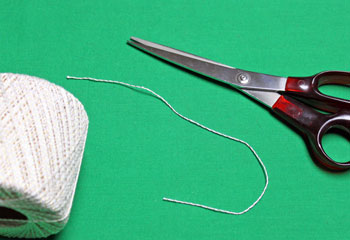
Cut yarn (or narrow ribbon) for hanging loop 8 to 10 inches long.
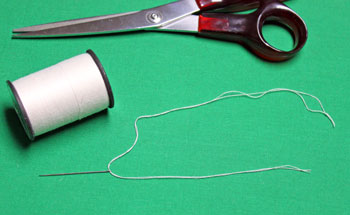
Thread needle with a double-strand of thread.
Tie a knot in one end.
Tie a knot in one end.
Position the shapes with three on each side and their folded edges back-to-back.
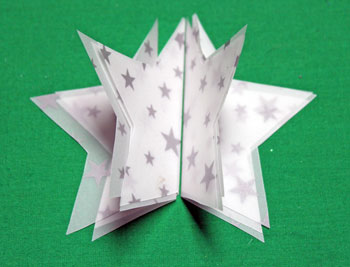
Flatten the shapes together.
Push the needle through all layers in the fold and 3/8 inch above the bottom edge.
Do not pull the thread all the way to the knot yet.
Push the needle through all layers in the fold and 3/8 inch above the bottom edge.
Do not pull the thread all the way to the knot yet.
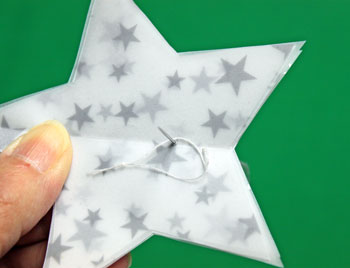
Bring the needle back through 3/8 inch from the first point.
Push the needle between the two strands of thread above the end knot.
This will prevent the knot from being pulled through the vellum.
Pull the thread firmly to complete the first stitch.
Push the needle between the two strands of thread above the end knot.
This will prevent the knot from being pulled through the vellum.
Pull the thread firmly to complete the first stitch.
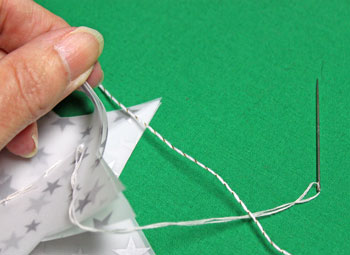
Continue stitches at 3/8 inch apart.
The last needle point should be at least 3/8 inch from all edges.
When at the next to last point, stop and insert the yarn between the 3 forward and 3 backward layers.
The last stitch will wrap the yarn not sew through it.
The last needle point should be at least 3/8 inch from all edges.
When at the next to last point, stop and insert the yarn between the 3 forward and 3 backward layers.
The last stitch will wrap the yarn not sew through it.
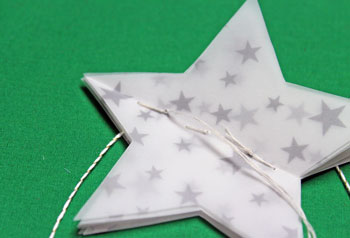
Make the last stitch and bring the needle back through at the previous point.
Take the needle back through the top point and return again through the point below.
This gives the yarn additional thread for strength when hanging.
Take the needle back through the top point and return again through the point below.
This gives the yarn additional thread for strength when hanging.
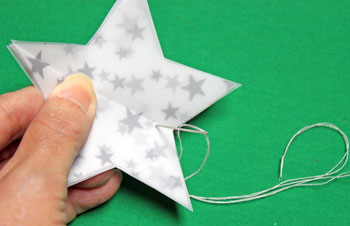
Knot to secure the thread and trim.
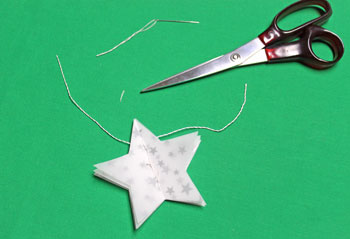
Tie a knot in the yarn ends to form the hanging loop.
Adjust the folds in the vellum to form the three-dimensional shape.
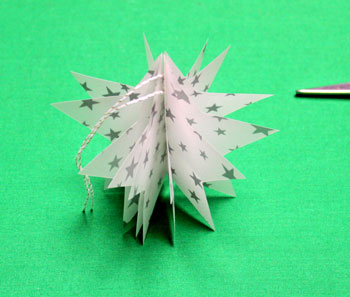
The Vellum Ornament is finished and ready to display.

Use the decoration for holidays - Christmas, Valentine's Day, Easter, Independence Day, Thanksgiving Day, whatever - or for parties - indoors or out.
Enjoy!
Just a few materials and tools become a simple and elegant Vellum Ornament that can be used any time of the year.
Enjoy!
Just a few materials and tools become a simple and elegant Vellum Ornament that can be used any time of the year.


funEZcrafts
Welcome
Come on in and stay awhile...

funEZcrafts
Welcome
Come on in and stay awhile...