Easy Christmas Crafts: Folded Paper Squares Star
Some pretty paper cut into squares and folded just so become fun Folded Paper Squares Star decorations by adding some glue and a piece of yarn or ribbon. Fun and easy instructions included below.
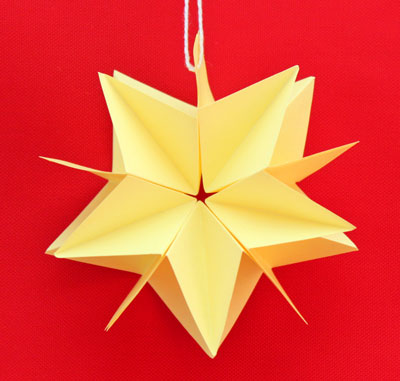
First, let's look at some examples. The first one is a yellow 5-point star made with yellow 20-pound paper.
First, let's look at some examples. The first one is a yellow 5-point star made with yellow 20-pound paper.
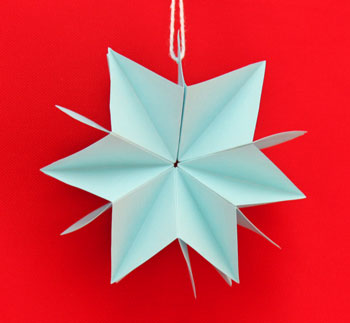
The next one is a 6-point star made with blue 20-pound paper.
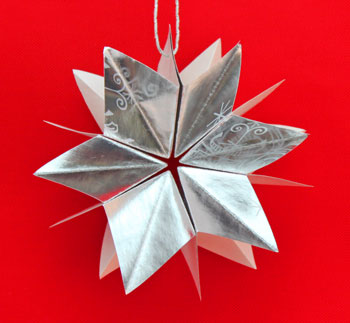
The third one is another 6-point made with silver wrapping paper decorated with snowflakes.
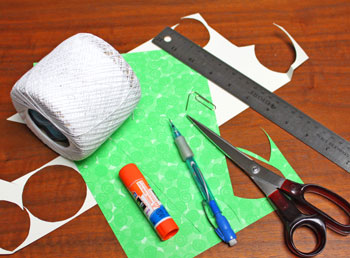
Easy Christmas Crafts: Folded Paper Squares Star Materials and Tools:
Decorative paper, but not heavy card stock
Scrap paper to make a template (I used poster board)
Yarn
Ruler
Pencil
Paper clip or other pointed object
Scissors
Scrap paper to make a template (I used poster board)
Yarn
Ruler
Pencil
Paper clip or other pointed object
Scissors
Note: a rotary cutter, self-healing mat and clear cutting ruler work too, and you won't need to make the template.
The Steps for How to Make the Easy Christmas Crafts: Folded Paper Squares Star:
The squares can be any size, they just all need to be the same size within one star.
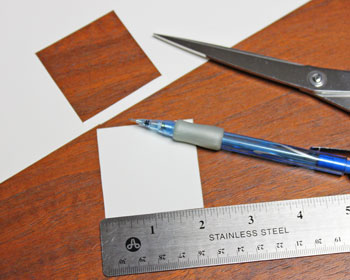
I chose to make the stars using a 2-inch square template.
The finished stars were roughly 3 inches across.
Using a ruler and pencil, draw a 2-inch square and cut it out for the template.
I chose to make the stars using a 2-inch square template.
The finished stars were roughly 3 inches across.
Using a ruler and pencil, draw a 2-inch square and cut it out for the template.
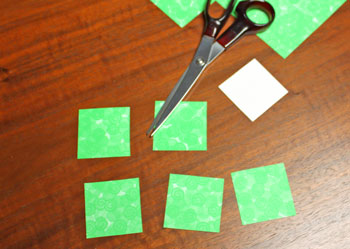
Cut the number of squares for the star based on the number of points you want the star to have.
A 5-point star uses five squares, a 6-point star six squares and so on.
I like a 5-point star, so I cut five 2-inch squares from the decorative paper.
A 5-point star uses five squares, a 6-point star six squares and so on.
I like a 5-point star, so I cut five 2-inch squares from the decorative paper.
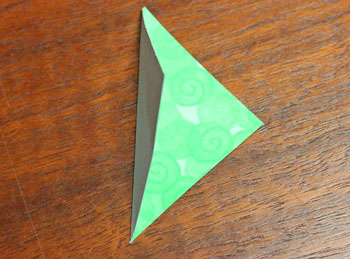
Begin folding the squares.
First, fold the square on the diagonal.
For this example, I'm using single sided decorative paper to make the folding process easier to see.
The inside of the folded diagonal will be the face of the star.
First, fold the square on the diagonal.
For this example, I'm using single sided decorative paper to make the folding process easier to see.
The inside of the folded diagonal will be the face of the star.
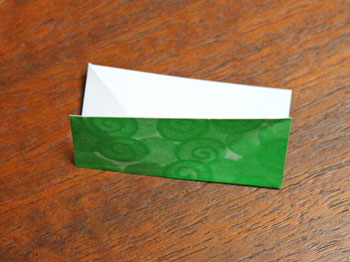
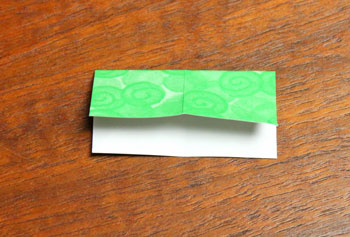
Next, fold the square in half.
The face side that was inside the diagonal should be on the outside of the half-folded square.
The face side that was inside the diagonal should be on the outside of the half-folded square.
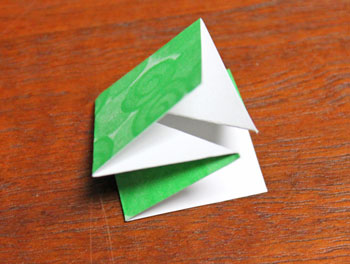
Now, fold the square in half again perpendicular to the previous half fold with the face side of the paper on the outside.
Using the folded lines in the square, fold the shape into a small square.
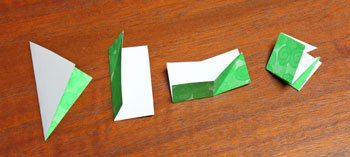
Here are the four folding steps for each square, left to right:
• diagonally with face inside
• in half vertically with the face on the outside
• in half horizontally with the face on the outside
• finally into a small square with the face on the outside.
• diagonally with face inside
• in half vertically with the face on the outside
• in half horizontally with the face on the outside
• finally into a small square with the face on the outside.
Fold each square the same way.
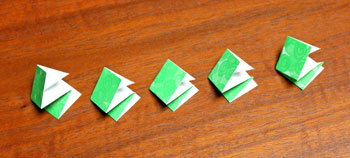
Put glue on the face of one of the small squares and glue a second small square on top of it making sure the points and edges match.
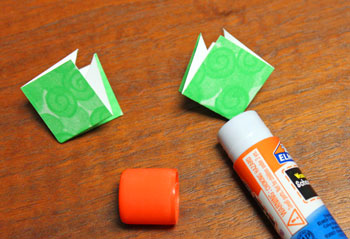
Make sure the open ends are matched when gluing the shapes together.
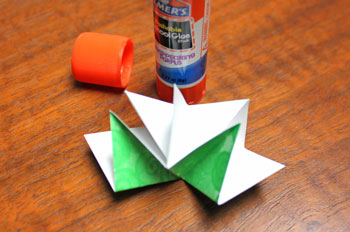
Continue gluing the small squares together to form a stack of small squares.
Let the glue set.
Let the glue set.

Open the small squares into a fan.
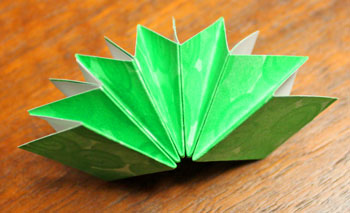
Add glue to the remaining two sides and pull together to form the star.
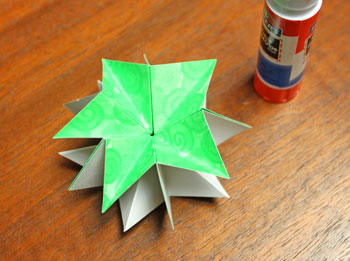
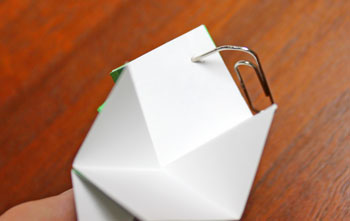
Using the end of a paper clip (or other sharp point), make a small hole in one of the glued together points.
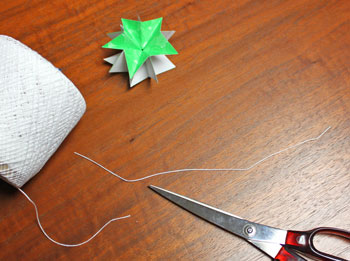
Cut a length of yarn 8-10 inches long.
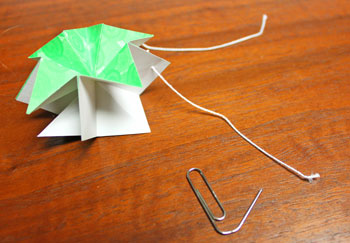
Using the end of the paper clip, push one end of the yarn through the small hole.
Bring the ends of the yarn together, tie a knot and trim the ends.
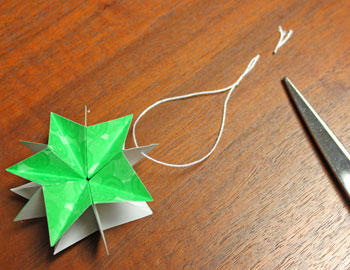
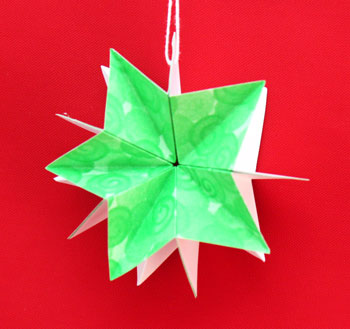
The Folded Paper Squares Star is finished and ready to display.
This fun technique works the same whether you make small stars or large stars.
Though, where card stock is too heavy for smaller stars, it might hold the shape better for really large stars.
And, wouldn't this fun little star make a pretty garland to hang on a mantel or in a doorway - especially with alternating red and green stars, or maybe gold and silver stars.
Have fun!
People of all ages can enjoy the fun of the simple Folded Paper Squares Star project.


funEZcrafts
Welcome
Come on in and stay awhile...

funEZcrafts
Welcome
Come on in and stay awhile...