Easy Paper Crafts: Holiday Advent Project
This versatile holiday advent project can be used for any holiday, celebration or event - just change the paper to fit the occasion.
Initially, I thought of this as the "thankful" advent calendar, but the project can be used in many ways.
The project uses simple "envelopes" to hold a message - thankful or whatever you want.
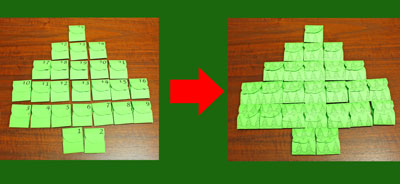
Let's take a look first at a Christmas version using the "thankful" theme.
At the end of the days, in this case 25, all of the envelopes will have a message inside.
Initially, I thought of this as the "thankful" advent calendar, but the project can be used in many ways.
The project uses simple "envelopes" to hold a message - thankful or whatever you want.
Let's take a look first at a Christmas version using the "thankful" theme.
At the end of the days, in this case 25, all of the envelopes will have a message inside.
Take a look at the simple steps below for how to make this fun ornament.
Easy Paper Crafts: Holiday Advent Project Materials and Tools:
Plain or decorative paper, 20 or 24-pound (I used plain green 24-pound)
Scissors
Holiday Advent Envelopes Numbered pattern (click to open an Adobe PDF)
Holiday Advent Tree Shapes pattern (click to open an Adobe PDF)
Scissors
Holiday Advent Envelopes Numbered pattern (click to open an Adobe PDF)
Holiday Advent Tree Shapes pattern (click to open an Adobe PDF)
You can display the tree on a bulletin board, a refrigerator or a special board with the use of thumbtacks, magnets, pins, tape or whatever you choose.

The Steps for How to Make the Easy Paper Crafts: Holiday Advent Project:
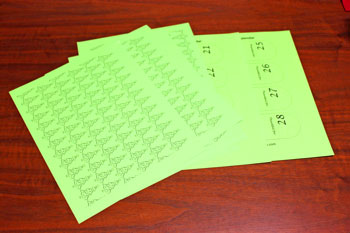
Print the Holiday Advent Envelopes Numbered pattern on the paper color of your choice.
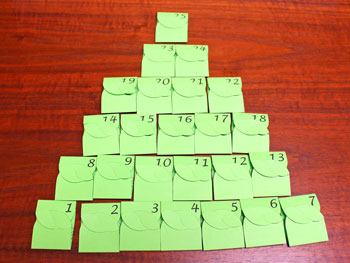
I printed seven of the eight pages of the pattern to get 25 numbered envelopes.
I printed seven of the eight pages of the pattern to get 25 numbered envelopes.
Use your printer's instructions for printing on the back of the paper to print the Holiday Advent Tree Shapes pattern on the back of each page.
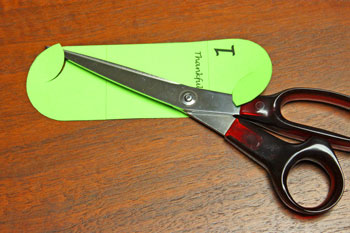
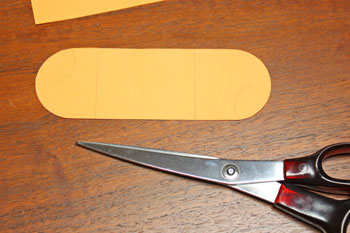
Cut around the ovals.
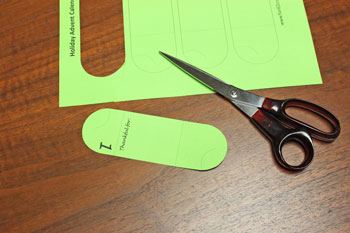
Cut along the dotted lines on each end of the oval.
Fold across the two lines to form the envelope.
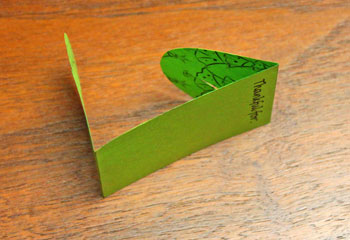
Overlap the ends of the envelope at the two cut notches.
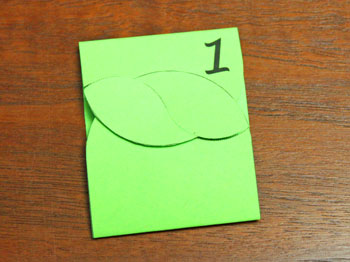
Continue cutting and folding each of the ovals.
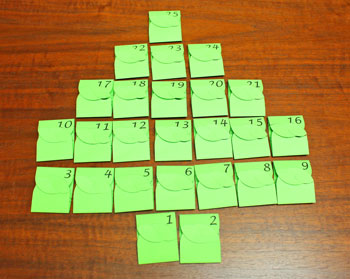
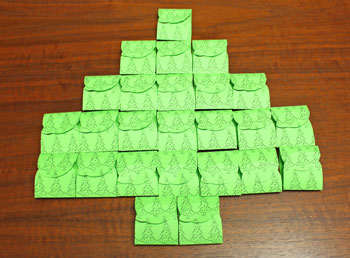
Form the packets into the shape of your choice.
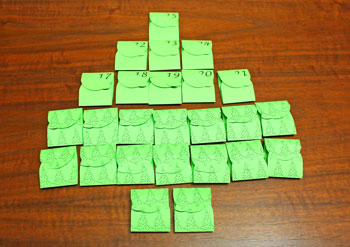
Here is one tree shape using the 25 numbered envelopes.
Form the packets into the shape of your choice.
Here is one tree shape using the 25 numbered envelopes.
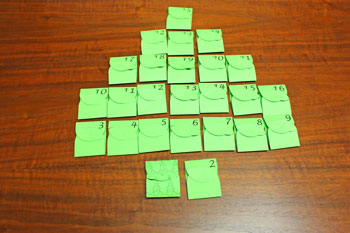
Another tree shape uses the 25 packets without two at the bottom.
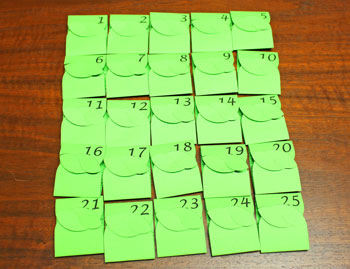
Or, if you prefer, you can just make a 5x5 set of the packets.
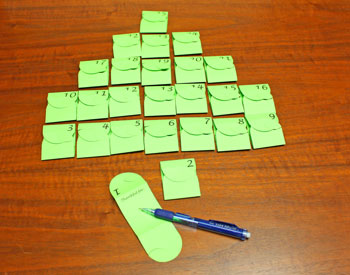
Each day, write a message on the inside.
It can be a "thankful" message, a list of accomplishments for the day, an anecdote or whatever.
It can be a "thankful" message, a list of accomplishments for the day, an anecdote or whatever.
To complete the day, fold the envelope with the holiday design on the outside and replace it in the shape.
Continue with the daily messages as the holiday draws near.
On the big day, all of the envelopes have been filled with messages and folded to show the holiday design.
For extra festivity, be creative and decorate the packets with holiday bling as they are finished each day.
For extra festivity, be creative and decorate the packets with holiday bling as they are finished each day.
The packets can also be used at Thanksgiving either with or without the numbers.
The objective of Thanksgiving is to give thanks.
With the Holiday Advent Project, each guest can fill out one of the envelopes with what they are most thankful for this season.
Or, each envelope can be just one "thankful" message and people can fill out as many as they want.
Let's make the Thanksgiving Holiday Advent project without the numbers.
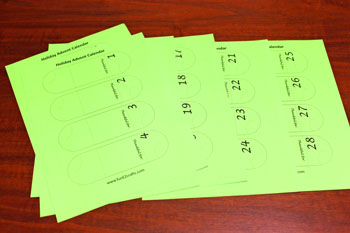
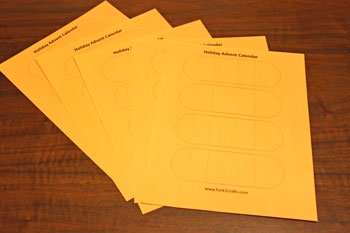
Print the Holiday Advent Calendar Generic pattern on the paper of your choice.
It's a one-page pattern with four ovals on the page.
Print as many as you need. I used plain orange 24-pound paper.
The objective of Thanksgiving is to give thanks.
With the Holiday Advent Project, each guest can fill out one of the envelopes with what they are most thankful for this season.
Or, each envelope can be just one "thankful" message and people can fill out as many as they want.
Let's make the Thanksgiving Holiday Advent project without the numbers.
Print the Holiday Advent Calendar Generic pattern on the paper of your choice.
It's a one-page pattern with four ovals on the page.
Print as many as you need. I used plain orange 24-pound paper.
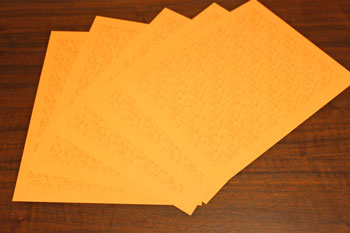
Print the Holiday Advent Turkey Shapes pattern on the back.
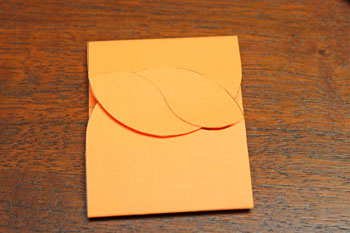
Cut around the oval shapes.
Cut along the curved lines at each end.

Fold across the envelope at the two lines.

Overlap the curved notches to form an envelope.
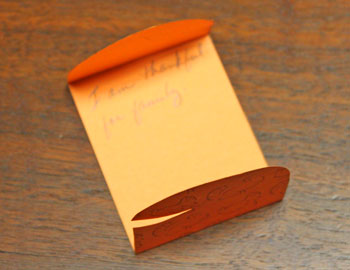
With the plain side out, the envelope does not contain a message yet.
With the plain side out, the envelope does not contain a message yet.
Write the "thankful" message on the plain side of the envelope and reverse the folds along the lines.
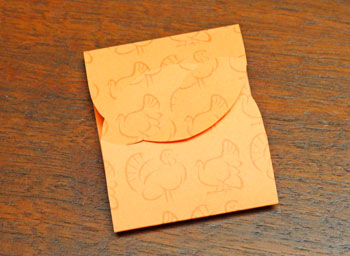
Overlap at the curved notches with the holiday design on the outside.
Place the completed "thankful" messages in a "thankful" basket.
And, paraphrasing a borrowed line from the movie Jaws, "You're gonna need a bigger basket."
Depending on the dynamics of the guests, the messages can be shared with the group or they can be kept private.
And, paraphrasing a borrowed line from the movie Jaws, "You're gonna need a bigger basket."
Depending on the dynamics of the guests, the messages can be shared with the group or they can be kept private.

As for school, the envelopes can include a count-down comment for the end of the school year, or a list of last-minute fun activities before the school year starts back.
Of course, the ideas are almost limitless.
Here are more holiday pages for the design-side of the envelopes:
Holiday Advent Easter Shapes
Holiday Advent Independence Day Shapes
Holiday Advent Heart Shapes
Holiday Advent Baby Shower Shapes
Holiday Advent Bridal Shower Shapes
Or, you can buy design paper to make the envelopes.
Have fun!
Use your imagination with the versatile Holiday Advent project and make the events, whatever they may be, memorable with handwritten notes.


funEZcrafts
Welcome
Come on in and stay awhile...

funEZcrafts
Welcome
Come on in and stay awhile...
This project works for other holidays - Valentine's Day, Easter, Independence Day, for example.
It also works for other events like school's out (or starting back), bridal shower, baby shower or other major event.
The messages inside can be loving or sexy for Valentine's Day or historical for Independence Day.
At a baby or bridal shower, the little envelopes can include messages to the bride or mom-to-be.