Easy Christmas Crafts: Paper Strips Christmas Tree
This Easy Christmas Crafts Paper Strips Christmas Tree is fun, fast and easy to make using just a few simple materials and tools.
For variety, make the little tree using different colors of paper and ribbon. They can hang in small spaces on a Christmas tree or anywhere to add a smile during the holiday season.
The materials and the tools are simple and inexpensive. You can make just a few or many in a short amount of time.
Take a look at the fun little Paper Strips Christmas Tree.

The paper strips Christmas tree is simple, fun and interesting.
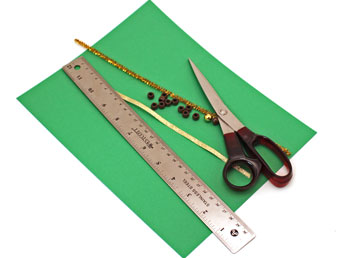
Easy Christmas Crafts: Paper Strips Christmas Tree Materials and Tools:
Paper - card stock, construction paper or similar paper that can hold its shape
Ribbon 1/4 inch wide by 10 inches long
Chenille stem 12 inches long
Gold bead for the tree topper
Spacer beads (optional - this example used 2 brown pony beads between the layers for a total of 12 spacer beads)
Scissors
Ruler
Pencil (not shown in picture)
Ribbon 1/4 inch wide by 10 inches long
Chenille stem 12 inches long
Gold bead for the tree topper
Spacer beads (optional - this example used 2 brown pony beads between the layers for a total of 12 spacer beads)
Scissors
Ruler
Pencil (not shown in picture)
Take a look at the simple materials and tools shown here.
The Steps for How to Make the Easy Christmas Crafts: Paper Strips Christmas Tree:
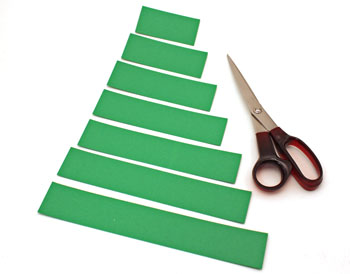
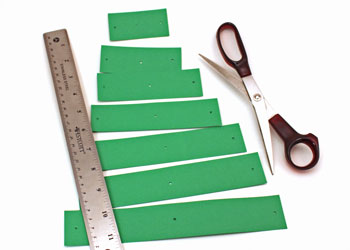
Mark and cut the paper into strips 1 1/2 inch wide by 3, 4, 5, 6, 7, 8 and 9 inches long. I used an 8 1/2 x 11 inch green paper slightly heavier than normal letter paper.
For the least number of cuts, cut four of the 1 1/2 inch wide strips the 11-inch length of the paper.
Cut one of the strips 9 inches long.
Next, cut the other three 11-inch strips into the 8-inch and 3-inch lengths, 7-inch and 4-inch pieces and 6-inch and 5-inch pieces.
The only extra is the 2-inch length cut off the 9-inch piece.
Use the point of the scissors to make a small hole in the crosswise center of the end of the strips 3/8 inch from the end.

Make a small hole in the center of the strips in addition to both ends.
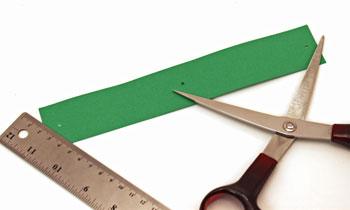
Make the three holes in each of the seven strips of paper.
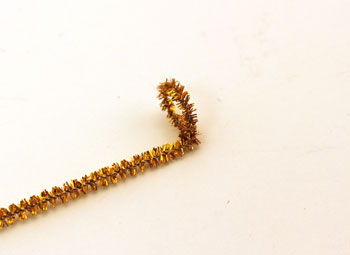
Wrap one end of the chenille wire around the tip of your finger to make a small loop.
Twist the end of the wire back on itself to lock the loop in place.
Bend the loop at a right angle.
This loop forms the bottom of the paper strips Christmas tree and prevents the strips from coming off.
Twist the end of the wire back on itself to lock the loop in place.
Bend the loop at a right angle.
This loop forms the bottom of the paper strips Christmas tree and prevents the strips from coming off.
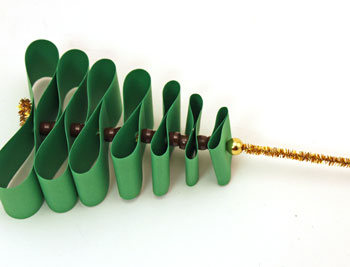
Add the 9-inch paper strip to the top of the chenille wire in an "S" shape.
Push the chenille wire through each of the small holes in the paper strip.
Push the chenille wire through each of the small holes in the paper strip.
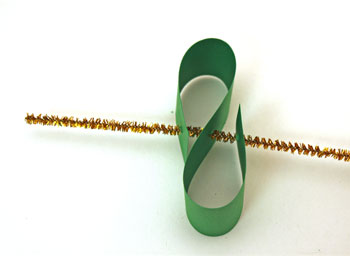
Push the paper strip down the chenille wire to the circle formed in the wire at the bottom.
Add the spacer beads. The spacer beads are optional. The small holes in the paper catch on the chenille wire. The paper strips hold their position even without the spacer beads.
Add the spacer beads. The spacer beads are optional. The small holes in the paper catch on the chenille wire. The paper strips hold their position even without the spacer beads.
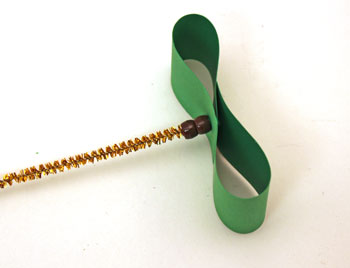
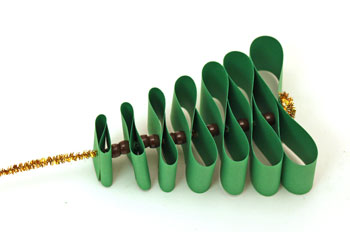
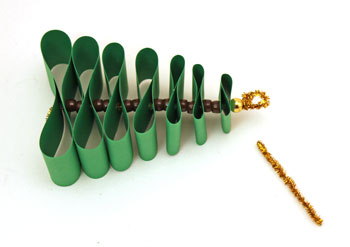
Add each of the paper strips decreasing in size until all of the strips are added.
Be careful adding the smallest layer. It can easily get creased instead of keeping its smooth shape.
Be careful adding the smallest layer. It can easily get creased instead of keeping its smooth shape.
Add the gold bead to the top of the tree shape.
Form a loop in the chenille wire above the gold bead.
Twist the wire back on itself to lock in place.
Break off any excess wire.
Make sure the end of the wire is tucked away and won't prick fingers.
Twist the wire back on itself to lock in place.
Break off any excess wire.
Make sure the end of the wire is tucked away and won't prick fingers.
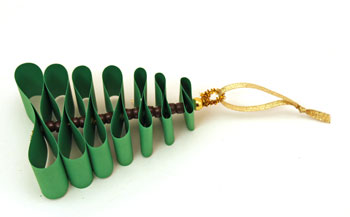
Thread the ribbon through the loop in the chenille wire.
Tie a knot in the end of the ribbon, and if necessary, trim the ribbon ends at an angle.
Tie a knot in the end of the ribbon, and if necessary, trim the ribbon ends at an angle.
Find a spot to hang the pretty little paper strips Christmas tree to add fun to the holidays.
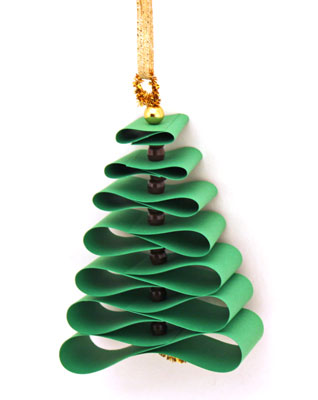
Whether young or young-at-heart, people of all ages can enjoy this easy Christmas crafts project.
Make one or many. Vary the colors and have a whole forest of Christmas trees.
Plus, this would be fun to have children color the strips of paper with "ornaments" before putting the tree together.
Use your imagination and have fun!
Using a few inexpensive materials and tools this Easy Christmas Crafts Paper Strips Christmas Tree is fun, easy, fast and inexpensive to make.


funEZcrafts
Welcome
Come on in and stay awhile...

funEZcrafts
Welcome
Come on in and stay awhile...