Easy Christmas Crafts: Drinking Straw Star
Using just a few materials and tools, the Drinking Straw Star becomes a fun and interesting decoration for the holidays or anytime throughout the year.
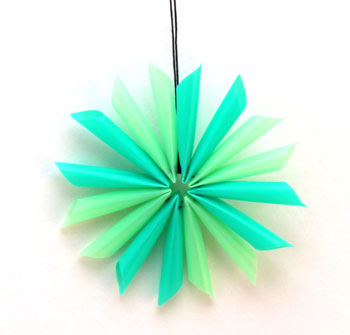
Simple and fun...take a look at this blue and green star.
Simple and fun...take a look at this blue and green star.
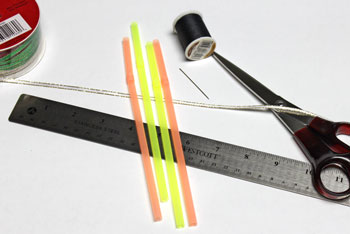
Easy Christmas Crafts: Drinking Straw Star Materials and Tools:
Drinking straws
Ribbon
Thread (I used upholstery thread, but you can use a doubled length of regular thread.)
Needle
Ruler
Scissors
Ribbon
Thread (I used upholstery thread, but you can use a doubled length of regular thread.)
Needle
Ruler
Scissors
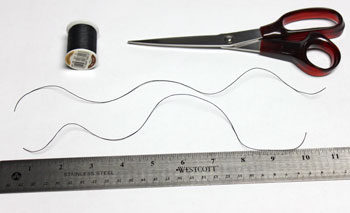
Take a look at the simple materials and tools shown here.
The Steps for How to Make the Easy Christmas Crafts: Drinking Straw Star:
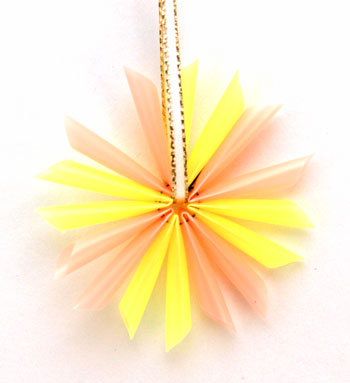
Select the colors of the straws and how large you want the finished star to be.
For this example and the blue and green one above, I used four straws cut into eight pieces.
The finished star is just over 2 1/2 inches across.
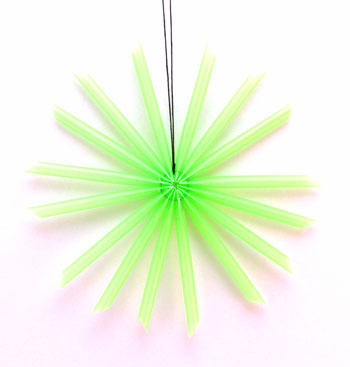
Another example below used eight straws and is just over 5 1/2 inches across.
If your straws are the flexible kind, cut off the flexible end.
For this example and the blue and green one above, I used four straws cut into eight pieces.
The finished star is just over 2 1/2 inches across.
Another example below used eight straws and is just over 5 1/2 inches across.
If your straws are the flexible kind, cut off the flexible end.
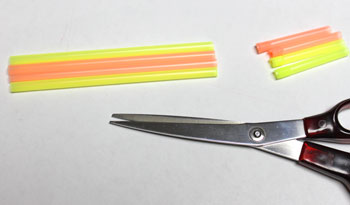
Decide how big you want your star to be. I wanted a smaller star.
This one will be just over 2 1/2 inches, which is the length of each of the halved straw pieces shown cut below.
Make sure the straw pieces are all roughly the same length.
This one will be just over 2 1/2 inches, which is the length of each of the halved straw pieces shown cut below.
Make sure the straw pieces are all roughly the same length.

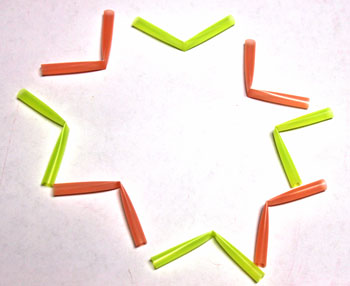
Fold each piece of straw in half.
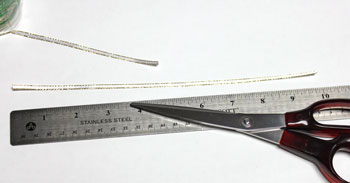
Cut two pieces of thread.
If you have upholstery thread, cut the pieces 12 inches long. If you are using regular all-purpose thread, cut each piece 24 inches long and fold it in half.
I used black as it is easier to see in the images. A thread matching the straws would be less noticeable in the finished star.
Note: I tried using glue - it did not work. First, the glue did not want to stick to the plastic. Second, the straws began popping apart even after being held with clothespins. Third, I lost patience.
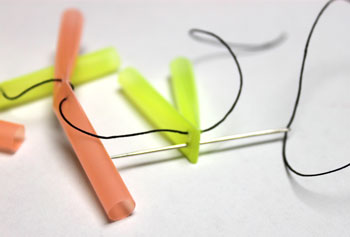
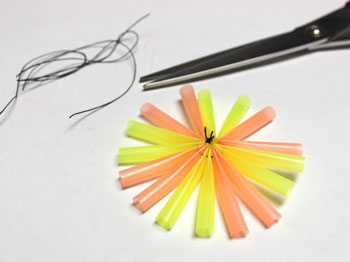
Thread the needle with one of the lengths of thread.
Push the needle through the folded end of one straw roughly 1/8 inch from the folded edge and 1/8 inch from the side of the straw.
Push the needle through the folded end of one straw roughly 1/8 inch from the folded edge and 1/8 inch from the side of the straw.
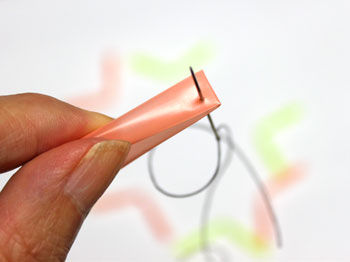
Pull the thread partially through the piece of straw leaving a long tail of thread not pulled through.
Add a second piece of straw positioning the needle the same distance from its edges.
Add a second piece of straw positioning the needle the same distance from its edges.
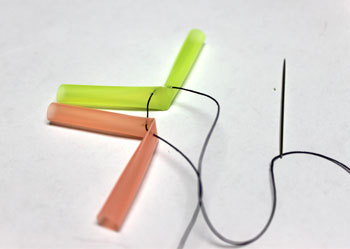
Continue pushing the needle through the pieces of straw until all are on the strand of thread.
Remove the needle from the thread.
Remove the needle from the thread.
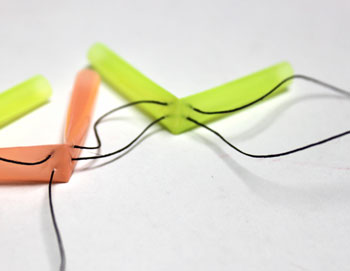
Thread the needle with the second length of thread.
Push the needle through the beginning straw 1/8 inch from the folded edge and 1/8 inch from the opposite edge from the first thread.
Push the needle through the beginning straw 1/8 inch from the folded edge and 1/8 inch from the opposite edge from the first thread.
Add the second piece of straw to the second thread.
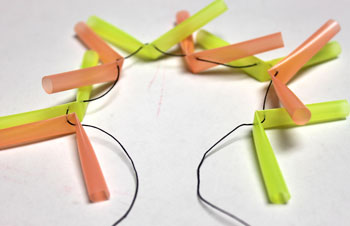
The objective is to have parallel threads running through the folded edges of the straws. With just one thread, the straws would not form a consistent star shape.
The objective is to have parallel threads running through the folded edges of the straws. With just one thread, the straws would not form a consistent star shape.
To help keep the threads from pulling through the straw pieces, tie a knot in the threads at the first straw piece.
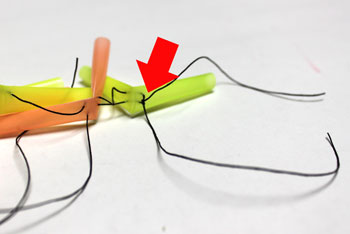
Continue pushing the second thread through all of the straw pieces in the same order as the first thread.
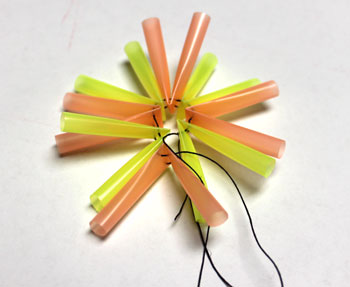
Pull the thread ends snugly and tie into a knot.
Be careful not to tie the ends too tightly.
The folded straws need some room to rotate around the threads. Trim the excess thread ends.
Be careful not to tie the ends too tightly.
The folded straws need some room to rotate around the threads. Trim the excess thread ends.
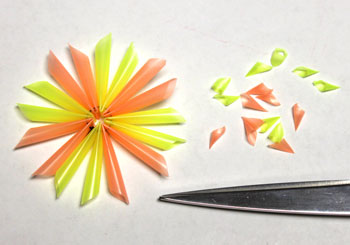
Trim the ends of the straws at an angle.
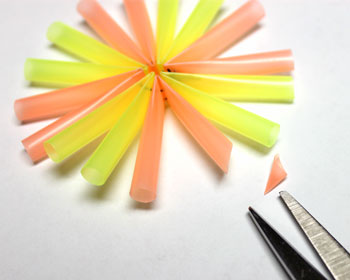
Alternate the angles back and forth around the star shape.
Cut a piece of narrow ribbon 10 inches long.
Thread the ribbon through the center of the star.
Pull the ends even and tie a knot.
Trim the ends of the ribbon at an angle.
Pull the ends even and tie a knot.
Trim the ends of the ribbon at an angle.

The fun little Drinking Straw Star is finished and ready to display.
Here's another larger version made with eight green straws. I cut off the flexible end and made sure the pieces of straw were the same length before folding the pieces in half and following the steps.
This star is roughly 5 1/2 inches across.
Instead of adding a ribbon, I used two of the ends of the extra thread to make a hanging loop while trimming the other two ends off.
This star is roughly 5 1/2 inches across.
Instead of adding a ribbon, I used two of the ends of the extra thread to make a hanging loop while trimming the other two ends off.
Drinking straws come in a variety of fun colors and in packs of 100 straws for not a lot of cost.
That would make several fun and colorful decorations for a holiday party or for any time of the year.
Have fun!
The Drinking Straw Star project is a great and inexpensive group project, especially if making lots of the ornaments.
That would make several fun and colorful decorations for a holiday party or for any time of the year.
Have fun!
The Drinking Straw Star project is a great and inexpensive group project, especially if making lots of the ornaments.


funEZcrafts
Welcome
Come on in and stay awhile...

funEZcrafts
Welcome
Come on in and stay awhile...