Easy Christmas Crafts: Three Stars Chenille Ornament
This Easy Christmas Crafts Three Stars Chenille Ornament is fast, fun and easy to make and requires very few materials and tools.
This easy Christmas crafts project can be fun for young and old alike.
Take a look at the fun ornament and the how-to-make instructions below.
This easy Christmas crafts project can be fun for young and old alike.
Take a look at the fun ornament and the how-to-make instructions below.

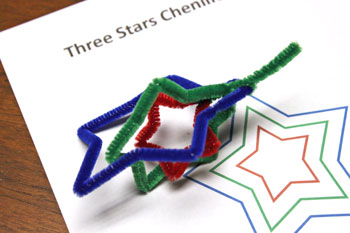
The stars within stars ornament is easy to make using the funEZ template for the star sizes.
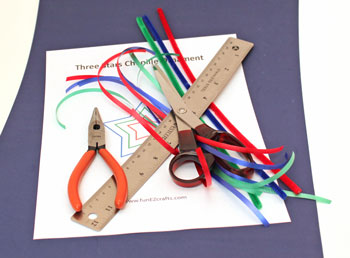
Easy Christmas Crafts: Three Stars Chenille Ornament Materials and Tools:
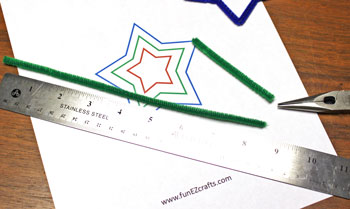
Easy Christmas Crafts Three Stars Chenille Ornament template (click to open the file)
Three 12 inch chenille wires in blue, green and red (or the colors of your choice)
Curling ribbon, one yard each of blue, green and red cut into 12-inch pieces (or other decorative ribbon)
Ruler
Scissors
Needle nose pliers (optional, but makes it easier on the fingers)
Beads - optional (15 small and 12 large in other version below)
The Steps for How to Make the Easy Christmas Crafts: Three Stars Chenille Ornament:
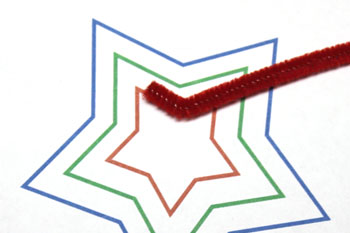
Print the funEZ Easy Christmas Crafts Three Stars Chenille Ornament template to size the three stars.
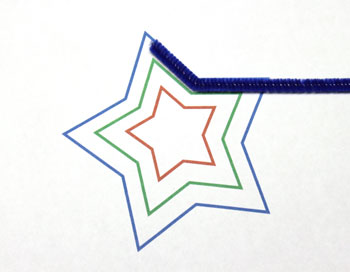
Place the blue chenille wire on the template 1/4 inch from one point of the star.
Follow the blue line and make the first bend at the first inside point of the star.
Note: the blue star is sized to use ALL of the 12-inch chenille wire with only a small amount of overlap to pinch the wire ends together.
Follow the blue line on the template making the in and out bends in the blue chenille wire.
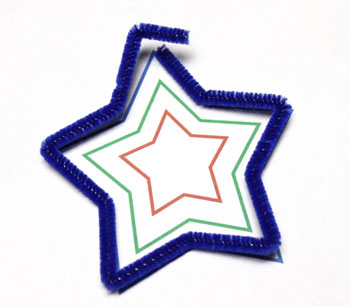
Make bends in each end of wires - like the top of the number "7" - approximately 1/8 inch.
Overlap the ends and press the top of each "7" down to lock the ends of the wire.
Press the ends firmly to make sure no wire ends point outward. (Fingers work here, but the needlenose pliers help.)
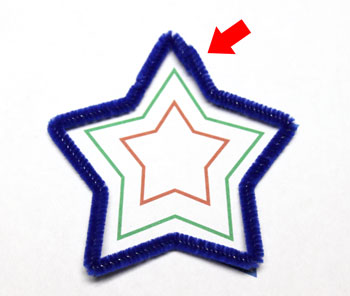
The resulting closed blue chenille star should follow the blue line on the template.
Overlap the ends and press the top of each "7" down to lock the ends of the wire.
Press the ends firmly to make sure no wire ends point outward. (Fingers work here, but the needlenose pliers help.)
The resulting closed blue chenille star should follow the blue line on the template.
Cut (or break) the green chenille wire to 8 1/2 inches.
Keep the short piece of green wire to be used later.
Keep the short piece of green wire to be used later.
Place the green chenille wire on the green line of the template 1/4 inch from an outside point of the star.
Follow the template to make the in and out bends in the chenille wire to form the green star shape.
Follow the template to make the in and out bends in the chenille wire to form the green star shape.
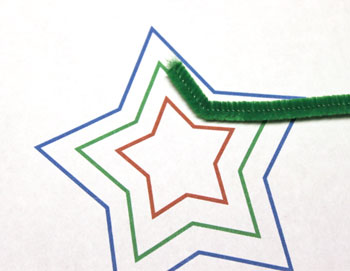
Make bends in each end of the green chenille wire as was done for the blue star.
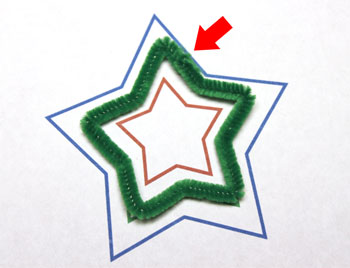
Pinch the ends together to close the green star.
The chenille wire should follow the green line on the template.
Pinch the ends together to close the green star.
The chenille wire should follow the green line on the template.
Cut (or break) the red chenille wire to 5 1/2 inches.
Set aside the other end for later in the project.
Set aside the other end for later in the project.
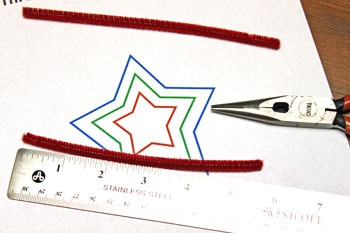
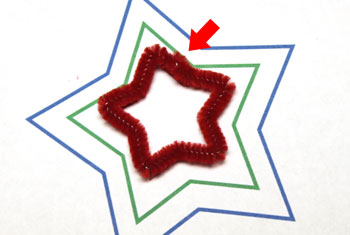
Place the end of the red chenille wire on the template 1/4 inch from one outward point of the red star.
Make in and out bends in the red chenille wire following the shape of the red star.
Make in and out bends in the red chenille wire following the shape of the red star.
Bend each end of the wire and connect them as was done for the green and blue stars.
The finished red star should follow the red outline on the template.
The finished red star should follow the red outline on the template.
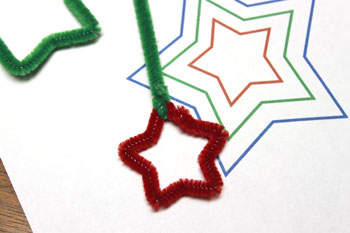
Wrap one end of the short green chenille wire around the top point of the red star.
Twist to lock in place.
Leave the other end pointing upward.
The top of each star is defined as the point with the connected wires on one side.
Twist to lock in place.
Leave the other end pointing upward.
The top of each star is defined as the point with the connected wires on one side.
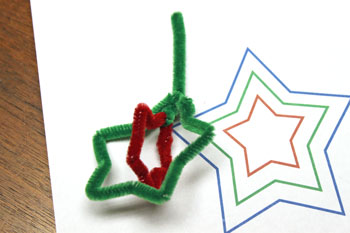
Place the red star inside the green star with the top of the green star over the top of the red star.
Wrap the end of the short green chenille wire around the top of the green star to connect the red and green stars.
Wrap the end of the short green chenille wire around the top of the green star to connect the red and green stars.
Place the red and green stars inside the blue star.
The top of the green star should be inside the top of the blue star.
Wrap the short piece of green chenille wire around the top of the blue star to connect the red, green and blue stars.
The top of the green star should be inside the top of the blue star.
Wrap the short piece of green chenille wire around the top of the blue star to connect the red, green and blue stars.
Tie three groups of three ribbons - red, green and blue - to the short green chenille wire above the top of the stars.
I tried just one group of ribbons. Tying three separate groups works better.
I tried just one group of ribbons. Tying three separate groups works better.

Use the edge of the scissors to curl each of the ribbon ends.
Notice the curling ribbons disguise the connected ends of the chenille wires at the top of the stars.
Notice the curling ribbons disguise the connected ends of the chenille wires at the top of the stars.
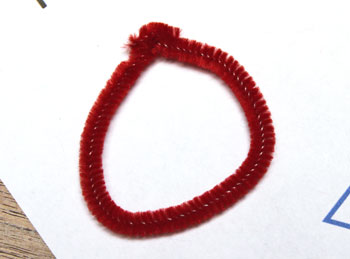
Make a loop of the remaining red chenille wire.
Pinch the ends of the wire to make sure no pointed ends stick out.
Pinch the ends of the wire to make sure no pointed ends stick out.
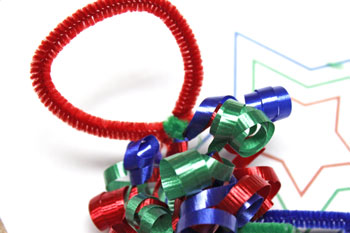
Wrap the end of the short green chenille wire around the connection in the red loop of chenille wire.
This forms the hanging loop for the finished Easy Christmas Crafts Three Stars Chenille Ornament.
This forms the hanging loop for the finished Easy Christmas Crafts Three Stars Chenille Ornament.
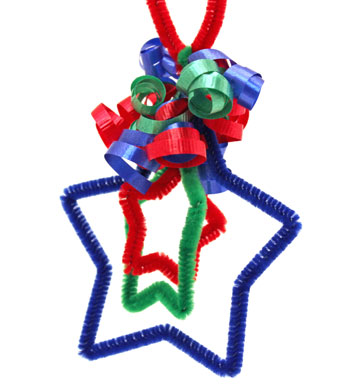
Just look at the finished ornament.
Simple, bright and cheerful.
Adjust the stars as you prefer. I chose to off-set them slightly such that each star can be seen.
Simple, bright and cheerful.
Adjust the stars as you prefer. I chose to off-set them slightly such that each star can be seen.
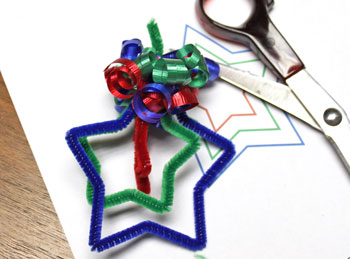
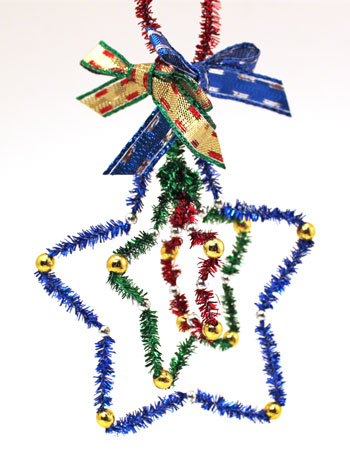
This version uses metallic chenille wires in blue, green and red.
I added larger gold beads to each outer point (except the top one) and a smaller silver bead to each inner point of each star.
The bows at the top include all of the colors: blue, green, red, silver and gold.
(And, I prefer the other one - it's brighter and more fun!)
I added larger gold beads to each outer point (except the top one) and a smaller silver bead to each inner point of each star.
The bows at the top include all of the colors: blue, green, red, silver and gold.
(And, I prefer the other one - it's brighter and more fun!)
This is a great project for kids to do with little supervision.
Or, grandparents can have a wonderful time working with their grandkids.
It's also a great project for seniors or an office teamwork project.
Just a few or quite a lot of the ornaments can be made quickly and inexpensively.
Have fun!
This Easy Christmas Crafts Three Stars Chenille Ornament provides a fun, fast and inexpensive project for kids, adults and seniors!


funEZcrafts
Welcome
Come on in and stay awhile...

funEZcrafts
Welcome
Come on in and stay awhile...