Easy Christmas Crafts: Paper Arcs Christmas Tree
Nine different paper arcs along with a shiny embellishment make a pretty little paper arcs Christmas tree to display during the holiday season.
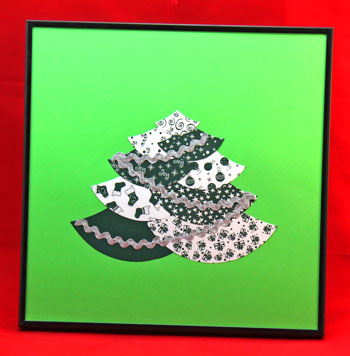
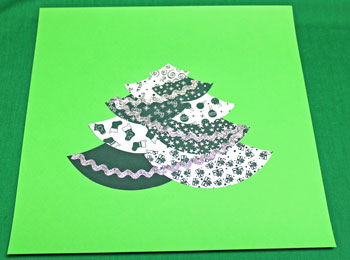
This version uses nine different papers all within the same dark green color family and is embellished with silver rick rack.
This version uses nine different papers all within the same dark green color family and is embellished with silver rick rack.
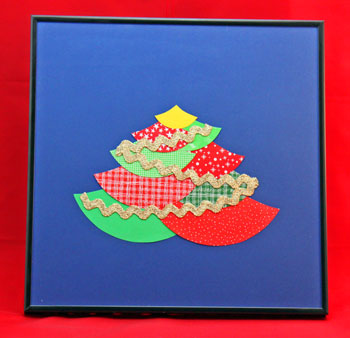
Or, look at this version in green, red and yellow embellished with gold on a blue background.
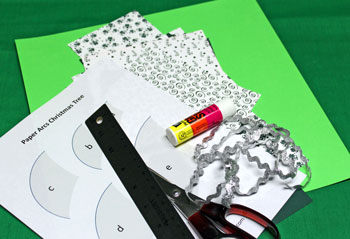
Easy Christmas Crafts: Paper Arcs Christmas Tree Materials and Tools:
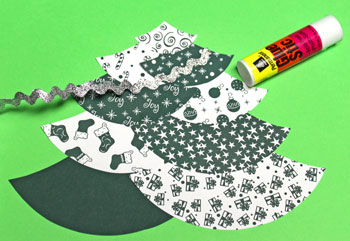
Paper - nine different colors and prints of your choice
One 12x12 background paper
Embellishments - ribbon, rick rack, sequins, etc.
Ruler
Glue (double sided tape is also helpful, but not necessary)
Scissors
Pencil (not shown in picture)
Pattern - Paper Arcs Christmas Tree
12x12 scrapbook frame - optional (not shown)
One 12x12 background paper
Embellishments - ribbon, rick rack, sequins, etc.
Ruler
Glue (double sided tape is also helpful, but not necessary)
Scissors
Pencil (not shown in picture)
Pattern - Paper Arcs Christmas Tree
12x12 scrapbook frame - optional (not shown)
Take a look at the simple materials and tools.
The Steps for How to Make the Easy Christmas Crafts: Paper Arcs Christmas Tree:
Print the Paper Arcs Christmas Tree pattern.
Cut around the pattern shapes.
Cut around the pattern shapes.
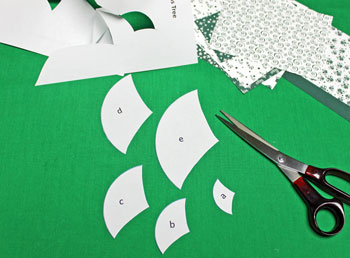
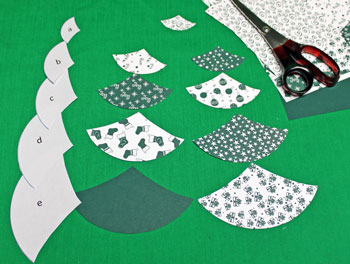
Determine which papers to use for each shape.
This tree alternates dark and light prints back and forth.
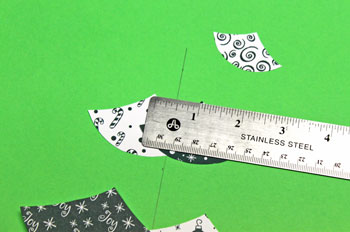
Cut around each of the shapes.
Cut one of the smallest shape and two each of the four other shapes.
This tree alternates dark and light prints back and forth.
Cut around each of the shapes.
Cut one of the smallest shape and two each of the four other shapes.
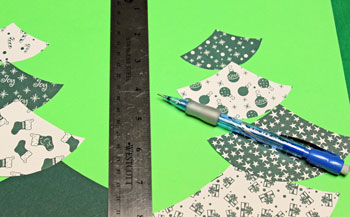
Measure and mark a center line on the background paper.
Draw the line starting 3 inches from the bottom edge and upward for five inches.
This line will be hidden behind the tree.
Draw the line starting 3 inches from the bottom edge and upward for five inches.
This line will be hidden behind the tree.
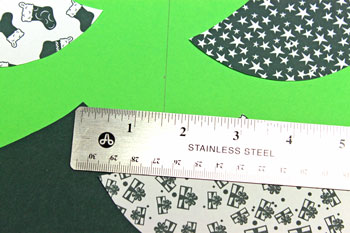
Overlap the e shapes (the largest) such that their upper points are three inches apart.
Glue those shapes together where they overlap but not to the background yet.
Glue those shapes together where they overlap but not to the background yet.
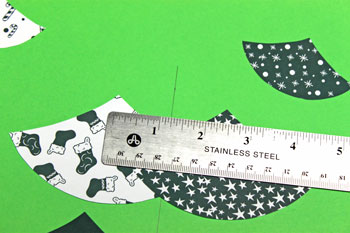
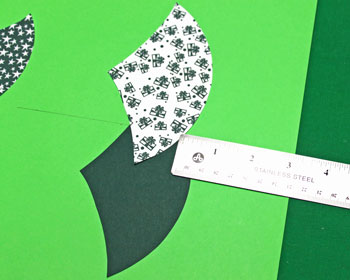
Overlap the d shapes, next largest, such that their upper points are 2 1/2 inches apart.
Glue those shapes together where they overlap but not to the background.
Glue those shapes together where they overlap but not to the background.
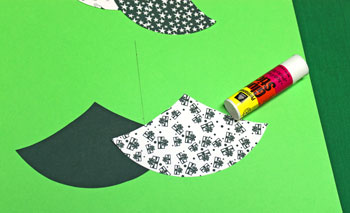
Overlap the c shapes - the middle size - such that their upper points are 2 inches apart.
Glue where they overlap.
Overlap the b shapes - the second smallest shapes - such that their upper points are 1 inch apart and glue them together.
Glue where they overlap.
Overlap the b shapes - the second smallest shapes - such that their upper points are 1 inch apart and glue them together.
Position the largest e shapes 3 inches from the bottom edge and centered across the pencil line.
The intersection of the two shapes should just cover the bottom end of the center pencil line.
The intersection of the two shapes should just cover the bottom end of the center pencil line.
Glue the e shapes in place.
Center and add the d shapes over the larger e shapes.
Overlap the shapes just enough to hide any background paper between the shapes.
Glue the d shapes in place.
Overlap the shapes just enough to hide any background paper between the shapes.
Glue the d shapes in place.
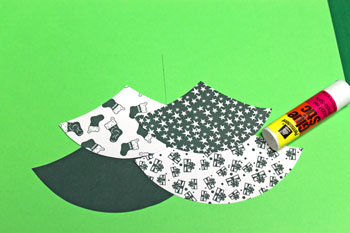
In decreasing size add the remaining shapes - centering, overlapping and gluing.

Decorate the tree with any embellishments you choose.
This tree has silver rick rack as a garland.
This tree has silver rick rack as a garland.
Allow the glue to dry.
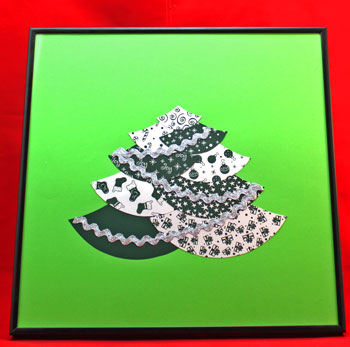
Add a simple scrapbook frame to display the Paper Arcs Christmas Tree.
Be traditional with the colors and papers, or make it with teal, fuchsia and bright yellow. Add sequins or hole punch ornaments in addition to a garland.
Be creative and have fun!
The Paper Arcs Christmas Tree can be a pretty decoration leaning on a mantel, against a stack of books or held in an easel among other festive holiday decorations.
Be creative and have fun!
The Paper Arcs Christmas Tree can be a pretty decoration leaning on a mantel, against a stack of books or held in an easel among other festive holiday decorations.


funEZcrafts
Welcome
Come on in and stay awhile...

funEZcrafts
Welcome
Come on in and stay awhile...