Easy Christmas Crafts: Construction Paper Nutcracker Doll
This Easy Christmas Crafts Construction Paper Nutcracker Doll is both fun and funny.
Plus, he provides an opportunity to learn geometric shapes such as circles, ellipses, rectangles and cylinders.
The cute little nutcracker doll can be made easily and inexpensively using construction paper and glue.
Or, if you prefer, use other types of paper and be exact (much more than I was) with each step for a more regal and proper nutcracker.
Let's look at the finished Construction Paper Nutcracker Doll. Isn't he just fun?
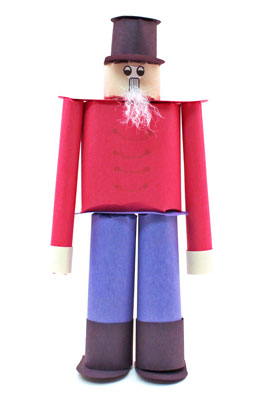
He's fun and easy to make. Plus, he's inexpensive. If he gets crushed or wobbly, another one can easily be made to take his place.
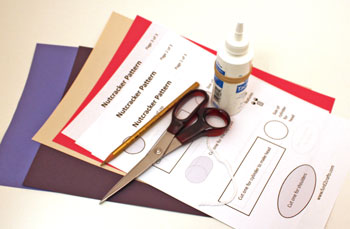
Easy Christmas Crafts: Construction Paper Nutcracker Doll Materials and Tools:
Construction Paper one piece each of blue, black, read and tan
Small piece of white yarn, 1-2 inches (optional for beard)
Gold pencil or crayon to draw buttons
Scissors
Glue
Paper clips
Pattern (Easy Christmas Crafts Construction Paper Nutcracker Doll pattern)
Paper towel - not shown, but necessary for glue mishaps and sticky fingers
Small piece of white yarn, 1-2 inches (optional for beard)
Gold pencil or crayon to draw buttons
Scissors
Glue
Paper clips
Pattern (Easy Christmas Crafts Construction Paper Nutcracker Doll pattern)
Paper towel - not shown, but necessary for glue mishaps and sticky fingers
Take a look at the simple materials and tools shown here. The paper is inexpensive construction paper, but other papers can be used as well for a smoother and more polished nutcracker doll.
The Steps for How to Make the Easy Christmas Crafts: Construction Paper Nutcracker Doll:
Print all three pages of the Easy Christmas Crafts Construction Paper Nutcracker Doll pattern.
Cut around the pattern's solid line pattern shapes. The dotted line shapes provide size and shape guidelines when gluing the different round and elliptical cylinder shapes.
Cut the noted number of pattern pieces from the appropriate color of paper.
> Black for cap and boots
> Red for shoulders, torso and arms
> Tan for head and hands
> Blue for legs and the ellipse between torso and legs

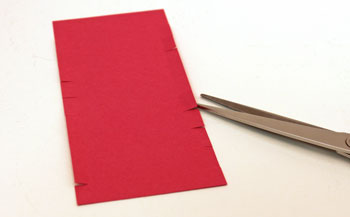
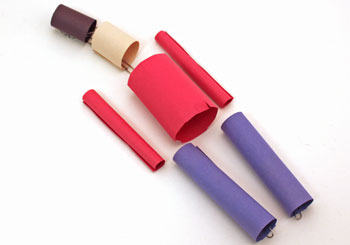
Each cylinder shape has cuts into each end of the cylinder for gluing the adjacent shapes together.
You can make the cuts before forming the shapes or make the cuts after. I did some of both.
For a more exacting shape, make sure each cut is the same depth, each cut is equally spaced and the folded edges are even.
For a quick and easy project, make the cuts after the shapes are glued and dry.
For a more exact shape, make the cuts before gluing the shapes and use a straight edge to form the folds evenly.
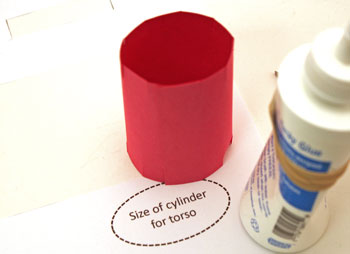
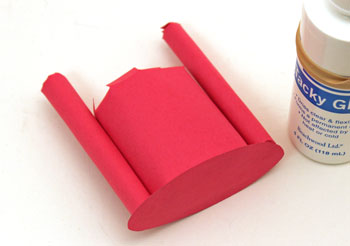
Use the dotted line shape on the pattern to size and form the specific cylinder.
This elliptical cylinder is for the torso.
This elliptical cylinder is for the torso.
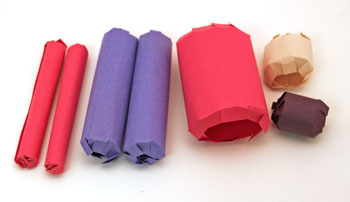
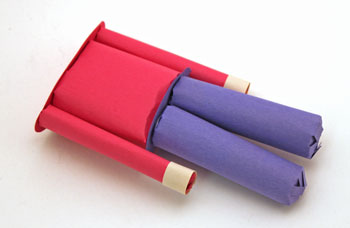
Make all of the cylindrical shapes.
Use paper clips to hold the shapes as they dry.
Use paper clips to hold the shapes as they dry.
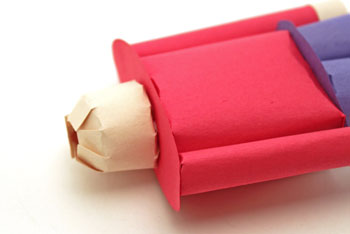
Fold the clipped edges inward.
Apply glue to the top of the torso and the top of the arms.
Glue the shapes to the shoulder ellipse.
Glue the shapes to the shoulder ellipse.
Wrap the hand shapes around the bottom of the arms.
Add glue to hold the hands to the arms.
Add glue to hold the hands to the arms.
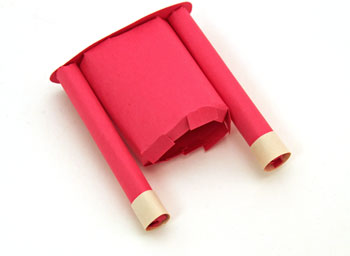
Glue the blue ellipse to the bottom of the torso shape.

Glue the top of the legs to the blue ellipse.
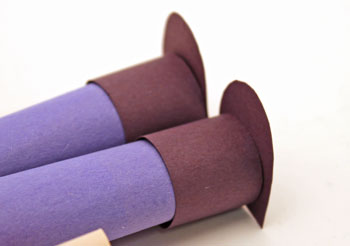
Glue the boot soles to the bottom of each leg.
Wrap a boot shape around the bottom of each leg.
Apply glue to hold the boot shapes to the legs.
Wrap a boot shape around the bottom of each leg.
Apply glue to hold the boot shapes to the legs.
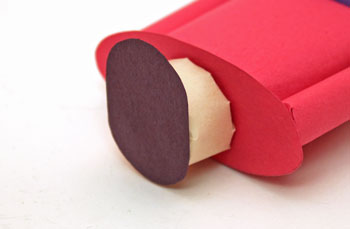
Glue the head shape to the center of the shoulders.
Glue the cap's bill shape to the top of the head.
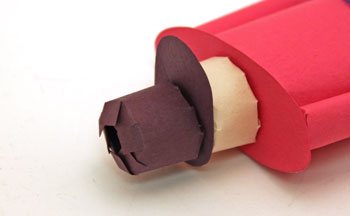
Position and glue the back portion of the elongated ellipse over the head. Let the front portion form the cap's bill.
Position and glue the back portion of the elongated ellipse over the head. Let the front portion form the cap's bill.
Position the main portion of the cap toward the back of the top of the cap's bill.
Add glue to hold in place.
Add glue to hold in place.
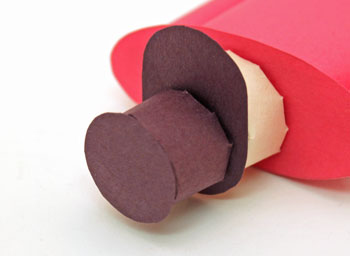
Glue the circular top of the cap to the top of the cap's cylinder shape.
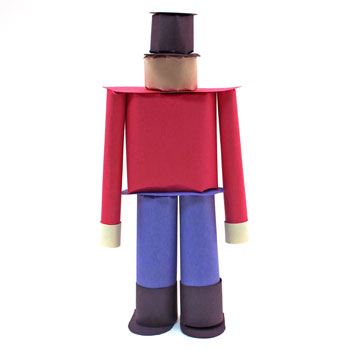
The construction paper nutcracker doll is almost done. He's formed, and he's standing, but he doesn't have a face yet.
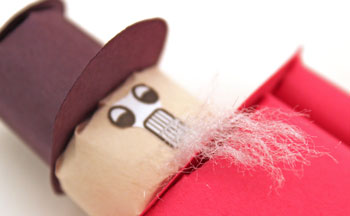
Trim around the facial features found on page 1 of the pattern.
Center and glue the features beneath the cap's bill.
Pull the yarn apart into to separate strands.
Glue the yarn under the facial features to form the nutcracker's beard.
Trim the yarn as desired.
Center and glue the features beneath the cap's bill.
Pull the yarn apart into to separate strands.
Glue the yarn under the facial features to form the nutcracker's beard.
Trim the yarn as desired.
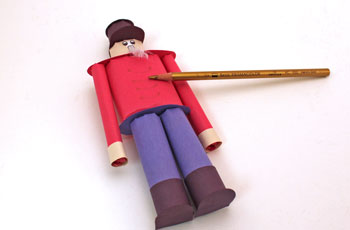
Use a pencil or crayon to add buttons and braid to the front of the torso jacket.
Here he is - a fun and whimsical construction paper nutcracker doll.

Have fun making your own versions of this little nutcracker doll!
The inexpensive and Easy Christmas Crafts Construction Paper Nutcracker Doll can be fun for families, for classrooms, for grandparents and grandkids and for anyone just for fun.
The inexpensive and Easy Christmas Crafts Construction Paper Nutcracker Doll can be fun for families, for classrooms, for grandparents and grandkids and for anyone just for fun.


funEZcrafts
Welcome
Come on in and stay awhile...

funEZcrafts
Welcome
Come on in and stay awhile...