Easy Christmas Crafts: Quilled Paper Christmas Tree Ornament
Using techniques similar to true quilling, this quilled paper Christmas tree ornament uses three colors of construction paper, a piece of yarn and some glue to form a fun little decoration for the holidays. No special quilling tools required.
Isn't the result just fun?
Isn't the result just fun?
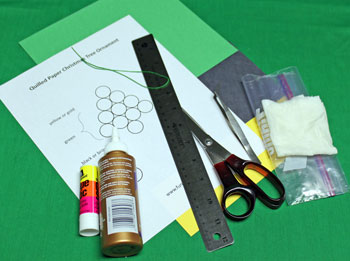
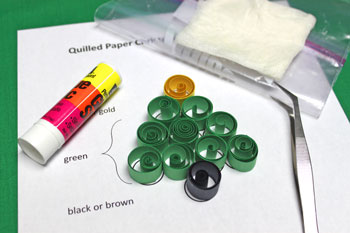
Easy Christmas Crafts: Quilled Paper Christmas Tree Ornament Materials and Tools:
Construction paper - green, yellow and black or brown
Yarn - 12-inch length
Damp paper towel - just barely wet
Ruler
Glue - I used two kinds, a glue stick and tacky glue
Scissors
Tweezers (or use a T-pin or other small round item to wrap the strips around)
Pattern - Quilled Paper Christmas Tree Ornament
Yarn - 12-inch length
Damp paper towel - just barely wet
Ruler
Glue - I used two kinds, a glue stick and tacky glue
Scissors
Tweezers (or use a T-pin or other small round item to wrap the strips around)
Pattern - Quilled Paper Christmas Tree Ornament
Take a look at the simple materials and tools.
The Steps for How to Make the Easy Christmas Crafts: Paper Quilt Patch Ornament:
Print the Quilled Paper Christmas Tree Ornament pattern.
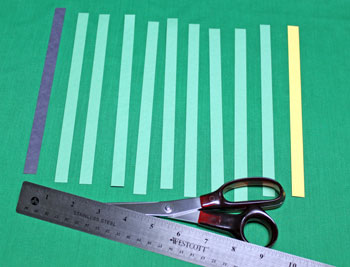
Cut strips of construction paper 1/2 inch wide by 9 inches long.
If your sheet of construction paper is only 8 1/2 inches wide, that will be long enough.
Cut one of black, nine of green and one of yellow of the 1/2 inch by 9-inch strips.
Cut strips of construction paper 1/2 inch wide by 9 inches long.
If your sheet of construction paper is only 8 1/2 inches wide, that will be long enough.
Cut one of black, nine of green and one of yellow of the 1/2 inch by 9-inch strips.
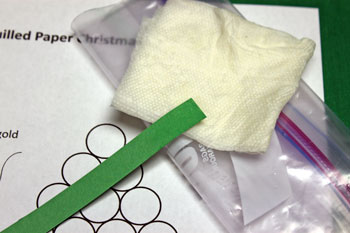
Use the damp paper towel to dampen 2/3 the length of one strip of paper.
I fold the damp paper towel around the strip and very quickly pull the paper through the damp towel.
The objective is like that of curling hair - damp hair holds a curl better than dry hair.
In the case of the paper strip, though, you want the paper to be just barely dampened.
I fold the damp paper towel around the strip and very quickly pull the paper through the damp towel.
The objective is like that of curling hair - damp hair holds a curl better than dry hair.
In the case of the paper strip, though, you want the paper to be just barely dampened.
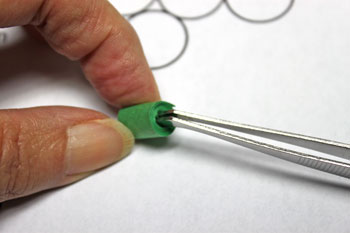
Starting at the dampened end of the paper strip, wrap the paper around a small object.
I like to use tweezers because they can hold the end of the paper as I wrap it around.
But, you can use a T-pin, a toothpick or other small object to wrap the paper around.
Hold the wrapped paper between your fingers for about 30 seconds to allow the dampened paper to "set" into the curl.
Unfurl the curled paper and curl it once again.
Use the single circle on the pattern to size the curled circle.
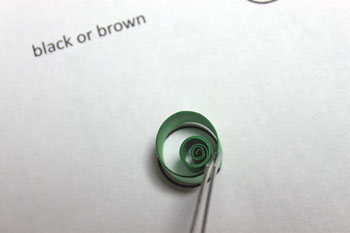
Apply glue to the end of the paper strip and press it to the sized circle.
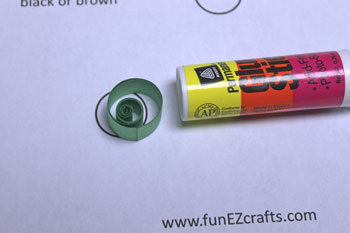
Make all of the circles the same way.
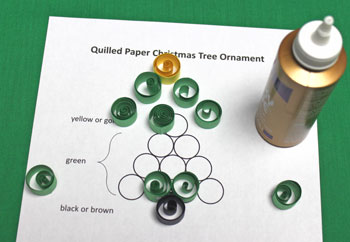
Position the curled circles on the pattern tree in the order you want them to be joined.
For fun, I alternate the curled direction on each row. One row will be curled to the right and the next row will be curled to the left.
Position the curled circles on the pattern tree in the order you want them to be joined.
For fun, I alternate the curled direction on each row. One row will be curled to the right and the next row will be curled to the left.
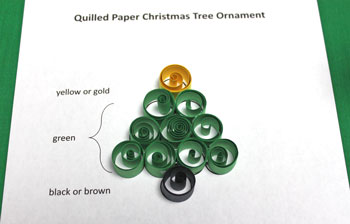
Glue the circles together.
Where the circles touch on the pattern is where to apply the glue on the adjacent circles.
Where the circles touch on the pattern is where to apply the glue on the adjacent circles.
Allow the glue to dry.
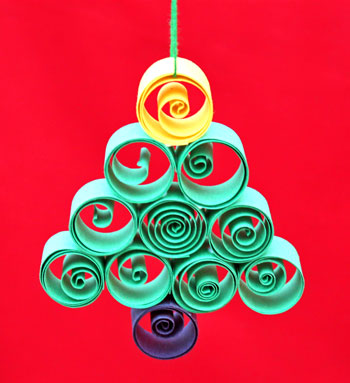
Insert the yarn between layers of the yellow curled circle.
Match the ends and tie a knot to form the hanging loop.
Match the ends and tie a knot to form the hanging loop.

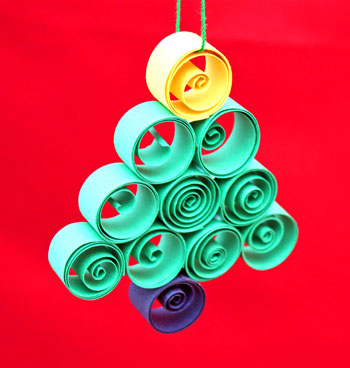
Here's the finished quilled paper Christmas tree ornament with its variety of curled "branches" hanging on display
Here's another version. for this one, I did not dampen the paper. I wrapped each strip five to ten times before gluing the end to form the circle. The result was gentle spirals within each curl.

This little tree is a simple yet interesting decoration. And, it really doesn't take much time at all.
Have fun!
The Quilled Paper Christmas Tree Ornament provides fun and enjoyment for young and old alike to make one, a couple or many of the decorations.
Have fun!
The Quilled Paper Christmas Tree Ornament provides fun and enjoyment for young and old alike to make one, a couple or many of the decorations.


funEZcrafts
Welcome
Come on in and stay awhile...

funEZcrafts
Welcome
Come on in and stay awhile...