Easy Felt Crafts: Emoti-Pumpkin
This easy felt crafts emoti-pumpkin expresses many different emotions with just a few different shapes for eyes and mouth.
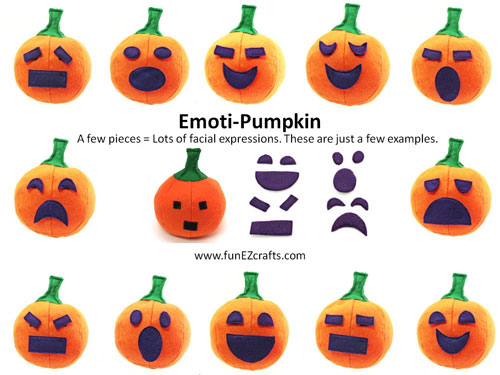
This picture shows just a small sample of the different combinations of eye and mouth shapes.
Mix and match the shapes, turn them up, down or sideways to make many more expressions.
This picture shows just a small sample of the different combinations of eye and mouth shapes.
Mix and match the shapes, turn them up, down or sideways to make many more expressions.
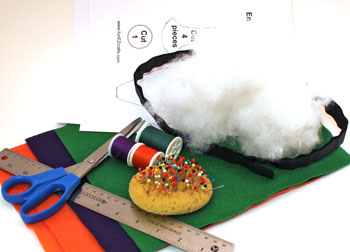
Easy Felt Crafts: Emoti-Pumpkin Materials and Tools:
Three patterns: Easy Felt Crafts Emoti-Pumpkin Pattern, Easy Felt Crafts Emoti-Pumpkin Pattern for Faces, Easy Felt Crafts Emoti-Pumpkin Pattern Loop Tape Positions (click on each to open the PDF files)
Craft felt - 9x12 inch - two orange, one green, one purple (or choose your own colors)
Thread - use the same color for all or match each color - orange, green and purple
Poly fiberfill
Hook and loop tape for sewing 3/4 inch wide by 10 inches
Pins
Needle
Sewing machine - not shown (optional, this can also be sewn by hand)
Ruler
The Steps for How to Make the Easy Felt Crafts: Emoti-Pumpkin:
Print each of the pages for the three patterns: Easy Felt Crafts Emoti-Pumpkin Pattern, Easy Felt Crafts Emoti-Pumpkin Pattern for Faces, Easy Felt Crafts Emoti-Pumpkin Pattern Loop Tape Positions (click on each to open the PDF files).
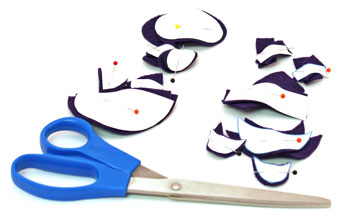
Cut around each of the pattern pieces for the pumpkin and for the face shapes.
Cut around each of the pattern pieces for the pumpkin and for the face shapes.
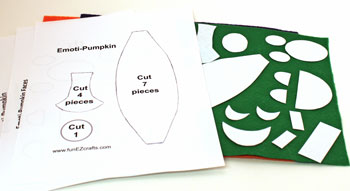
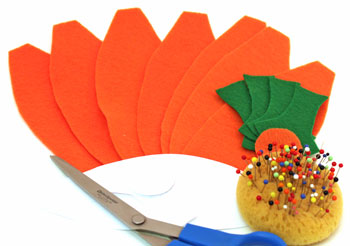
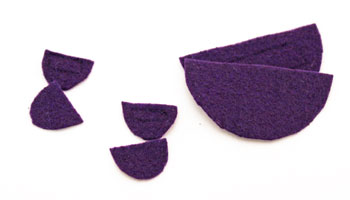
Cut seven of the orange pumpkin shapes, four of the green stem pieces and one orange circle for the bottom or blossom end of the pumpkin.
Begin sewing the pumpkin shapes. Use a 1/4 inch seam.
Sew four of the pieces together and three of the pieces together along their long edges.
Sew four of the pieces together and three of the pieces together along their long edges.

Cut the loop portion of the hook and loop tape the sizes shown on the pattern for the loop tape positions.
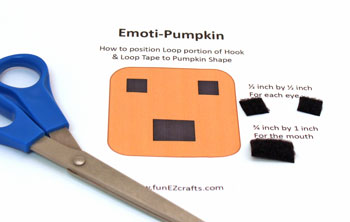
Cut around the black and orange rounded rectangle pattern.
Fold it in half and place the fold along the middle seam of the four connected orange pieces.
Fold it in half and place the fold along the middle seam of the four connected orange pieces.
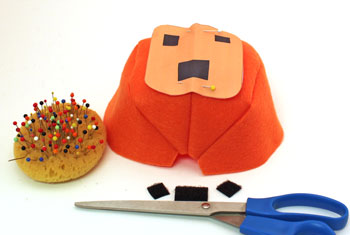
Pin the loop tape pieces behind the three black shapes on the orange rounded rectangle pattern.
Remove the pattern.
Remove the pattern.
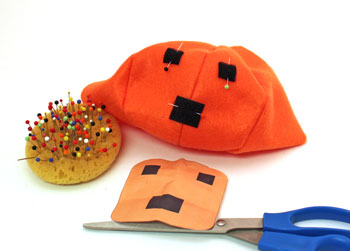
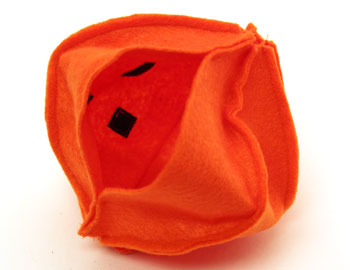
Sew the loop tape to the orange felt.
Connect the two orange pieces together along one long edge.
For the other edge, sew 1 1/2 inch from each end.
Leave the opening large to sew the bottom and top pieces to the pumpkin shape.
For the other edge, sew 1 1/2 inch from each end.
Leave the opening large to sew the bottom and top pieces to the pumpkin shape.
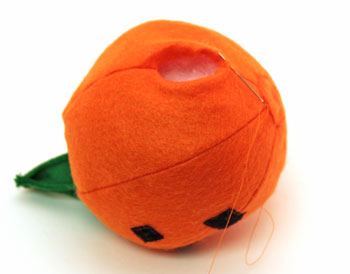
Turn the seams to the inside of the pumpkin shape.
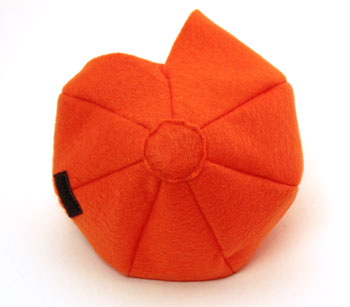
Pin the orange circle to the bottom centered over the opening below the large loop tape rectangle.
Pin the orange circle to the bottom centered over the opening below the large loop tape rectangle.
Sew the circle to the bottom of the pumpkin shape.
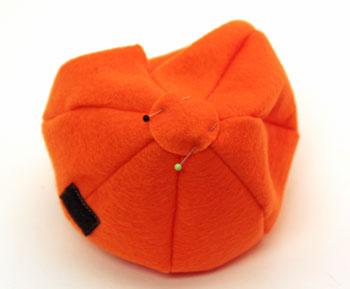
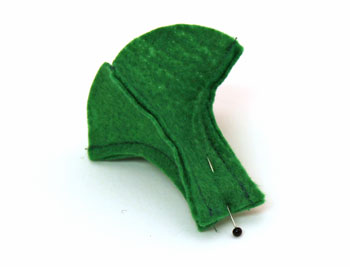
Sew the four green stem pieces together along their sides using a narrow 1/4 inch seam.
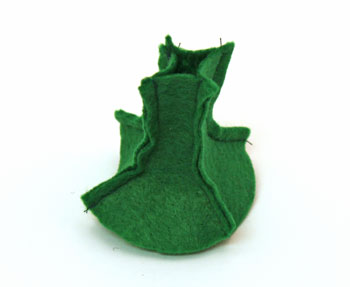
Pleat the top of the shape, pin and sew across the top to close the stem.
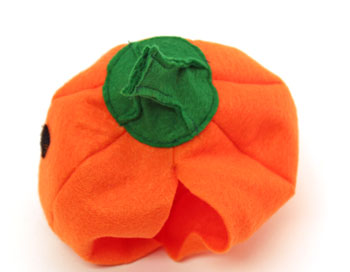
Pin the bottom of the stem to the top of the pumpkin centering the stem over the open circle at the top.

Sew around the bottom edge of the stem through the top of the orange pumpkin shape.
Add fiberfill to the inside of the pumpkin shape.
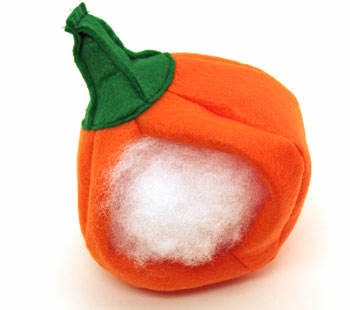
Put just enough filling to have a gentle shape.
Sew the opening to hold the fiberfill.
After I determined the amount of fiberfill needed, I removed the fiberfill, turned the pumpkin shape wrong side out and sewed the seam on the sewing machine leaving roughly 2 inches open.
I turned the pumpkin back right side out, re-filled it and hand sewed the smaller opening closed.
After I determined the amount of fiberfill needed, I removed the fiberfill, turned the pumpkin shape wrong side out and sewed the seam on the sewing machine leaving roughly 2 inches open.
I turned the pumpkin back right side out, re-filled it and hand sewed the smaller opening closed.
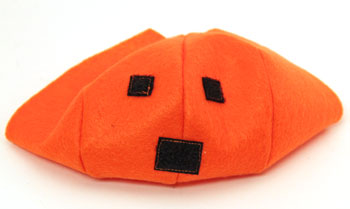
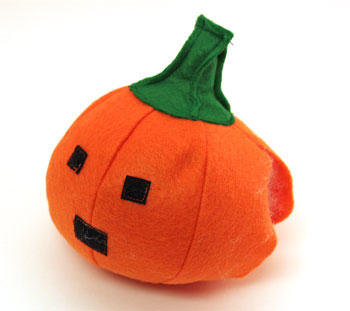
Here's the basic pumpkin shape of the Easy Felt Crafts Emoti-Pumpkin with his loop tape eyes and mouth.
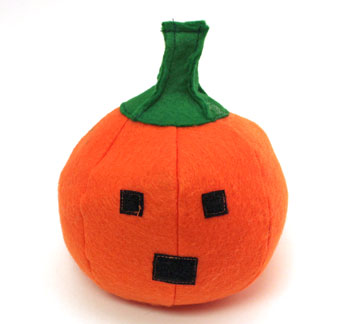
Next, let's work on his facial expressions.
Cut two of each face shape.
Cut two of each face shape.
Cut pieces of hook tape to fit inside the shapes for the eye and mouth shapes.
Pin the hook tape to one of each pair of shapes.
Pin the hook tape to one of each pair of shapes.
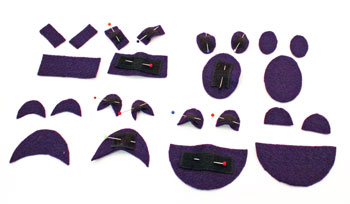
Sew the edges of the hook tape to the felt shapes.
The second felt shape will go over the first to hide the seam around the hook tape and to add stability to the shape.
The second felt shape will go over the first to hide the seam around the hook tape and to add stability to the shape.
Sew around the edges of each shape.
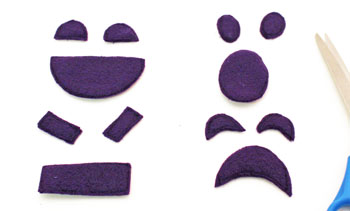
Now let's add some facial expressions to our Easy Felt Crafts Emoti-Pumpkin.
We have chords, rectangles, ovals and moons.
I call these four Happy, Confused, Surprised and Sad.
We have chords, rectangles, ovals and moons.
I call these four Happy, Confused, Surprised and Sad.
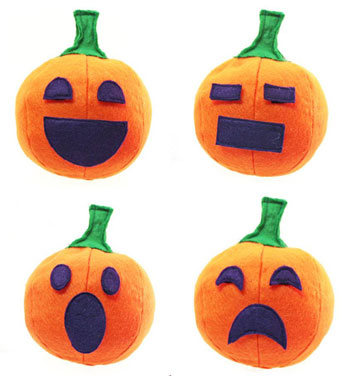
Of course, there are many more combinations.
These pictures show a few more of the Easy Felt Crafts Emoti-Pumpkin facial expressions.
These pictures show a few more of the Easy Felt Crafts Emoti-Pumpkin facial expressions.
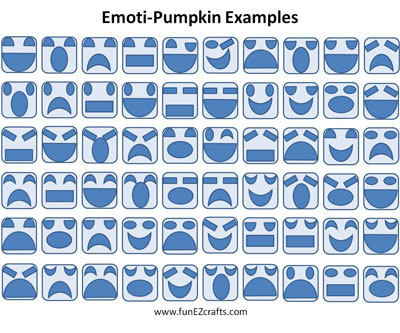
For additional combinations, take a look at these examples - again, this is not all.
You can mix and match and turn the shapes a variety of directions to achieve many facial expressions.
You can mix and match and turn the shapes a variety of directions to achieve many facial expressions.
This easy felt crafts emoti-pumpkin uses inexpensive materials and a little time to make a fun toy for children and adults alike.
It can be serious or humorous depending on your need.
Have fun!
This easy felt crafts emoti-pumpkin can add fun to an office, and on a serious note, it can be used to help people - adults and children - express themselves.
It can be serious or humorous depending on your need.
Have fun!
This easy felt crafts emoti-pumpkin can add fun to an office, and on a serious note, it can be used to help people - adults and children - express themselves.


funEZcrafts
Welcome
Come on in and stay awhile...

funEZcrafts
Welcome
Come on in and stay awhile...