Easy Angel Crafts: Spiral Wire Angel Ornament
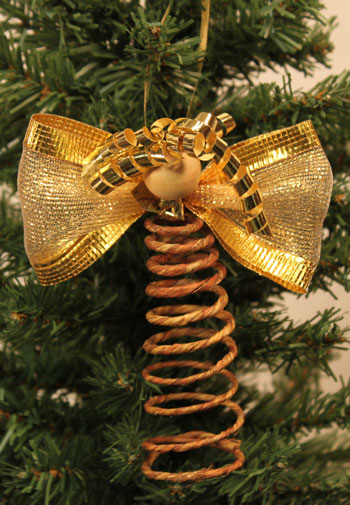
This simple and pretty Easy Angel Crafts Spiral Wire Angel Ornament can fill those empty spots on the Christmas tree and peak out at those who pass by.
A few simple, inexpensive materials and around-the-house tools are all you need to make the Easy Angel Crafts Spiral Wire Angel ornament. Just look.
A few simple, inexpensive materials and around-the-house tools are all you need to make the Easy Angel Crafts Spiral Wire Angel ornament. Just look.
Let's look at the materials and the steps for how to make the spiral wire angel ornament:
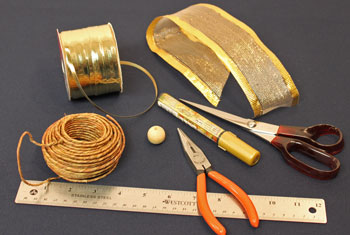
Easy Angel Crafts: Spiral Wire Angel Ornament Materials and Tools:
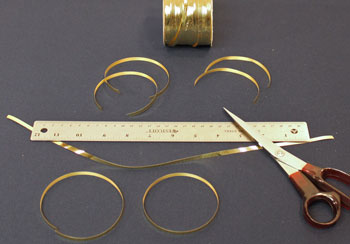
Floral wire - naturally wrapped roughly 30 inches long (or any wire that will hold the shape, for example, 18-20 gauge regular floral wire or silver colored solder wire from the hardware area)
Curling ribbon 1/4 inch wide (2 pieces each of 5-inch, 8-inch and 10-inch lengths and 1 piece of 15-inch length)
Wide ribbon - 10 inches by 2 to 2 1/2 inches wide
Wooden doll head 3/4 inch in diameter
Needle nose pliers or wire cutters
Ruler
Scissors
Cylindrical object 3/4 to 1-inch in diameter for forming the wire spiral (I used a paint pen)
The Steps for How to Make the Easy Angel Crafts: Spiral Wire Angel Ornament:
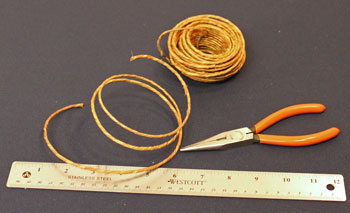
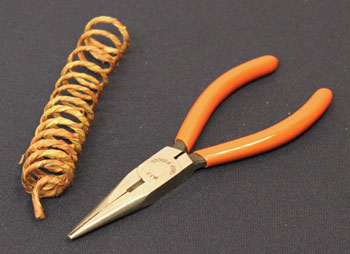
Measure and cut the wire to be roughly 30 inches in length.
Do not straighten the wire to measure it.
Use the best guess at 30 inches by rolling the wire along the ruler.
Do not straighten the wire to measure it.
Use the best guess at 30 inches by rolling the wire along the ruler.
Wrap the wire around a cylindrical object that is 3/4 to 1-inch in diameter.
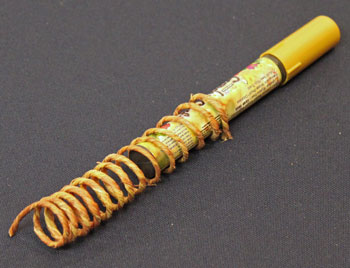
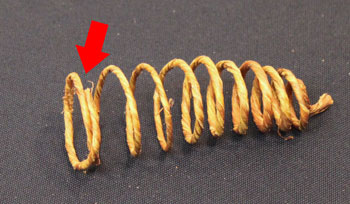
At one end of the spiral, use the pliers to made a 1/2 inch bend in the wire.
With the pliers, pinch the wire such that the bend is in the center of the spiral.
With the pliers, pinch the wire such that the bend is in the center of the spiral.
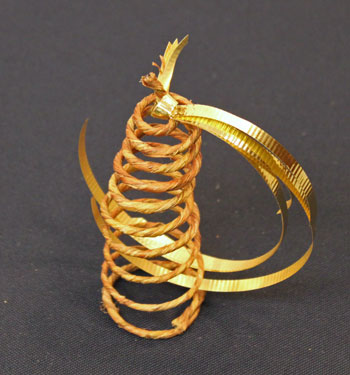
Working carefully, unscrew the spiral such that the opposite end, the Easy Angel Crafts Spiral Wire Angel's base, is larger.
This little angel remained narrow.
Taking a little more time, the wire spirals can be made fuller with a wider base.
This little angel remained narrow.
Taking a little more time, the wire spirals can be made fuller with a wider base.
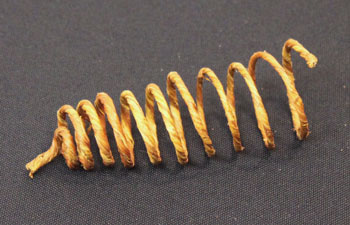
At the base end of the spiral, wrap the end of the wire over the adjacent spiral.
This closes the spiral and also allows the Easy Angel Crafts Spiral Wire Angel to sit upright
This closes the spiral and also allows the Easy Angel Crafts Spiral Wire Angel to sit upright
Measure and cut the pieces of narrow, curling ribbon.
Cut two pieces 5 inches long, two pieces 8 inches long, two pieces 10 inches long and one piece 15 inches long.
Set the 15-inch piece of ribbon aside to be used later.
Cut two pieces 5 inches long, two pieces 8 inches long, two pieces 10 inches long and one piece 15 inches long.
Set the 15-inch piece of ribbon aside to be used later.
Match the ends of the six ribbons - the 5-inch, 8-inch and 10-inch pieces.
Tie the ribbons in one bundle around the spiral wire just below the 1/2 inch bend.
Tie the ribbons in one bundle around the spiral wire just below the 1/2 inch bend.
Thread the six ribbons through the hole in the wooden doll head.
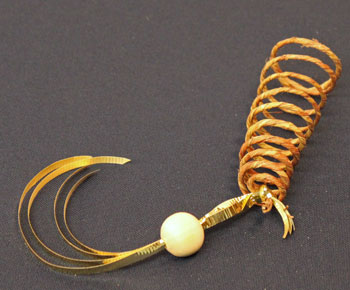
Pull the ribbons through the doll head.
Next, push the doll head onto the end of the 1/2 inch bend of the wire.
Next, push the doll head onto the end of the 1/2 inch bend of the wire.
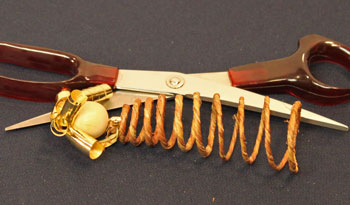
Hold the ribbons firmly at the doll head and using the edge of the scissors to curl each one individually.
For tighter curls, pull each ribbon over the scissors twice.
For tighter curls, pull each ribbon over the scissors twice.
Measure and cut the wide ribbon to 10 inches in length.
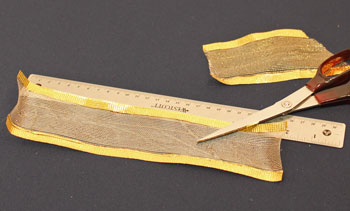
Fold the wide ribbon.
Overlap the ends in the middle of one side of the fold.
Overlap the ends in the middle of one side of the fold.
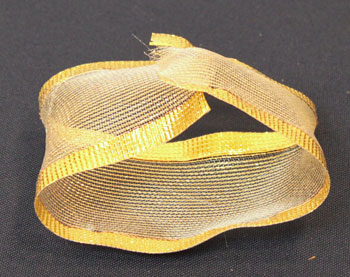
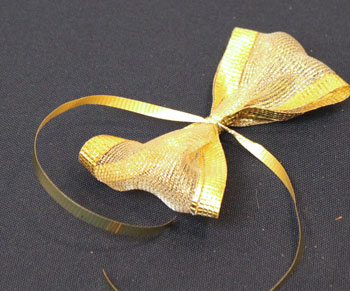
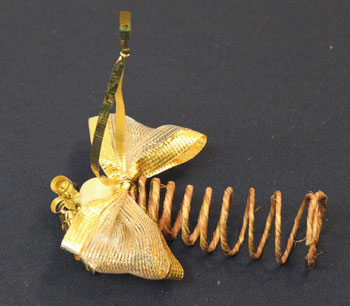
Form a bow in the wide ribbon.
Pinch the ribbon at the halfway point and tie the 15-inch length of the narrow ribbon around the pinched area.
Pinch the ribbon at the halfway point and tie the 15-inch length of the narrow ribbon around the pinched area.
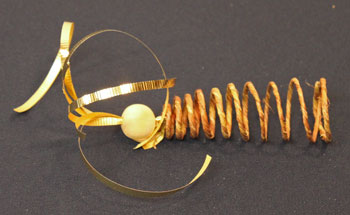
Next, attach the wings of the Easy Angel Crafts Spiral Wire Angel using the narrow ribbon.
Tie the ribbon around the wire bend just below the doll head.
Tie the ribbon around the wire bend just below the doll head.
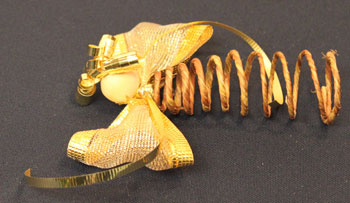
Make the hanging loop for the Easy Angel Crafts Spiral Wire Angel by tying a knot in the ends of the narrow ribbon.
The simple yet pretty Easy Angel Crafts Spiral Wire Angel is finished.
As an option, facial features - eyes and mouth - can be added with pens or makeup.
As an option, facial features - eyes and mouth - can be added with pens or makeup.
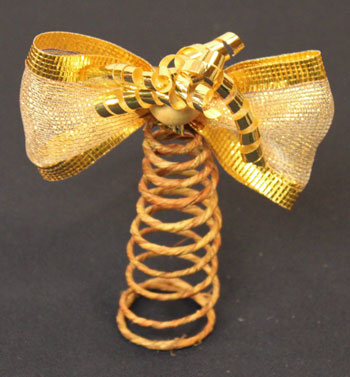
Here, the pretty little angel hangs from the Christmas tree!
Here's another version of the Easy Angel Crafts Spiral Wire Angel with slightly different curls and spirals.

These simple Easy Angel Crafts Spiral Wire Angels take very little time to make and are inexpensive as well.
By varying the length of wire, a whole family of angels could be made to decorate a mantel or sideboard.
Plus, the angels could be red, green, blue or any other colors you want for their hair and wings.
Have fun!
Whether a few or many, these Easy Angel Crafts Spiral Wire Angels can decorate the tree, a table or where a simple yet pretty angel is needed this holiday season.


funEZcrafts
Welcome
Come on in and stay awhile...

funEZcrafts
Welcome
Come on in and stay awhile...