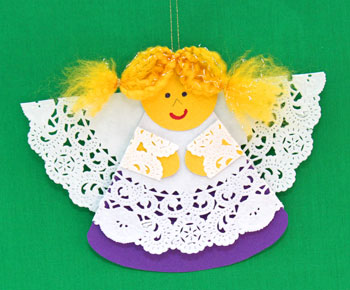
Easy Angel Crafts: Cardstock and Doily Angel
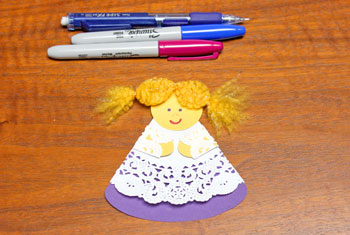
Cardstock, a 6-inch paper doily and some yarn become an enchanting little Cardstock and Doily Angel with her fuzzy hair and bright smile.
Isn't she just fun?
Isn't she just fun?

Let's look at the materials and the steps for how to make this simple and enchanting angel:
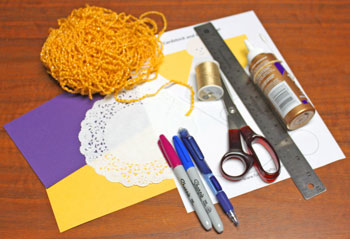
Easy Angel Crafts: Cardstock and Doily Angel Materials and Tools:
Cardstock - one color for the body and another for the head and arms
Six-inch paper doily (or use the semicircle on the pattern)
Yarn
Thread
Glue
Scissors
Ruler
Pens and/or pencils (or cosmetic pens and pencils)
Cardstock and Doily Angel pattern
Six-inch paper doily (or use the semicircle on the pattern)
Yarn
Thread
Glue
Scissors
Ruler
Pens and/or pencils (or cosmetic pens and pencils)
Cardstock and Doily Angel pattern
The Steps for How to Make the Easy Angel Crafts: Cardstock and Doily Angel:
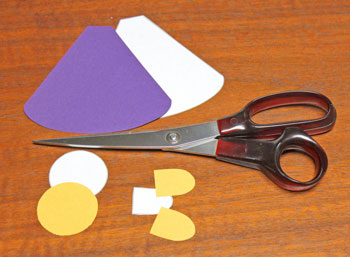
Print the Cardstock and Doily Angel pattern.
Cut out the pattern shapes from cardstock.
If you do not have a six-inch doily, cut two of the large semicircular pattern shape out of tissue paper, wrapping paper or other thin paper.
Cut out the pattern shapes from cardstock.
If you do not have a six-inch doily, cut two of the large semicircular pattern shape out of tissue paper, wrapping paper or other thin paper.
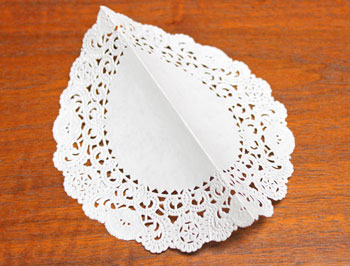
Gently fold the six-inch paper doily in half.
One of the halves forms the angel's wings.
To keep the wings from looking lopsided, fold the doily such that the ends of the folded edge are roughly the same.
One of the halves forms the angel's wings.
To keep the wings from looking lopsided, fold the doily such that the ends of the folded edge are roughly the same.
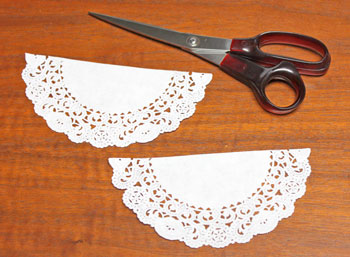
Cut along the gentle fold to yield two half doilies.
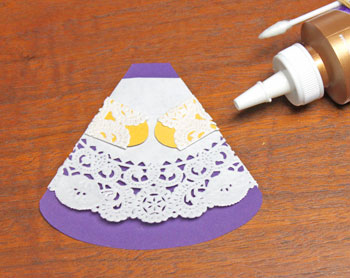
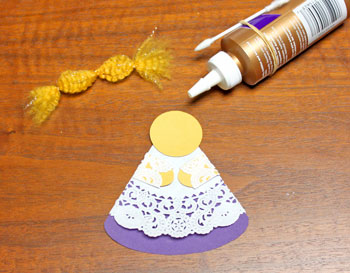
Center one of the doily halves over the body shape and fold the doily around the edges.
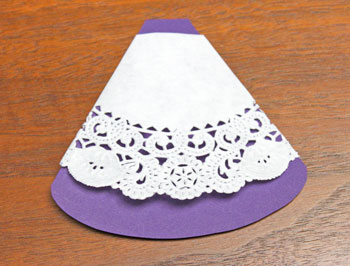
Trim the doily ends from the back of the shape allowing 1/4 inch to overlap the back.
Glue the doily to the back of the body shape along the edges.

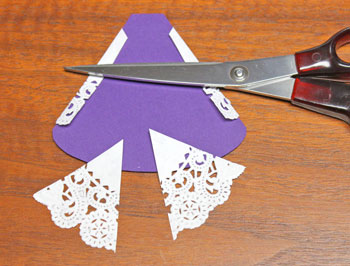
Position and glue the two doily pieces over the arms.
Let a small portion of the arms extend for the angel's hands.
Let a small portion of the arms extend for the angel's hands.
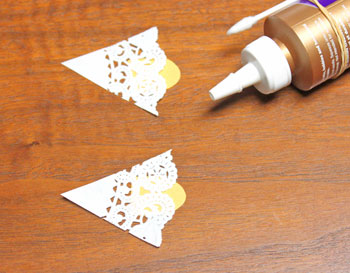
Fold the doily pieces around the straight edges along the sides of each arm and glue to the back of the arm.
Trim the doily pieces along the straight end.
Trim the doily pieces along the straight end.
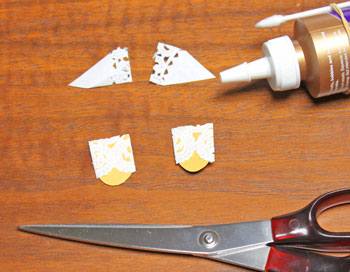
Position and glue the arms to the body shape.
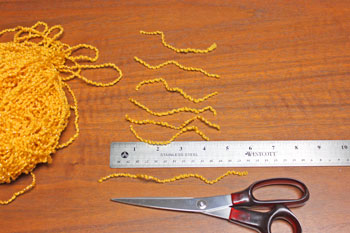
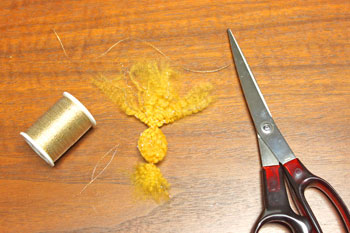
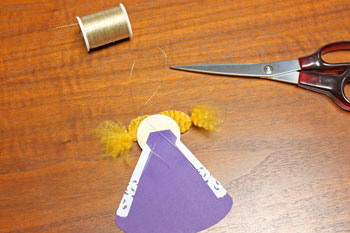
Cut six (6) pieces of yarn 4.5 inches long.
Cut one piece of yarn 6 inches long.
Cut one piece of yarn 6 inches long.
Using the longer piece of yarn, tie the six pieces into a bundle.
Use a square or hard knot to secure the bundle of yarn.
Use a square or hard knot to secure the bundle of yarn.
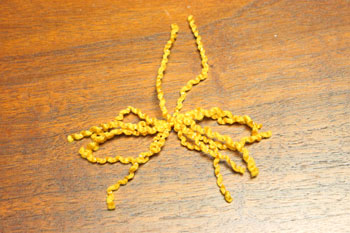
Pull the longer yarn ends, one to each side, and trim off the excess length.
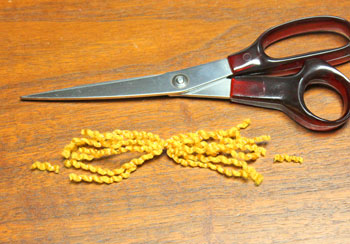
Form the "hair" by separating the fibers in the strands of yarn.
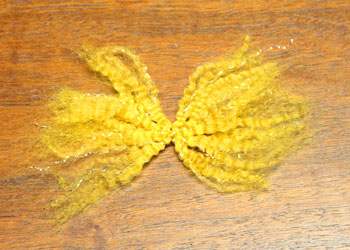
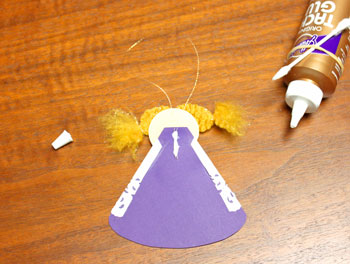
Cut two pieces of thread to tie each side of the hair.
Wrap one piece of thread 1/2 inch from the ends of the fibers on one side.
Tie the thread tightly to group the "hair."
Do the same with the second piece of thread on the opposite side.
Wrap one piece of thread 1/2 inch from the ends of the fibers on one side.
Tie the thread tightly to group the "hair."
Do the same with the second piece of thread on the opposite side.
Position and glue the head on the body.
Add glue to the top of the head and place the hair over the glue.
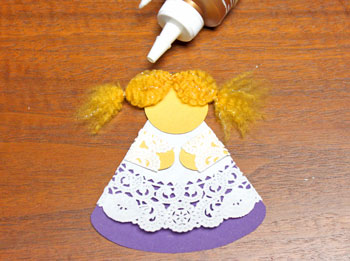
With pens and pencil, draw the angel's face. (You can also use cosmetics for the angel's face.)
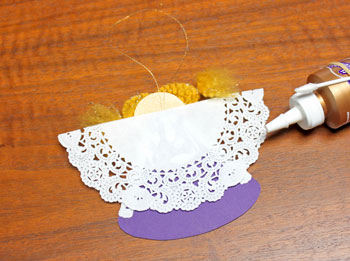
Cut a piece of thread 8-10 inches long for the hanging loop.
Place a small line of glue on the back of the angel's body.
Fold the thread in half and position the cut ends of the thread into the line of glue.
Fold the thread in half and position the cut ends of the thread into the line of glue.
Add more glue to the back of the angel's body.
Center and position the remaining doily half with the straight edge along the top.
Place the "right" side of the doily over the glue such that the "right" side will be visible from the front of the angel.
Center and position the remaining doily half with the straight edge along the top.
Place the "right" side of the doily over the glue such that the "right" side will be visible from the front of the angel.
The Cardstock and Doily Angel is finished and ready to display.


funEZcrafts
Welcome
Come on in and stay awhile...

funEZcrafts
Welcome
Come on in and stay awhile...
Use different colors of cardstock and yarn to make this little angel in a variety of colors.
Have fun!
The Cardstock and Doily Angel is a fast, fun and easy project for families, church groups, craft parties or senior centers.
Have fun!
The Cardstock and Doily Angel is a fast, fun and easy project for families, church groups, craft parties or senior centers.