Easy Christmas Crafts: Five-Point Paper Cone Star
Simple paper, glue and ribbon become a fun and easy five-point paper cone star to hold a small gift or just be a pretty decoration.
First, let's look at some examples.
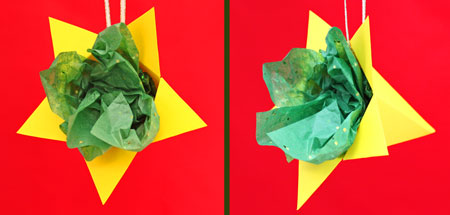
The first one is a yellow five-point paper cone star made using yellow card stock paper with glitter accented green tissue paper inside.
First, let's look at some examples.
The first one is a yellow five-point paper cone star made using yellow card stock paper with glitter accented green tissue paper inside.
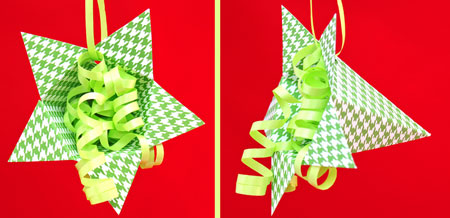
The next version is made with green and white card stock and holds green curled ribbon inside as a fun decoration.
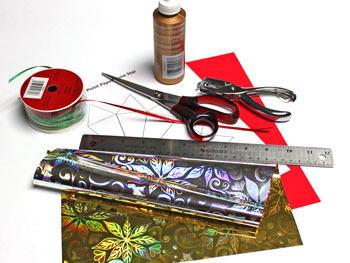
Easy Christmas Crafts: Five-Point Paper Cone Star Materials and Tools:
Decorative card stock, (20 pound paper works, too, just not as sturdy)
Decorative item - tissue paper, ribbon or other for inside the cone
Ribbon (narrow 1/8 to 1/4 wide)
Ruler
Hole punch
Glue
Scissors
Five-Point Paper Cone Star pattern
Decorative item - tissue paper, ribbon or other for inside the cone
Ribbon (narrow 1/8 to 1/4 wide)
Ruler
Hole punch
Glue
Scissors
Five-Point Paper Cone Star pattern
The Steps for How to Make the Easy Christmas Crafts: Five-Point Paper Cone Star:
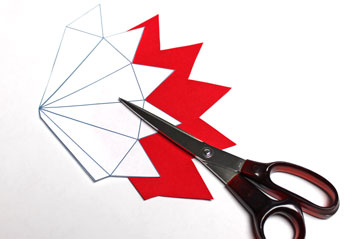
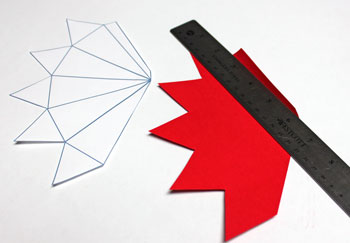
Print the Five-Point Paper Cone Star pattern and cut out the shape from the decorative paper.
Card stock makes a strong cone for holding small gifts.
If you just want the cone for a decoration, 20-pound paper works too.
The paper needs to hold its shape along the folds to show off the five-point star.
Card stock makes a strong cone for holding small gifts.
If you just want the cone for a decoration, 20-pound paper works too.
The paper needs to hold its shape along the folds to show off the five-point star.
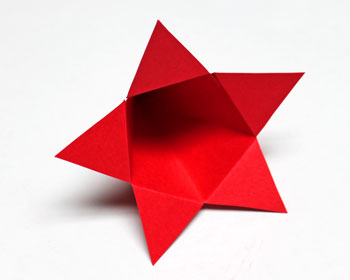
Begin folding the cone shape by following the lines as indicated on the pattern.
Use the ruler (or another firm straight edge) to help make the folds.
Use the ruler (or another firm straight edge) to help make the folds.
All of the cone lines should be folded inward.
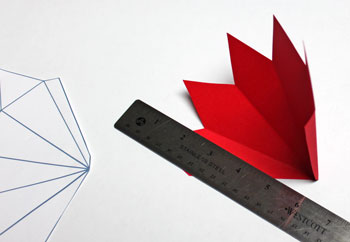
Begin folding on the star lines.
These folds are in the opposite direction to the cone folds.
These folds are in the opposite direction to the cone folds.
The star line folds should be at right angles to the cone.
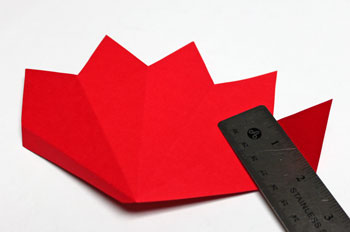
Place glue along the small edge of the cone.
Be careful not to use too much glue.
Be careful not to use too much glue.
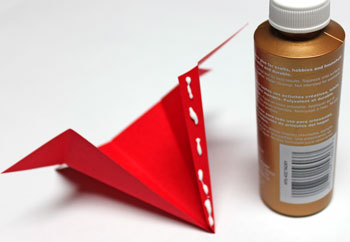
Overlap the edges of the cone matching the straight edge of the cone to the folded edge of the small glue area.
Allow the glue to set.
Allow the glue to set.
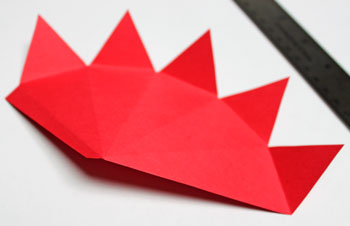
Punch a hole in the overlapped edges for the ribbon hanger.
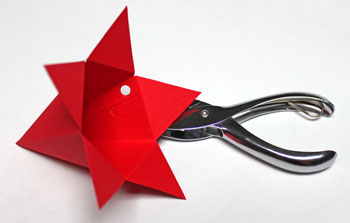
Cut an 8 to 10 inch piece of narrow ribbon

Insert the ribbon through the punched hole in the cone.
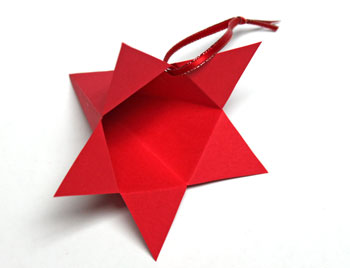
Fold the ribbon in half, and tie a knot in the ends to form a loop.
Fold the ribbon in half, and tie a knot in the ends to form a loop.
Add decorative paper or ribbon inside the five-point paper cone star for some bling.
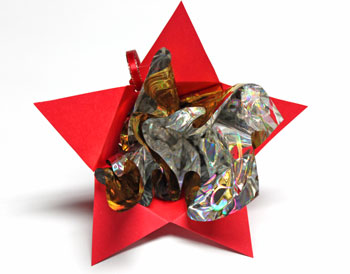
This star has a silver and gold holographic cellophane for an added decorative touch.
The cellophane, though, would not hold its shape inside the cone like the tissue paper did.
I had to use glue in the base of the cone to hold the cellophane.
For the curling ribbon in the example above, I inserted the ribbon curls through the hanging loop such that the curls would not fall out.
Here's the fun and easy five-point paper cone star finished and hanging on display.
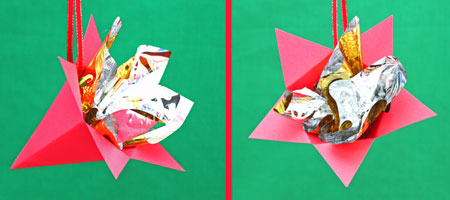
Of course, this little paper cone star can hold - and hide - small gifts right under the noses of the receivers.
Or, fill them with bright candies or a few nuts.
This pretty little star cone can hold small and fun gifts for guests at holiday parties, too.
Have fun!
Fun, fast and easy, you can make a few, several or many of the five-point paper cone star decorations in not a lot of time.
Or, fill them with bright candies or a few nuts.
This pretty little star cone can hold small and fun gifts for guests at holiday parties, too.
Have fun!
Fun, fast and easy, you can make a few, several or many of the five-point paper cone star decorations in not a lot of time.


funEZcrafts
Welcome
Come on in and stay awhile...

funEZcrafts
Welcome
Come on in and stay awhile...