Easy Paper Crafts: Pocket Calendar
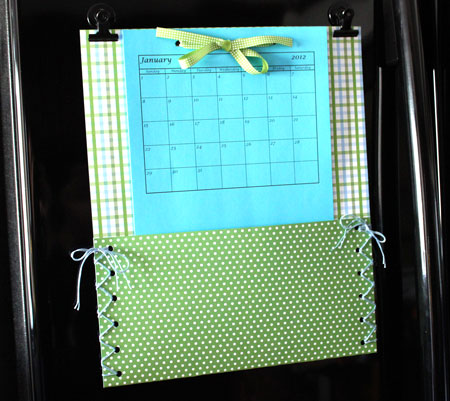
This easy paper crafts pocket calendar can be hung on a refrigerator, near a desk, on a door or where you need a pocket calendar.
It's a useful easy paper crafts project that is inexpensive in both time and money.
Here, the finished pocket calendar hangs on a refrigerator with magnetic clamps. (Oops, I should have removed the fingerprints from the refrigerator!)
It's a useful easy paper crafts project that is inexpensive in both time and money.
Here, the finished pocket calendar hangs on a refrigerator with magnetic clamps. (Oops, I should have removed the fingerprints from the refrigerator!)
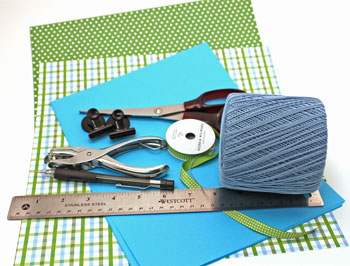
Easy Paper Crafts: Pocket Calendar Materials and Tools:
Card stock - two pieces of matching or contrasting (12 inches by 12 inches) Paper - twelve pieces of 8.5 x 11 printer paper to print the calendar
Ribbon 3/8 to 1/2 inch wide by 24 inches long
Yarn
Scissors
Ruler
Pencil
Hole punch
Magnetic clamps - two
Calendar - 2017 2018 2019 blank month (click to open PDF file)
Ribbon 3/8 to 1/2 inch wide by 24 inches long
Yarn
Scissors
Ruler
Pencil
Hole punch
Magnetic clamps - two
Calendar - 2017 2018 2019 blank month (click to open PDF file)
The Steps for How to Make the Easy Paper Crafts: Pocket Calendar:
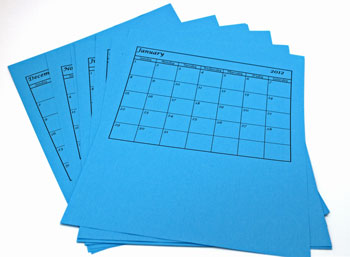
Print the twelve pages for the pocket calendar (see links to calendars above).
Each month prints on a separate page. I used blue paper, but if you write a lot of notes on your calendar, you may prefer white paper.
The extra space below each monthly calendar provides room for additional notes some of which will be hidden by the pocket.
Each month prints on a separate page. I used blue paper, but if you write a lot of notes on your calendar, you may prefer white paper.
The extra space below each monthly calendar provides room for additional notes some of which will be hidden by the pocket.
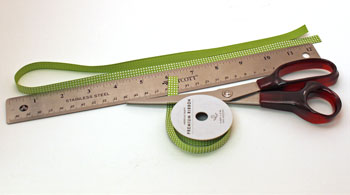
Measure and cut the ribbon.
The ribbon should be 3/8 to 1/2 inch wide and 24 inches long.
The ribbon should be 3/8 to 1/2 inch wide and 24 inches long.
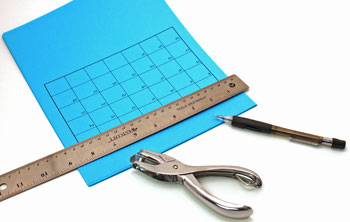
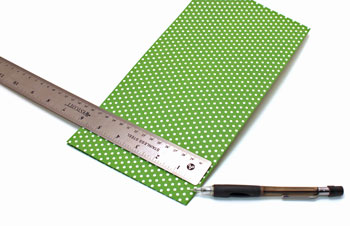
The top of the calendar contains two holes through all pages.
Measure and mark the placement of each hole.
Measure 2.25 (2 1/4) inches from the side and 0.75 (3/4) inch from the top for each hole.
The holes will be four inches apart.
Mark the top page and use it as a guide for the other months.
Measure and mark the placement of each hole.
Measure 2.25 (2 1/4) inches from the side and 0.75 (3/4) inch from the top for each hole.
The holes will be four inches apart.
Mark the top page and use it as a guide for the other months.
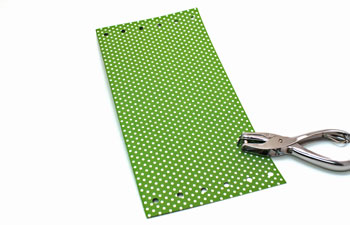
Punch the holes in each of the calendar pages.
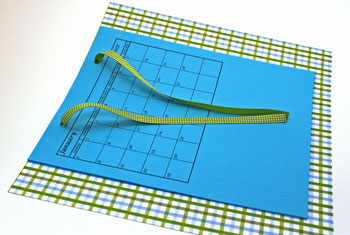
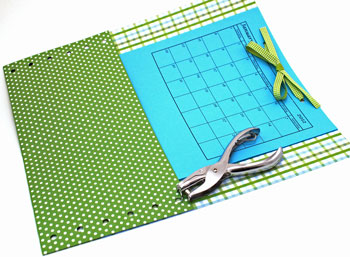
Center the top of the calendar across one of the 12 x 12 card stock pages.
Punch matching holes into the card stock page.
Center the top of the calendar across one of the 12 x 12 card stock pages.
Punch matching holes into the card stock page.

Thread each end of the ribbon through the two holes from the back of the card stock.
Pull the ribbon all the way through and evenly match the ends.
Pull the ribbon all the way through and evenly match the ends.
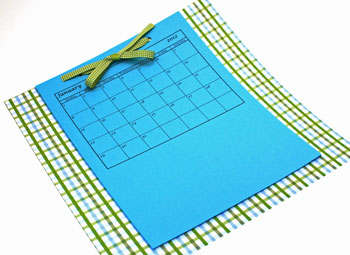
Tie a bow in the ribbon to hold the easy paper crafts pocket calendar pages in place.
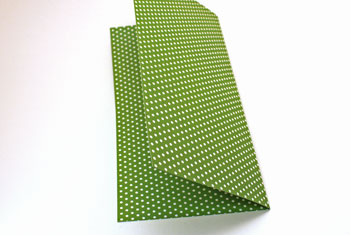
Fold the second 12 x 12 card stock page in half.
Starting from the folded edge, mark each end of the folded card stock for the holes.
Measure up 0.5 (1/2) inch from the fold and 0.75 (3/4) inch from the doubled edge for the first hole.
From there, measure and mark every 1 inch for a total of six marks for six evenly spaced holes.
Measure and mark both edges.
Measure up 0.5 (1/2) inch from the fold and 0.75 (3/4) inch from the doubled edge for the first hole.
From there, measure and mark every 1 inch for a total of six marks for six evenly spaced holes.
Measure and mark both edges.
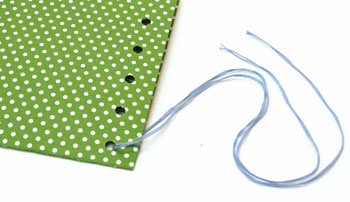
Punch the six holes in each side of the folded card stock.
Place the pocket calendar inside the folded card stock such that only the top four holes on both sides overlap the first card stock's edges.
Make sure the edges are even.
Using the holes as a guide, mark and punch the four matching holes in the first card stock on both sides.
Make sure the edges are even.
Using the holes as a guide, mark and punch the four matching holes in the first card stock on both sides.
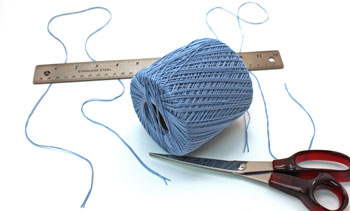
Measure and cut the yarn. I used two strands of #10 crochet yarn for each side.
Each length must be 32 inches.
Each length must be 32 inches.
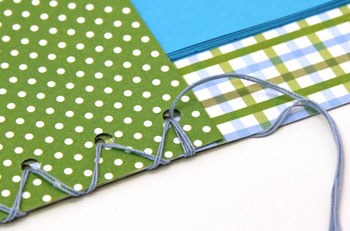
Starting at the folded edge, weave the yarn into the first hole similar to beginning to lace a shoe.
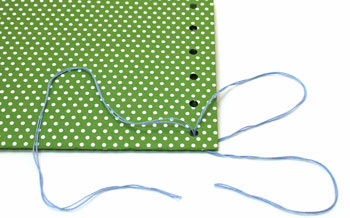
Pull the yarn ends to form the loop in the first hole and match the ends evenly.
Begin cross lacing the yarn through the holes, again like lacing a shoe.
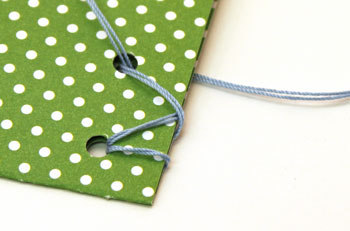
Continue lacing the yarn up the side of the easy paper crafts pocket calendar.
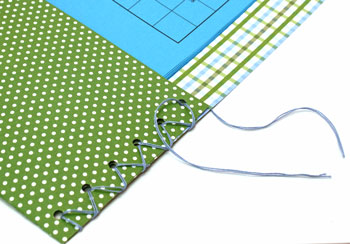
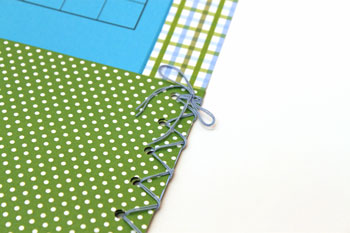
To add strength to the top hole, wrap each end of the yarn through the hole a second time.
Tie a bow in the yarns at the top of the laced edge. Perform the same lacing steps for the opposite side.
The easy paper crafts pocket calendar is finished and ready to hang where a calendar is needed.
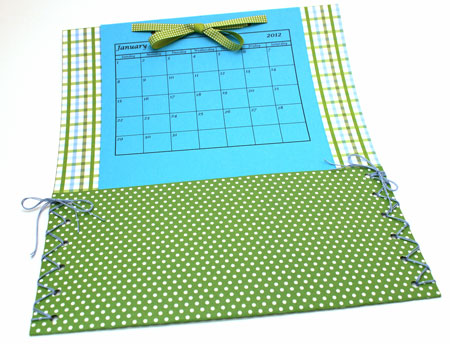
This easy paper crafts pocket calendar takes its decoration from the papers, ribbon and yarn.
But, if you prefer more embellishment, there is plenty of space to add fun decorations.
Have fun making your own!
A few simple and inexpensive materials along with a few simple tools makes this easy paper crafts pocket calendar simple, fun and fast for anyone to do.
But, if you prefer more embellishment, there is plenty of space to add fun decorations.
Have fun making your own!
A few simple and inexpensive materials along with a few simple tools makes this easy paper crafts pocket calendar simple, fun and fast for anyone to do.


funEZcrafts
Welcome
Come on in and stay awhile...

funEZcrafts
Welcome
Come on in and stay awhile...