Easy Angel Crafts: Felt Triangle Angel
Make this easy angel crafts felt triangle angel with inexpensive craft felt, a small fabric scrap and some yarn.
Optionally, fiberfill adds shape, and ribbon decorates the front.
Using simple stitches, she takes very little time to make.
Take a look at the felt triangle angel with her antique white wings and her fun red yarn hair.
Optionally, fiberfill adds shape, and ribbon decorates the front.
Using simple stitches, she takes very little time to make.
Take a look at the felt triangle angel with her antique white wings and her fun red yarn hair.
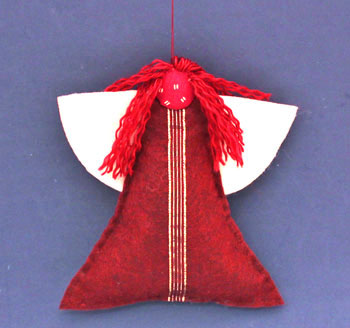
This little angel can decorate a tree, hang in an office or kitchen and be place setting gifts for dinner party.
Easy Angel Crafts: Felt Triangle Angel Materials and Tools:
Easy Angel Crafts Felt Triangle Angel pattern (click to open PDF file)
Craft felt - two pieces of 9x12-inch, one for the body and one for the wings
Small fabric scrap (for a 2 1/4 inches diameter circle)
Ribbon 1/2 inch wide by 7 inches long (just make sure the ribbon extends enough to tuck into the top and bottom)
Yarn for hair (can also use thread, just add more stitches)
Fiberfill (optional -would look great without the filling)
Thread (use same thread for hanging loop)
Needle
Yarn needle
Pins
Scissors
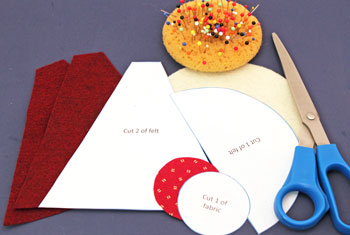
Take a look at the simple materials and tools shown here.

The Steps for How to Make the Easy Angel Crafts: Felt Triangle Angel:
Print the Easy Angel Crafts Felt Triangle Angel pattern.
Cut out each of the pattern pieces.
Cut two of the triangle shape and one of the semi-circular shape out of the felt.
I made this angel using cranapple felt for the body and antique white for the wings.
Cut one of the small circle from the fabric scrap.
Cut out each of the pattern pieces.
Cut two of the triangle shape and one of the semi-circular shape out of the felt.
I made this angel using cranapple felt for the body and antique white for the wings.
Cut one of the small circle from the fabric scrap.
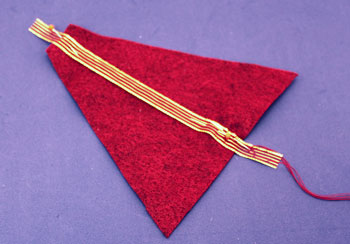
Cut the ribbon longer than the length of the triangle shape by at least 1/2 inch on both ends.
Pin the ribbon down the center front of one of the triangles.
To find the center, fold the triangle in half lengthwise.
Sew along each side of the ribbon to hold it in place. Use simple and fast running stitches. (The free e-book of How to Sew Stitches helps with basic stitches.)
Pin the ribbon down the center front of one of the triangles.
To find the center, fold the triangle in half lengthwise.
Sew along each side of the ribbon to hold it in place. Use simple and fast running stitches. (The free e-book of How to Sew Stitches helps with basic stitches.)
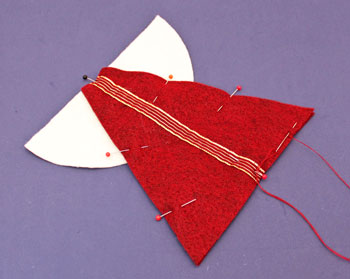
Pin the two triangles and the semi-circular shape together.
Match the center of the semi-circle to the center top of the triangle.
Tuck the ends of the ribbon between the two triangles and pin.
Sew around the triangle shape with a 1/8 to 1/4 inch seam using easy and fast running stitches.
Start the stitches along the bottom edge 1 1/2 inches from one corner.
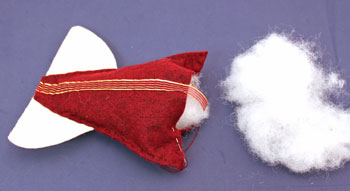
Sew the sides, top and part of the bottom edge.
Stop to add the fiberfill. (This is optional. The triangle angel would look great without the fiberfill.)
Don't push the fiberfill into the top of the triangle.
Adjust the fiberfill across the bottom as you finish sewing the bottom edge.
Stop to add the fiberfill. (This is optional. The triangle angel would look great without the fiberfill.)
Don't push the fiberfill into the top of the triangle.
Adjust the fiberfill across the bottom as you finish sewing the bottom edge.
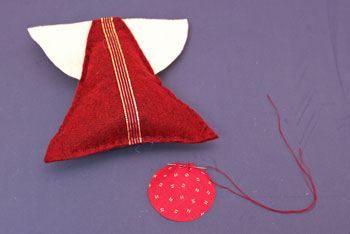
Begin sewing around the small circle with running stitches.
Use two strands of thread to guard against breakage when you pull the thread ends.
Use two strands of thread to guard against breakage when you pull the thread ends.
Pull the threads to form a gentle cup.
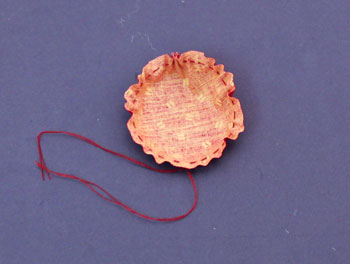
Add a small amount of fiberfill to the circle. (This is optional, too.)
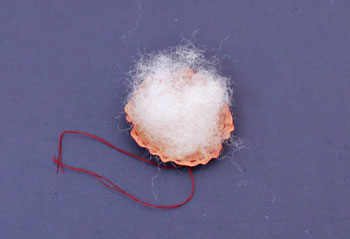
Pull the threads firmly to close the circle.
Tie the thread ends together while pulling firmly.
Cut the thread ends leaving 1 1/2 inch of thread.
Tuck the thread ends inside the yo yo.
Tie the thread ends together while pulling firmly.
Cut the thread ends leaving 1 1/2 inch of thread.
Tuck the thread ends inside the yo yo.
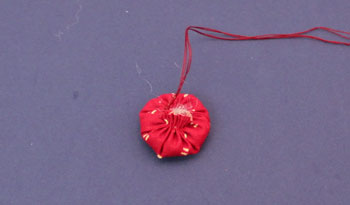
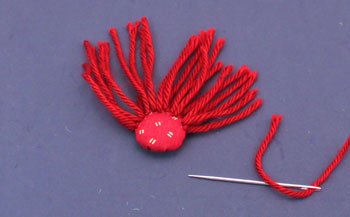
The small yo yo is ready for the felt triangle angel's yarn hair.

Thread the yarn into the yarn needle.
Make a small stitch in the edge of the yo yo.
Make a small stitch in the edge of the yo yo.
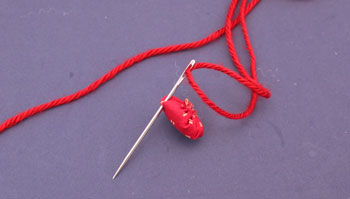
Pull the yarn through leaving roughly 2 inches of yarn as hair.
Make another stitch in the same place to lock the yarn in place.
Make another stitch in the same place to lock the yarn in place.
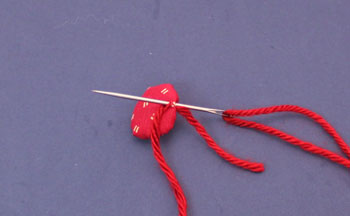
Cut the yarn leaving roughly 2 inches for hair.
Add the next stitch for the yarn hair close to the first in the same way.
Add the next stitch for the yarn hair close to the first in the same way.
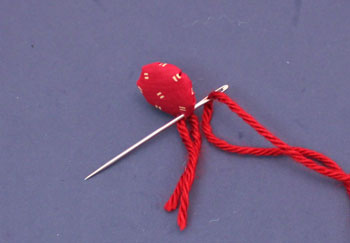
Make the yarn hair stitches around two-thirds of the yo yo.
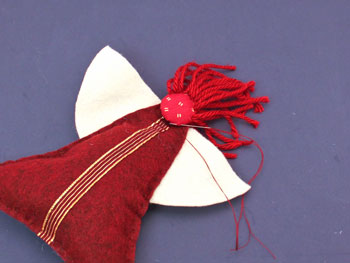
Use hidden stitches to attach the yo yo to the top of the triangle in the front.
Match the bottom of the yarn hair stitches with the top of the wings on both sides.
Match the bottom of the yarn hair stitches with the top of the wings on both sides.
Sew the yo yo to the felt across the back.
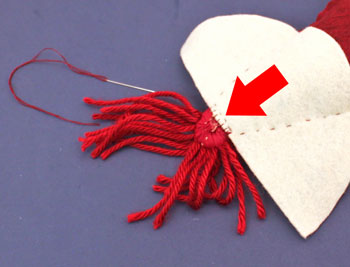
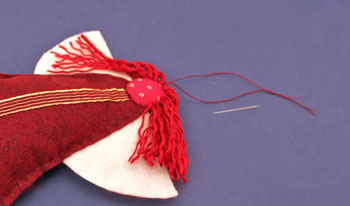
Make more abundant hair by separating each of the yarn ends into their separate strands.
Use the needle and thread to add a hanging loop to the top of the felt triangle angel's head.
Sew a small stitch leaving a five inch thread tail.
Sew another small stitch over the first.
Pull the thread through and tie the ends together at four inches length.
Trim the ends of the thread loop.
Sew a small stitch leaving a five inch thread tail.
Sew another small stitch over the first.
Pull the thread through and tie the ends together at four inches length.
Trim the ends of the thread loop.
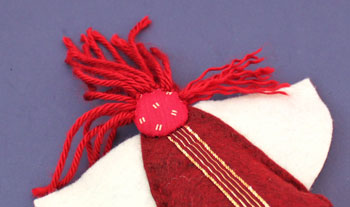
The fun little felt triangle angel adds whimsy to a tree, a room, an office or wherever she hangs.
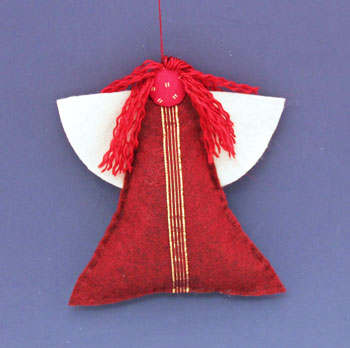
The Easy Angel Crafts Felt Triangle Angel needs just a few inexpensive materials, basic tools and the simple steps. The little angel can be made quickly too.
Use different colors of felt with different fabric scraps to make a whole choir of different angels.
Have fun making one or many!
The inexpensive and Easy Angel Crafts Felt Triangle Angel is a great group project, too, for a family, a craft party, a community center or an office team building exercise.


funEZcrafts
Welcome
Come on in and stay awhile...

funEZcrafts
Welcome
Come on in and stay awhile...