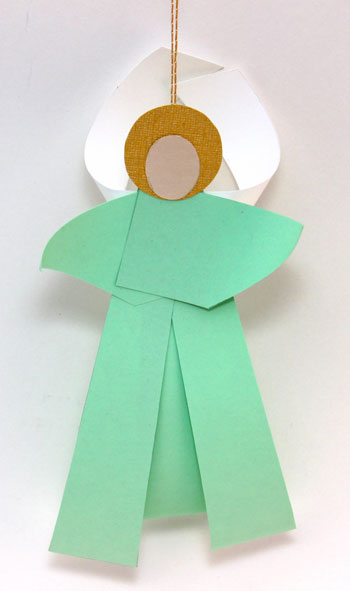
Easy Angel Crafts: Curled Paper Angel
Four different colors of medium weight cardstock along with some glue become this simple and fun little Curled Paper Angel. She can be a pretty addition overlooking a room or anywhere.
This version is pastel green.
This version is pastel green.
Let's look at the materials and the steps for how to make this simple and pretty angel:
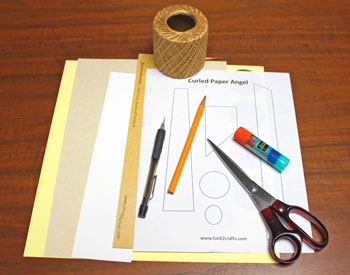
Easy Angel Crafts: Curled Paper Angel Materials and Tools:
Paper - four colors - robe, wings, halo, face. (I used scraps of medium weight cardstock for the angel's robe, halo and wings and construction paper for the face.)
Yarn
Glue
Scissors
Pencil
Round object for burnishing (I used a round pencil.)
Curled Paper Angel pattern
Yarn
Glue
Scissors
Pencil
Round object for burnishing (I used a round pencil.)
Curled Paper Angel pattern
The Steps for How to Make the Easy Angel Crafts: Curled Paper Angel:
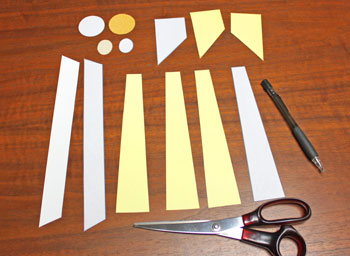
Print the Curled Paper Angel pattern.
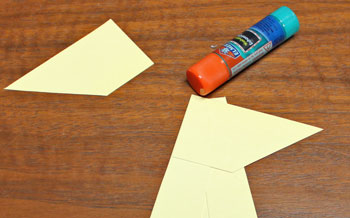
Cut around the printed pattern shapes.
Trace and cut the pattern shapes from the four papers.
If your paper is decorated differently on the front and back, make sure the shapes are cut to yield the design you want - for example, the arm shapes should be mirror images to have the same design showing.
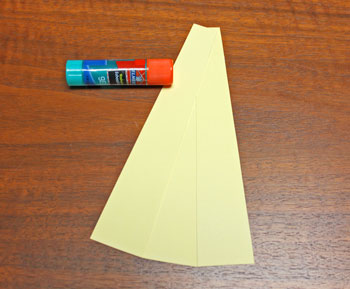
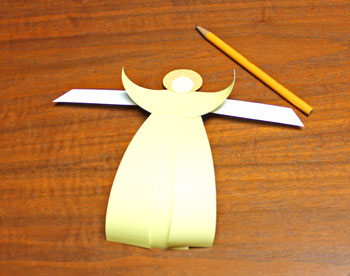
Overlap the narrow ends of the three trapezoid shapes with the edge of the large ends just touching.
Glue the shapes together near the top - narrow ends.
Glue the shapes together near the top - narrow ends.
Add a small strip of glue to the back of the straight across edge of one of the arm shapes.
Position the edge with the glue along one edge of the trapezoids, matching the top edge as well.
The long point should be toward the top.
Position the edge with the glue along one edge of the trapezoids, matching the top edge as well.
The long point should be toward the top.
Position and glue the second arm shape opposite the first.
Use the line of the trapezoid below the first arm to help estimate how to position the second arm's edges along that line and even with the top.
Use the line of the trapezoid below the first arm to help estimate how to position the second arm's edges along that line and even with the top.

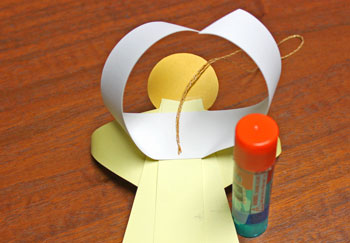
Apply glue to a small portion of the halo shape on its back side.
Position and glue the halo over the top of the arm shapes.
Position and glue the halo over the top of the arm shapes.
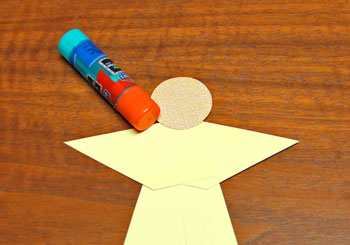
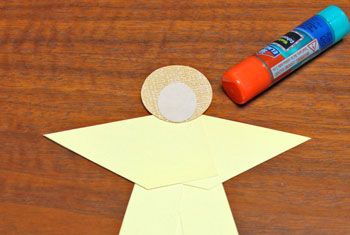
Add glue to the back of the face shape.
Position the bottom edge of the oval even with the bottom edge of the halo.
Press together.
Position the bottom edge of the oval even with the bottom edge of the halo.
Press together.
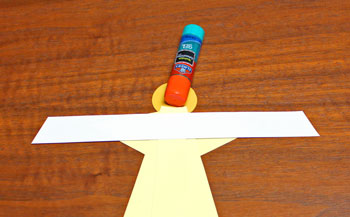
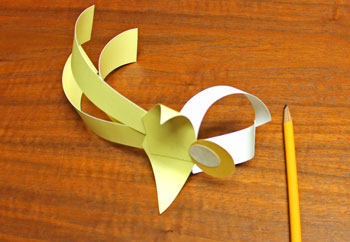
Turn the angel shape over.
Bend - but don't crease - the wing shape trapezoid matching the opposite ends to get an idea of the center of the shape.
Add glue just the center - about a half-inch on each side of the center.
Position the wing shape with the shorter edge toward the top.
Press the center of the wing shape with the glue to the center of the back of the body shape just below the halo.
Use a round object to burnish the paper shapes.
Burnishing is much like pulling scissors across curling ribbon.
However, scissors tend to form a crease when trying to burnish the paper.
The round object forms a curl as you pull it across the paper.
Burnishing is much like pulling scissors across curling ribbon.
However, scissors tend to form a crease when trying to burnish the paper.
The round object forms a curl as you pull it across the paper.
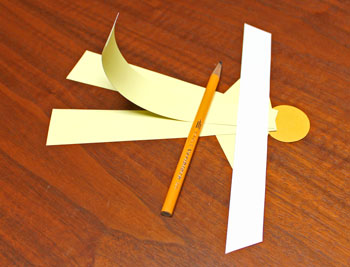
Burnish (i.e, curl) the three body shapes toward the back.
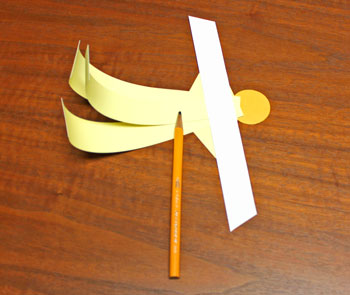
Burnish the arm shapes toward the front.
Burnish the each end of the wing shape toward the back.
Gently curve each side of the wing shape upwards at an angle.
Bend the paper slightly - don't crease, just gently bend.
Gently curve each side of the wing shape upwards at an angle.
Bend the paper slightly - don't crease, just gently bend.
Cut a length of yarn 10 to 14 inches long.
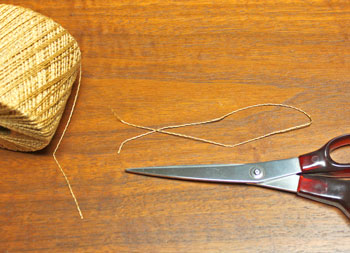
Fold the yarn in half.
Apply glue to the cut ends of the yarn.
Press the ends in the center of the wing shape and allow the glue to dry.
Apply glue to the cut ends of the yarn.
Press the ends in the center of the wing shape and allow the glue to dry.
The Curled Paper Angel is finished and ready to display.
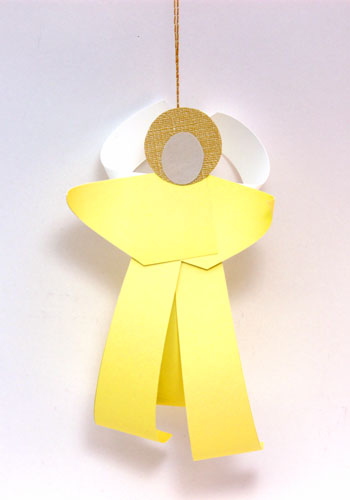
Choose the colors that you prefer for your angel. And, if you are good at drawing faces, your little angel would appreciate a smile too.
Have fun!
The Curled Paper Angel is a fun and easy project for any time of the year.
Have fun!
The Curled Paper Angel is a fun and easy project for any time of the year.

funEZcrafts
Welcome
Come on in and stay awhile...

funEZcrafts
Welcome
Come on in and stay awhile...
