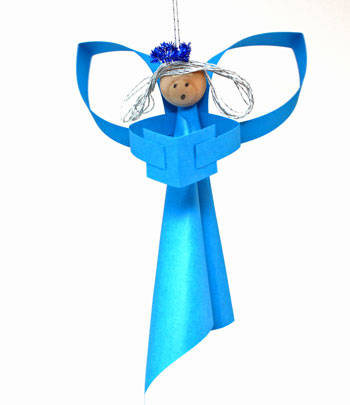
Easy Angel Crafts: Singing Angel
Medium weight cardstock along with a wooden bead and a chenille wire turn into a fun three dimensional Singing Angel ornament. She's pretty with or without her yarn hair.
This version is a pretty blue with a blue chenille wire halo.
This version is a pretty blue with a blue chenille wire halo.
Let's look at the materials and the steps for how to make this simple paper angel:
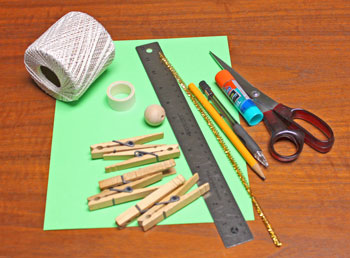
Easy Angel Crafts: Singing Angel Materials and Tools:
Paper - medium weight cardstock
Chenille wire 12-inches
Yarn
Wooden bead - 25 mm
Glue
Double sided tape
Scissors
Ruler
Pencil
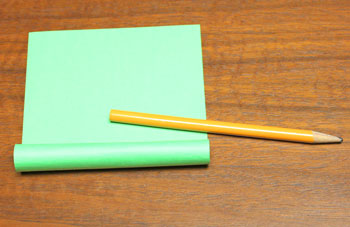
Round object for curling the paper (I used a round pencil.)
Clothespins
Chenille wire 12-inches
Yarn
Wooden bead - 25 mm
Glue
Double sided tape
Scissors
Ruler
Pencil
Round object for curling the paper (I used a round pencil.)
Clothespins
The Steps for How to Make the Easy Angel Crafts: Singing Angel:
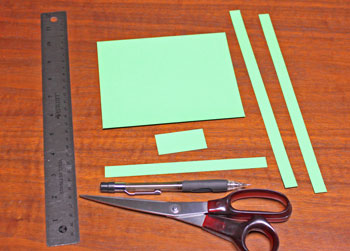
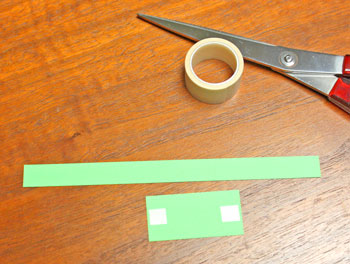
Measure, mark and cut the following shapes from the paper:
1 - 5-inch by 6-inch rectangle
2 - 0.5-inch by 11-inch strips
1 - 1-inch by 2-inch rectangle
1 - 0.5-inch by 6.5-inch strip
2 - 0.5-inch by 11-inch strips
1 - 1-inch by 2-inch rectangle
1 - 0.5-inch by 6.5-inch strip
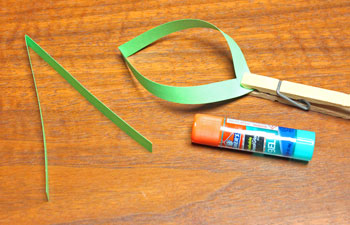
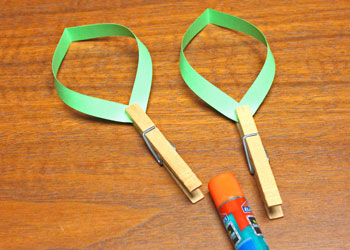
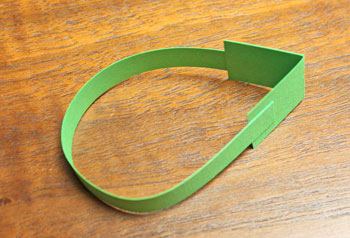
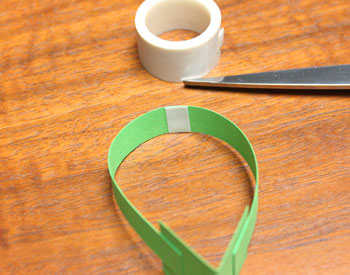
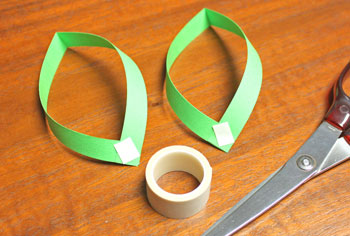
To form the wings, fold the long narrow strips in half.
For one shape, overlap one cut end at a right angle over the other cut end.
Apply glue where the ends overlap.
Use a clothespin (or binder clip) to hold the ends together while the glue dries.
For one shape, overlap one cut end at a right angle over the other cut end.
Apply glue where the ends overlap.
Use a clothespin (or binder clip) to hold the ends together while the glue dries.
Form the second wing shape like the first.
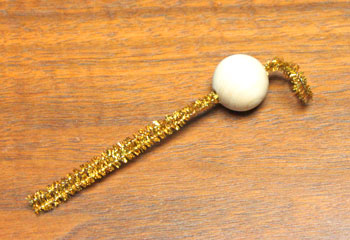
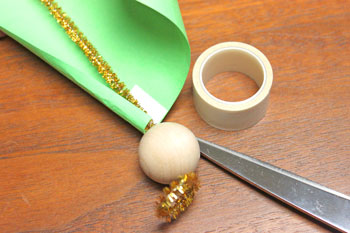
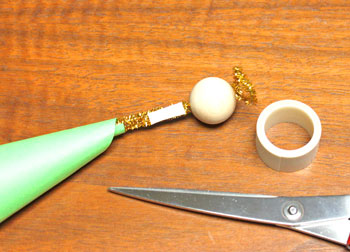
Fold the chenille wire in half.
Push the closed end of the folded wire through the wooden bead.
Push the closed end of the folded wire through the wooden bead.
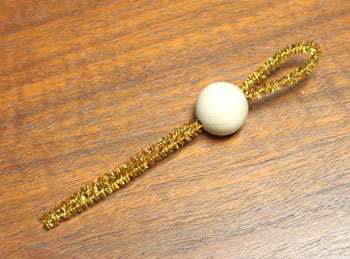
Bend the loop of chenille wire over the top of the wooden bead.
Open the loop to form the halo.
Open the loop to form the halo.
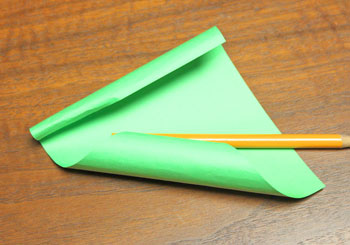
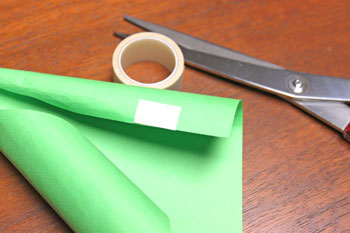
Use the round object to form a diagonal curl in the 5-inch by 6-inch paper shape.
Position the ends of the chenille wire in the first curl of the 5-inch by 6-inch paper shape.
Begin to tightly curl the paper around the chenille wire.
Place a piece of double-sided tape inside the curl such that it will hold the curl together.
Begin to tightly curl the paper around the chenille wire.
Place a piece of double-sided tape inside the curl such that it will hold the curl together.
Place a piece of double sided tape near the edge of the first curl roughly an inch from the bottom.
Curl the diagonal and press the paper curls together at the double sided tape.
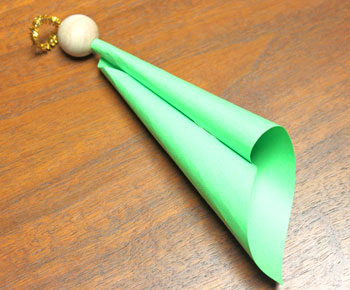
Gently pull the chenille wire out a short amount.
Position the front of the wooden bead and halo toward the front of the curled paper shape.
Apply glue or double sided tape to the chenille wire and gently push it back into the curl.
Hold the curled paper around the chenille wire for the glue or double sided tape to adhere the wire to the paper.
Position the front of the wooden bead and halo toward the front of the curled paper shape.
Apply glue or double sided tape to the chenille wire and gently push it back into the curl.
Hold the curled paper around the chenille wire for the glue or double sided tape to adhere the wire to the paper.
Cut two small pieces of double sided tape and attach them to the ends of the 1-inch by 2-inch rectangle.
Fold the hymnal - the 1-inch by 2-inch rectangle - in half.
Position each end of the 0.5-inch by 6.5-inch strip - the arms - over the double sided tape on the hymnal.
Position each end of the 0.5-inch by 6.5-inch strip - the arms - over the double sided tape on the hymnal.
Cut and place a piece of double sided tape in the middle of the arms shape.
Attach the arms to the back of the angel shape just below the wooden bead.
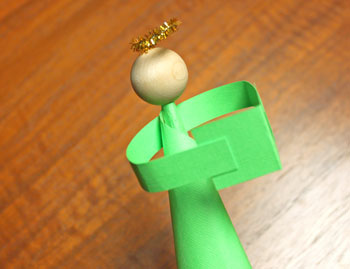
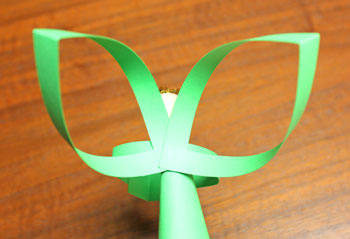
Cut and place double sided tape to the front of the glued points on the wing shapes.
Attach the wing shapes to the back of the angel shape over the arms.
Cut a piece of yarn 10 to 14 inches in length.
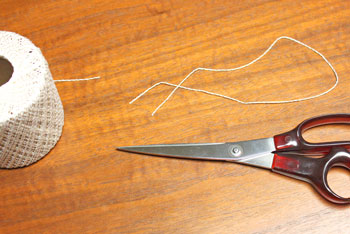
Tie the middle of the yarn around the base of the halo shape.
Pull the ends of the yarn even and tie a knot to form a loop.
Trim the ends of the yarn, if necessary.
Pull the ends of the yarn even and tie a knot to form a loop.
Trim the ends of the yarn, if necessary.
The Singing Angel is finished and ready to display.
I like this version without hair better, but if you prefer the angel with hair, add these steps.
Place pieces of double sided tape to the wooded bead, one in front of the chenille wire and one behind.
Hold your fingers slightly spread and wrap yarn around them several times making 8 to 10 loops. Cut the end of the yarn.
Keep the yarn loops and center half of the strands in front of the chenille wire and half behind.

Using the round object, tightly curl one end of the 5-inch by 6-inch rectangle.

funEZcrafts
Welcome
Come on in and stay awhile...

funEZcrafts
Welcome
Come on in and stay awhile...
Press each yarn strand into the double sided tape. Make sure each strand is stuck to the double sided tape.
Next, use a pencil to add dots for eyes and a slightly larger oval dot for the angel's singing mouth.
Either version is pretty.
Choose the one you prefer and make several.
Have fun!
The Singing Angel is a fun and easy project to make for her to sing at any time of the year.
Next, use a pencil to add dots for eyes and a slightly larger oval dot for the angel's singing mouth.
Either version is pretty.
Choose the one you prefer and make several.
Have fun!
The Singing Angel is a fun and easy project to make for her to sing at any time of the year.