Easy Paper Crafts: Construction Paper Fish
This fun and easy construction paper fish project can make several different fishes with minor changes in the measurements.
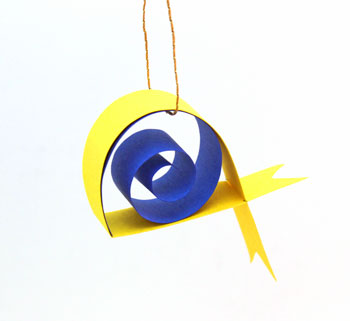
Here's a yellow and blue fish swimming along:
Here's a yellow and blue fish swimming along:
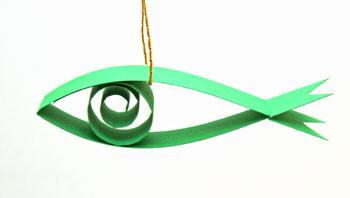
Or, what about a green one:
Take a look at the simple steps below to make the construction paper fish.
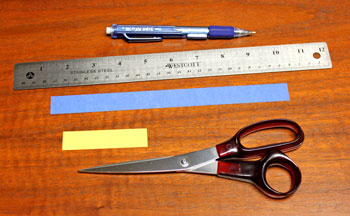
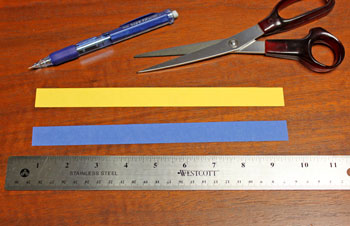
Easy Paper Crafts: Construction Paper Fish Materials and Tools:
Construction paper - colors of your choice
Yarn or thread
Ruler
Glue
Pencil
Scissors
Narrow round object (I used a wooden skewer.) to make the paper curls
Yarn or thread
Ruler
Glue
Pencil
Scissors
Narrow round object (I used a wooden skewer.) to make the paper curls

The Steps for How to Make the Easy Paper Crafts: Construction Paper Fish:
The first fish is similar to the green one above.
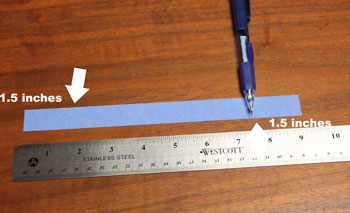
Cut two pieces of construction paper.
The first is 3/4 inch wide by 9 inches long (the width of a piece of construction paper).
The second piece is 3/4 inch wide by six inches long.
Cut two pieces of construction paper.
The first is 3/4 inch wide by 9 inches long (the width of a piece of construction paper).
The second piece is 3/4 inch wide by six inches long.

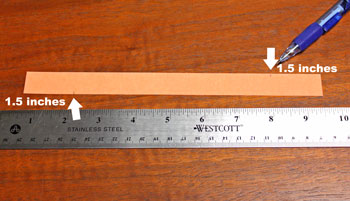
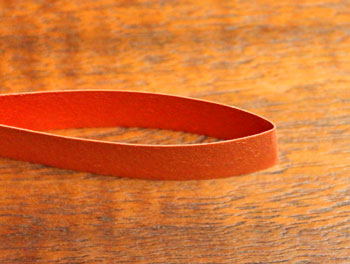
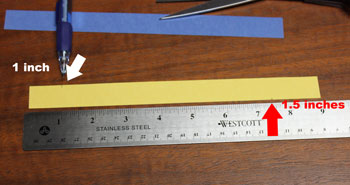
On the longer piece of paper, make a small mark 1.5 inches from each end.
The marks should be on opposite edges.
The marks should be on opposite edges.
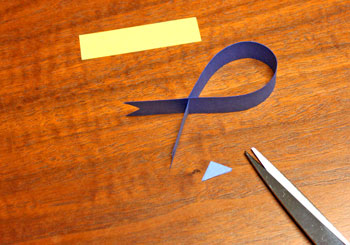
At each mark, cut across the paper halfway.
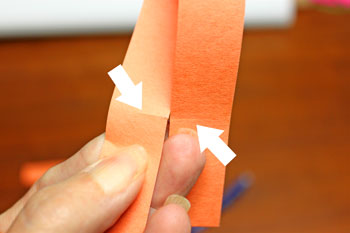
Join the two ends of the paper at the cut marks by overlapping the cut edges.
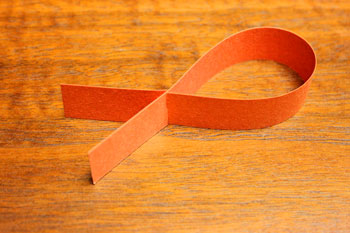
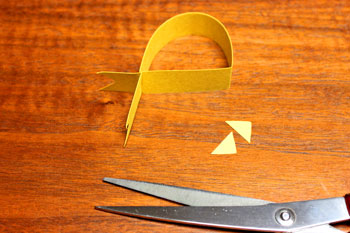
Make small "V" cuts in the ends of the paper for the fish's tail.
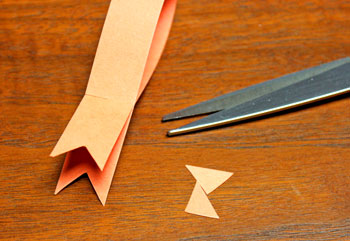
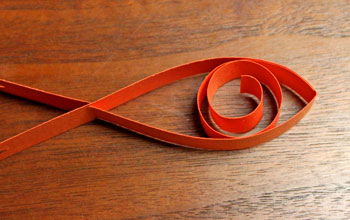
Gently fold the shape to form the fish's nose or mouth.
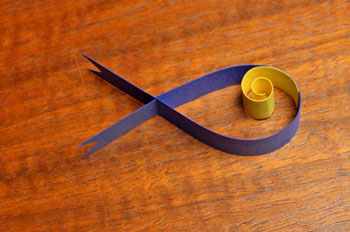
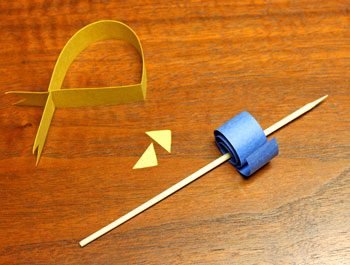
Wrap the 6-inch piece of paper around a narrow round object.
I used a wooden skewer.
A pencil is okay, but it's not quite narrow enough for the curl.
I used a wooden skewer.
A pencil is okay, but it's not quite narrow enough for the curl.

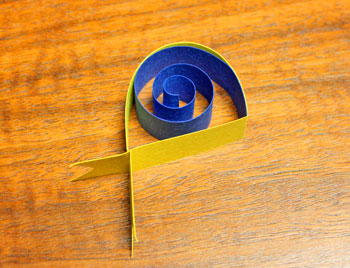
Add glue to the end of the curl for 1/2 to 3/4 inches.
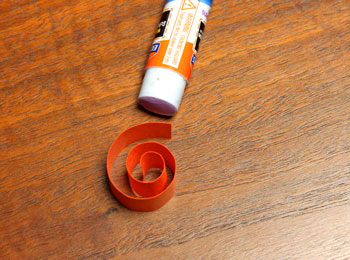
Glue the curl inside the shape.
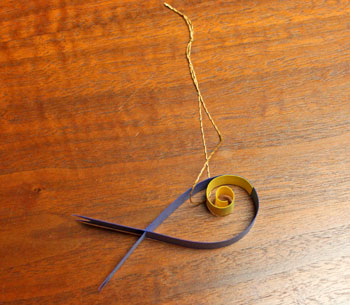
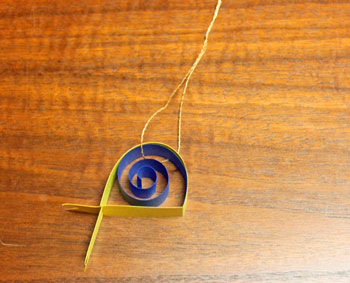
Cut a 12-inch length of yarn (or thread).

Insert the yarn through the top of the fish shape.
Bring the ends together and tie a knot to form the hanging loop.
Bring the ends together and tie a knot to form the hanging loop.
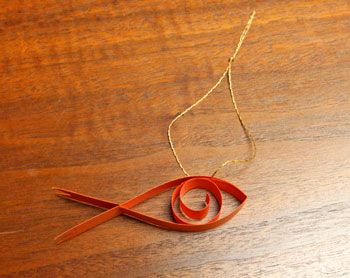
The fun and easy Construction Paper Fish is ready to display.
Note: For a shorter tail like the green one above, the cuts for the overlapping tail were 1-inch from each end.
Note: For a shorter tail like the green one above, the cuts for the overlapping tail were 1-inch from each end.
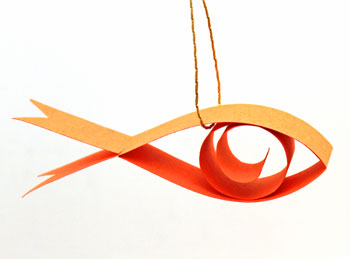
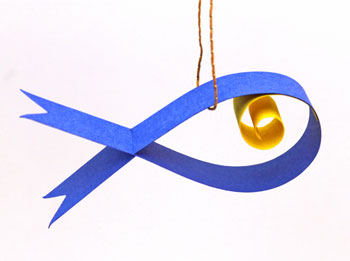
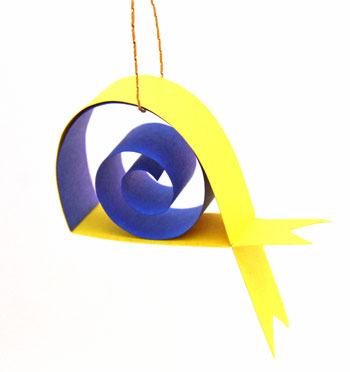
Next, let's make a blue fish with a rounded head and a smaller curl inside.
Cut two pieces of paper.
The first is 3/4 inch wide by 9 inches long (the width of the piece of construction paper).
The second is 3/4 inch wide by 3 inches long.
Cut two pieces of paper.
The first is 3/4 inch wide by 9 inches long (the width of the piece of construction paper).
The second is 3/4 inch wide by 3 inches long.
On the longer piece of paper, make small marks 1.5 inches from each end and on opposite edges.
Like for the earlier orange fish, cut halfway across the width of the paper at each of the marks.
Cut a "V" shape out of the ends of the paper strip for the fish's tail.
Connect the paper by overlapping the ends at the cut marks.
Cut a "V" shape out of the ends of the paper strip for the fish's tail.
Connect the paper by overlapping the ends at the cut marks.
Wrap the 3-inch piece of paper around a narrow round object (I used a wooden skewer) to make the curl.
Apply glue to the end of the curl and glue inside the shape.
Apply glue to the end of the curl and glue inside the shape.
Cut a 12-inch length of yarn.
Insert the yarn into the top of the fish shape.
Pull the ends of the yarn even and tie a knot to make a hanging loop.
Insert the yarn into the top of the fish shape.
Pull the ends of the yarn even and tie a knot to make a hanging loop.
The fun little blue fish with its yellow insides is finished and ready to display.
The third fish uses the same technique with some slight variations.
Cut two pieces of paper.
Both pieces are 3/4 inch wide by 9 inches long (the width of a piece of construction paper).
Cut two pieces of paper.
Both pieces are 3/4 inch wide by 9 inches long (the width of a piece of construction paper).
For the outer shape, mark the edges.
On one edge, mark 1-inch from the end.
From the opposite end and on the opposite edge, mark at 1.5 inches.
On one edge, mark 1-inch from the end.
From the opposite end and on the opposite edge, mark at 1.5 inches.
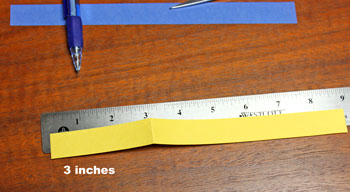
From the end with the 1-inch mark, make a gentle fold at the 3-inch measurement.
Like the earlier examples, cut at each of the marks halfway across the piece of paper.
Cut a "V" from the ends for the fish's tail.
Overlap the ends of the paper at the cut marks.
Cut a "V" from the ends for the fish's tail.
Overlap the ends of the paper at the cut marks.
Wrap the second piece of paper around a narrow round object to make the curl. (I used a wooden skewer.)
Apply glue to the end of the curled paper.
Glue the curl inside the shape.
Glue the curl inside the shape.
Cut a 12-inch length of yarn.
Insert the yarn through the top of the fish shape.
Pull the ends even and tie a knot to make a hanging loop.
Insert the yarn through the top of the fish shape.
Pull the ends even and tie a knot to make a hanging loop.
This fun little fish is finished and ready to display.
Simple paper and a few measurements become an interesting school of fishes.
Make other changes in the measurements and curls to make an even broader variety.
Have fun!
Inexpensive paper and a few tools make the Construction Paper Fish a great project for children and a great project for grandparents and grandkids.
Make other changes in the measurements and curls to make an even broader variety.
Have fun!
Inexpensive paper and a few tools make the Construction Paper Fish a great project for children and a great project for grandparents and grandkids.


funEZcrafts
Welcome
Come on in and stay awhile...

funEZcrafts
Welcome
Come on in and stay awhile...