Easy Felt Crafts: Handkerchief Valet
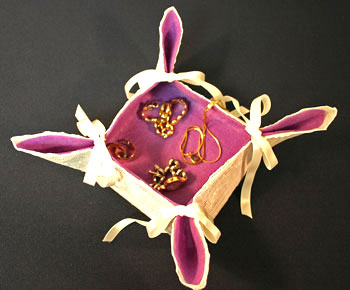
A pretty ladies' handkerchief easily becomes a beautiful valet tray to hold your jewelry and even your keys and phone.
With a few simple materials and tools, our easy how-to steps and a little bit of time and effort, a pretty handkerchief transforms into this beautiful organizer.
A lovely handkerchief, a piece of felt and some ribbon hold your daily treasures where you can easily find them in a valet tray.
With a few simple materials and tools, our easy how-to steps and a little bit of time and effort, a pretty handkerchief transforms into this beautiful organizer.
A lovely handkerchief, a piece of felt and some ribbon hold your daily treasures where you can easily find them in a valet tray.
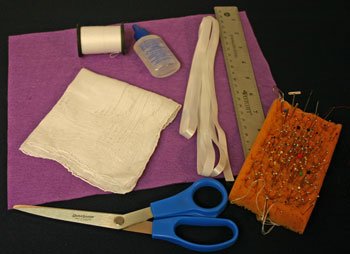
Easy Felt Crafts: Handkerchief Valet Materials and Tools:
Handkerchief (this one was roughly 10 x 10 inches)
Craft felt in the color of your choice (9 1/2 x 12 inches, or if your handkerchief is larger, craft felt roughly the size of the handkerchief)
Ribbon - matching or contrasting - 2 yards of 1/4 to 3/8 inch wide
Ruler
Scissors
Needle - small for fine stitches
Thread - matching the handkerchief
Pins Fray prevention liquid (clear glue works, too)
Iron
Starch or liquid stabilizer - Optional (e.g., spray sizing)
The Steps for How to Make the Easy Felt Crafts: Handkerchief Valet:
Note: You can find a beautiful handkerchiefs, many handmade, at flea markets at inexpensive prices.
Clean (if necessary) and press the handkerchief.
If the handkerchief is made of very fine cloth, add spray starch or sizing to provide stability to the material.
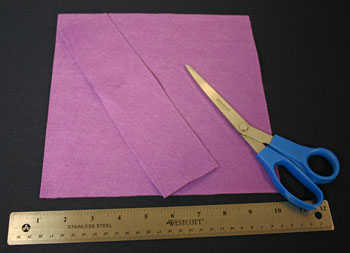
Measure and cut the felt into a square slightly smaller than the size of the handkerchief.
If the handkerchief is made of very fine cloth, add spray starch or sizing to provide stability to the material.
Measure and cut the felt into a square slightly smaller than the size of the handkerchief.
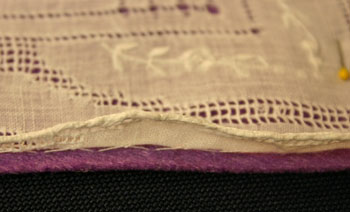
Both sides of a handkerchief are used, but there is a "pretty" side and a "less pretty" side.
Position the felt square over the "less pretty" side of the handkerchief.
Position the felt square over the "less pretty" side of the handkerchief.
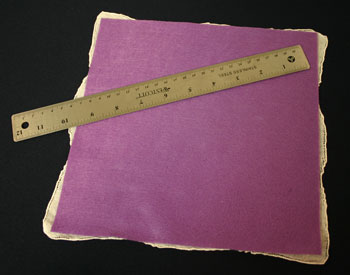
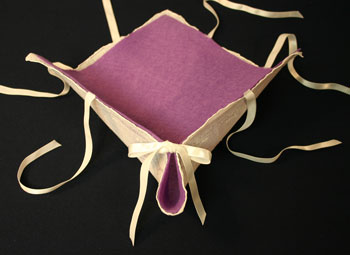
Pin the handkerchief to the felt square around the outer edge.

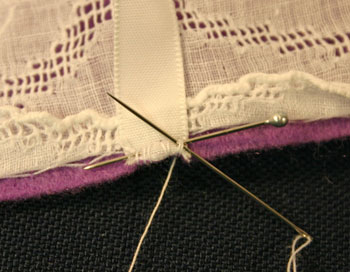
Thread your needle with the matching thread, knot one end of the thread.
Begin stitching at one corner of the square.
Stitch between the handkerchief and the felt.
Begin stitching at one corner of the square.
Stitch between the handkerchief and the felt.

Make the stitches small such that they cannot be seen either from the top of the handkerchief or from the inside of the felt.
Sew all four sides of the handkerchief and the felt square together.
Knot the last stitch, hide the end and cut the thread.
Sew all four sides of the handkerchief and the felt square together.
Knot the last stitch, hide the end and cut the thread.
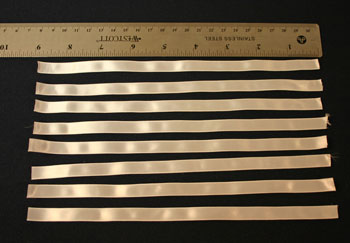
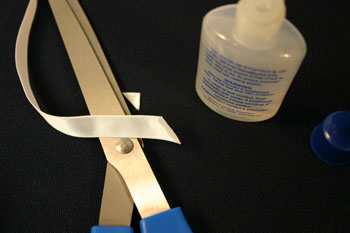
Cut the ribbon into eight pieces.
Each piece should be eight to nine inches in length.
Each piece should be eight to nine inches in length.
Fold the handkerchief back from the edge seam.
Pin one end of each ribbon to the edge of the felt.
Position the ribbon 2 1/2 to 3 inches from the corner of the square.
If the ribbon has a right (shiny) and wrong (dull) side, place the right side down toward the handkerchief.
Pin one end of each ribbon to the edge of the felt.
Position the ribbon 2 1/2 to 3 inches from the corner of the square.
If the ribbon has a right (shiny) and wrong (dull) side, place the right side down toward the handkerchief.
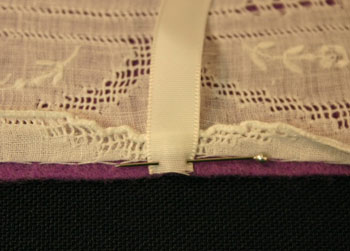
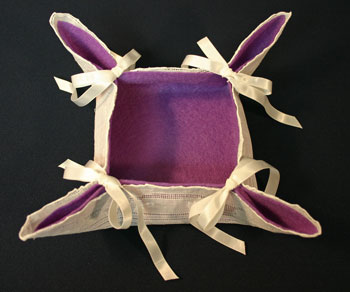
Pin two ribbons on each side for a total of eight ribbons.
This handmade handkerchief had two indentations on each side which were used to position the ribbon.
You may want to adjust the position of your ribbon pieces based on the design of your handkerchief.
Or, if you want a larger, shallow tray, place the ribbons closer to the corners, but make sure each ribbon is the same distance from its corner.
Sew each ribbon end to the felt.
Make the tiny seam large enough to insure the ribbon does not pull loose.
Use whip stitches (stitches that go over the end of the ribbon) to secure the seam.
Make the tiny seam large enough to insure the ribbon does not pull loose.
Use whip stitches (stitches that go over the end of the ribbon) to secure the seam.
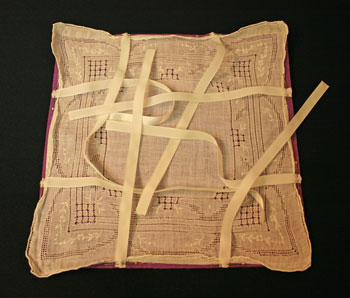
Stitch all eight ribbons to the felt square.
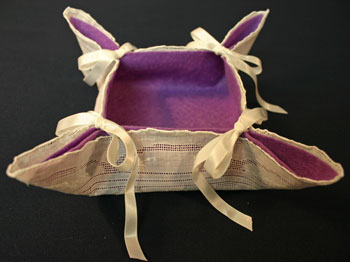
Using an iron adjusted to a ribbon-safe temperature, press the ribbons outward.
Take care to press the tiny seam flat.
Using an iron adjusted to a ribbon-safe temperature, press the ribbons outward.
Take care to press the tiny seam flat.
Trim the outer end of each ribbon at an angle.
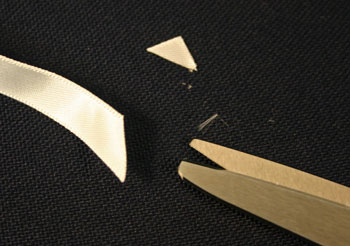
Add fray preventative liquid to the angled ends of each ribbon.
As an alternative, you can use a small amount of clear, washable glue.
Let the ends dry completely.
As an alternative, you can use a small amount of clear, washable glue.
Let the ends dry completely.
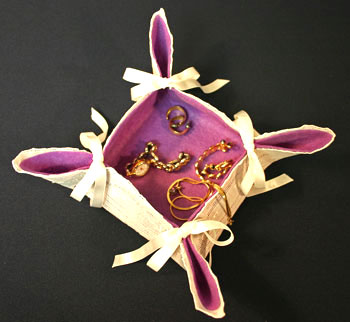
Begin tying the ribbons at each corner into a pretty bow.
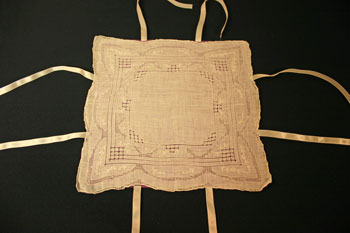
With all four bows tied at the corners, the pretty handkerchief valet tray is complete and ready to hold jewelry or other treasures.
This view shows the intricate handmade details of the ladies' handkerchief.
The size of the handkerchief valet tray allows plenty of room for your daily jewelry and could easily hold your phone and keys for ready access.
With just a little time, a ladies' handkerchief, some simple materials and tools plus easy sewing techniques, this beautiful valet tray can be your pretty organizer.
Or, it can become a keepsake gift from the heart that is both lovely and useful for a family member or a friend.
Enjoy!
Or, it can become a keepsake gift from the heart that is both lovely and useful for a family member or a friend.
Enjoy!


funEZcrafts
Welcome
Come on in and stay awhile...

funEZcrafts
Welcome
Come on in and stay awhile...