Easy Christmas Crafts: Diamond Shapes Christmas Tree
Whether ombre green or multi-colored, the Diamond Shapes Christmas Tree makes a fun little three-dimensional holiday decoration for a desk, table or other small space.
This version uses several colors of green in an ombre format with yellow as the top "star" color.
This version uses several colors of green in an ombre format with yellow as the top "star" color.
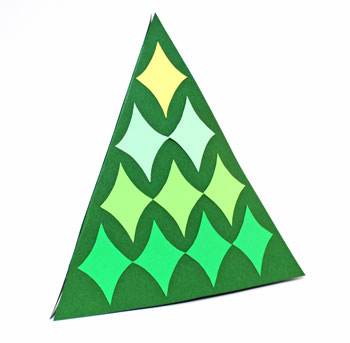
Though this image looks two-dimensional, the little tree shape has three sides and easily stands on its triangular base.
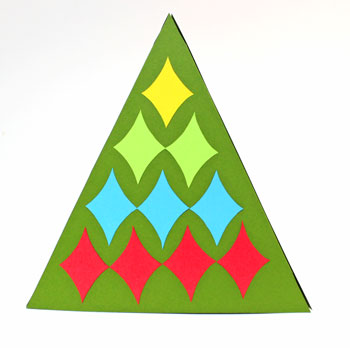
Let's make a multi-colored version.
Let's make a multi-colored version.
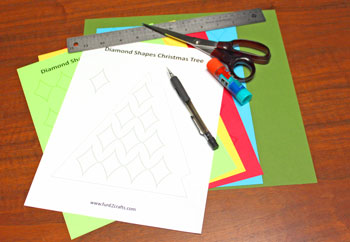
Easy Christmas Crafts: Diamond Shapes Christmas Tree Materials and Tools:
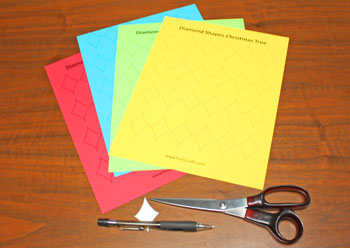
Paper - I used 24-pound for the multi-colored diamonds and medium-weight cardstock for the triangles and for the diamonds on the ombre version
Scissors
Pencil
Ruler or flat straight edge
Glue
Pattern - Diamond Shapes Christmas Tree pattern (click to open Adobe PDF)
Scissors
Pencil
Ruler or flat straight edge
Glue
Pattern - Diamond Shapes Christmas Tree pattern (click to open Adobe PDF)
Take a look at the simple materials and tools.
The Steps for How to Make the Easy Christmas Crafts: Diamond Shapes Christmas Tree:
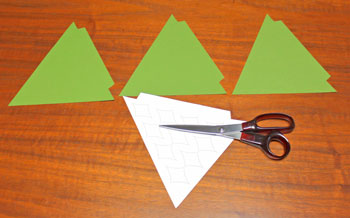
Print page 1 of the Diamond Shapes Christmas Tree pattern for the triangle shape and the diamond shape.
Position and mark around the triangle shape on the 12x12-inch cardstock.
Position and mark around the triangle shape on the 12x12-inch cardstock.
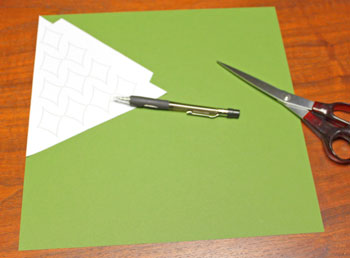
This picture shows how to easily position the three shapes to fit on the 12x12 paper.
If your paper is one-sided, make sure that the tabs for the triangles are all on one side.
This positioning puts the tabs on the right side on all three triangles.
If your paper is one-sided, make sure that the tabs for the triangles are all on one side.
This positioning puts the tabs on the right side on all three triangles.
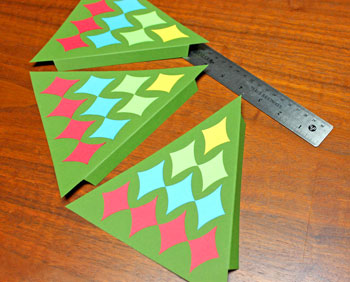
Cut around the three triangle shapes.
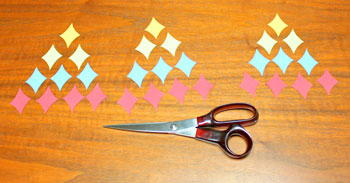
Either use the second page of the pattern to print the diamonds, or use the diamond pattern to mark the diamonds on card stock.
Cut out the diamond shapes - twelve for the bottom row, nine for the second row, six for the third row and three for the top.
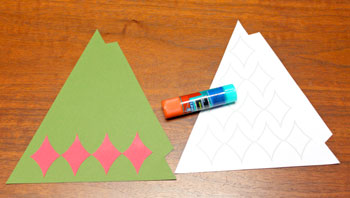
Use the triangle pattern as a visual guide for positioning the diamond shapes on the triangles.
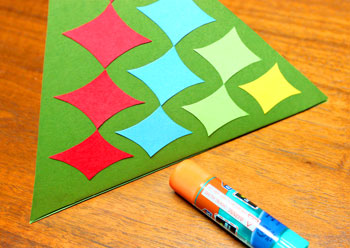
Place and glue the four diamonds on the bottom of the first triangle.
Place and glue the four diamonds on the bottom of the first triangle.
Place and glue the next three diamonds on the second row of the first triangle.
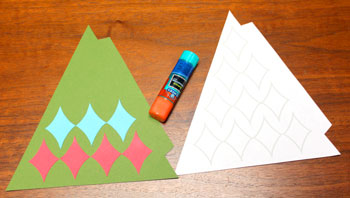
Place and glue the two diamond shapes for the third row to the first triangle shape.
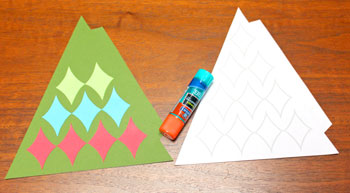
Place and glue the top diamond to the top of the first triangle.
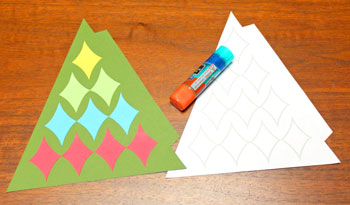
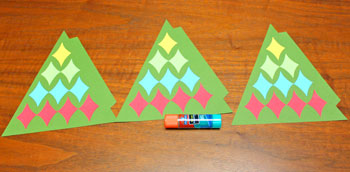
Use the same process to place and glue the diamonds to the other two triangles.
Use a ruler or flat straight edge to help fold the first tab to form a flap.
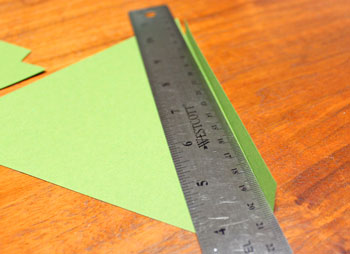
Form the flaps on each of the three triangles.
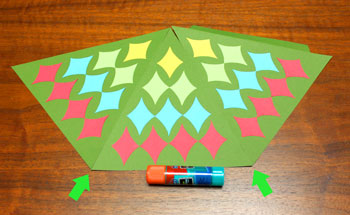
Overlay the triangles over the first two flaps aligning the edges (see the green arrows).
Apply glue to the flaps and allow to set.
Apply glue to the flaps and allow to set.
Fold the shape to overlap the triangle's edge over the remaining flap.
Apply glue to the flap to hold the shape together.
Apply glue to the flap to hold the shape together.
The Diamond Shapes Christmas Tree is finished and ready to display.
This corner view shows more of the little tree's three-dimensional shape.
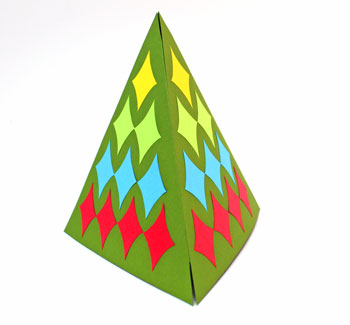
Just some paper and some glue makes a fun little tree.
It reminds me of argyle socks or perhaps a harlequin.
Have fun making different trees of different colors!
The Diamond Shapes Christmas Tree project makes a simplistic tree for those small spaces that need just a touch of holiday cheer.
It reminds me of argyle socks or perhaps a harlequin.
Have fun making different trees of different colors!
The Diamond Shapes Christmas Tree project makes a simplistic tree for those small spaces that need just a touch of holiday cheer.


funEZcrafts
Welcome
Come on in and stay awhile...

funEZcrafts
Welcome
Come on in and stay awhile...