Easy Christmas Crafts: Diamond Santa Claus Ornament
This little Diamond Santa Claus has a bright smile, rosy pink nose and cheeks and a fun attitude.
He's fun and easy to make with simple tools and materials..
He's fun and easy to make with simple tools and materials..

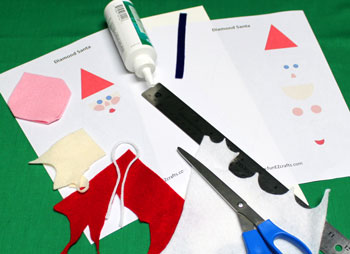
Easy Christmas Crafts: Diamond Santa Claus Ornament Materials and Tools:
Craft felt - small pieces of red, white, pink, ivory and blue
White yarn - 8 inches long
Poster board, chip board or card stock
Glue
Scissors
Ruler
Pattern - Easy Christmas Crafts Diamond Santa Claus
Pins (optional, but they help hold the pattern to the felt while cutting)
White yarn - 8 inches long
Poster board, chip board or card stock
Glue
Scissors
Ruler
Pattern - Easy Christmas Crafts Diamond Santa Claus
Pins (optional, but they help hold the pattern to the felt while cutting)
Take a look at the simple materials and tools shown here.
The Steps for How to Make the Easy Christmas Crafts: Diamond Santa Claus Ornament:
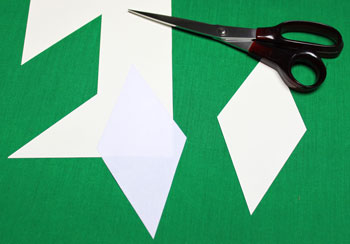
Print the Diamond Santa Claus pattern.
From the second page, cut out each of the pattern shapes.
From the second page, cut out each of the pattern shapes.
Cut the diamond shape from poster board, chip board or card stock.
Cut the diamond shape, the band on the hat and the mustache from the white felt.
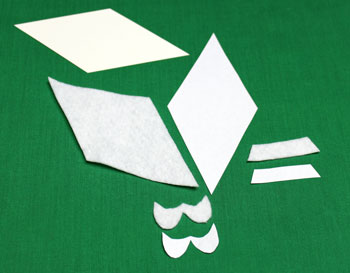
Cut each of the remaining shapes.
Cut the triangular hat shape and the smile from the bright red felt.
Cut the semi-circular face background from the ivory felt.
Cut the nose and cheeks from the pink felt.
Cut the eyes from the blue felt.
Cut the triangular hat shape and the smile from the bright red felt.
Cut the semi-circular face background from the ivory felt.
Cut the nose and cheeks from the pink felt.
Cut the eyes from the blue felt.
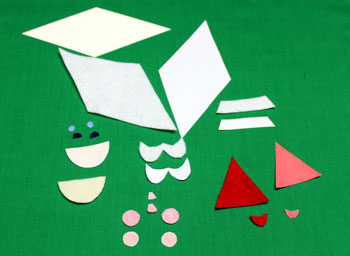
Rather than circles for the eyes, I cut one circle from the blue felt using the pattern, then cut that circle in half.

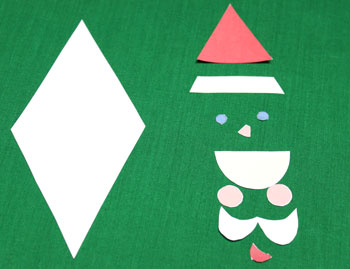
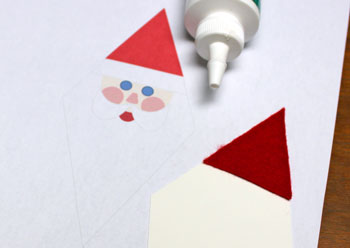
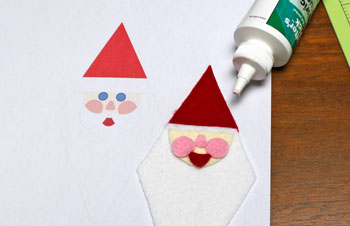
Use the first page of the Diamond Santa Claus pattern to help place the different pieces of felt on the diamond shape.
Glue the red triangular shape for the hat to the top of the diamond poster board shape matching the edges.
Glue the red triangular shape for the hat to the top of the diamond poster board shape matching the edges.
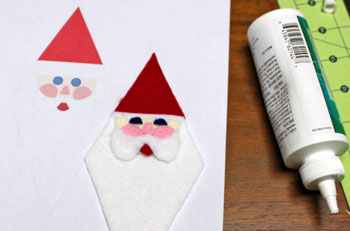
Cut away the triangular hat shape from the top of the white felt diamond.
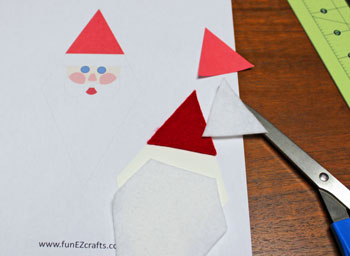
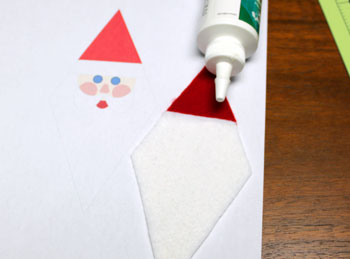
Glue the rest of the white felt diamond shape to the poster board.
Match the edges and butt the top edge against the red felt.
Match the edges and butt the top edge against the red felt.
Center and glue the semicircular face shape 1/8 inch below the edge of the red felt hat.

Begin gluing the face elements to the face background.
Start with the red smile. Center the smile with the bottom of the smile's curve touching the bottom of the face background's curve.
Glue the cheeks by overlapping the smile's points and with the cheeks touching the outer curve of the face background.
Make sure you leave room for the eyes as you position the cheeks.
Add and glue the nose between and slightly up from the cheeks.
Glue the mustache over the top of the smile, across the cheeks and with the point just touching the bottom of the nose.
Glue the eyes just above the cheeks.
Glue the eyes just above the cheeks.
Glue the white band of the hat above the eyes and across the "seam" between the white and red felt on the diamond shape.
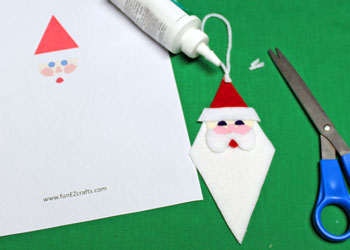
Fold the yarn in half and tie a knot in the ends of the yarn.
Glue the knot over the top of the red felt triangular hat to form the pom pom.
Trim any excess yarn.
Fold the yarn in half and tie a knot in the ends of the yarn.
Glue the knot over the top of the red felt triangular hat to form the pom pom.
Trim any excess yarn.
The little Diamond Santa Claus looks like he's laughing. Isn't he just fun?
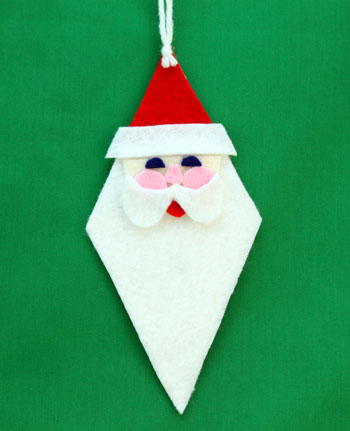
This simple and fun Santa Claus can be made quickly, easily and inexpensively.
Make him in traditional colors, or change the colors to fit your interests.
Have fun making one or many!
Anyone can enjoy making this Easy Christmas Crafts Diamond Santa Claus project to add some fun and laughter to the decorations this year.
Make him in traditional colors, or change the colors to fit your interests.
Have fun making one or many!
Anyone can enjoy making this Easy Christmas Crafts Diamond Santa Claus project to add some fun and laughter to the decorations this year.


funEZcrafts
Welcome
Come on in and stay awhile...

funEZcrafts
Welcome
Come on in and stay awhile...