Easy Christmas Crafts: Curly Ribbon Ornament
This Easy Christmas Crafts Curly Ribbon Ornament uses two colors of curling ribbon and a small piece of poster board or card stock to make a pretty decoration.
It's fun, easy and inexpensive to make.
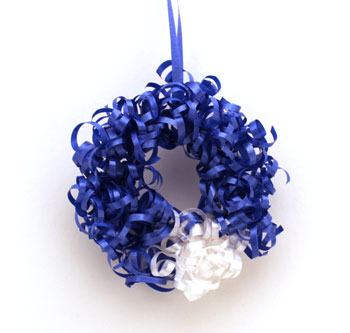
Take a look at this blue and white version of the fun little curly ribbon ornament.
Then view the how-to-make instructions below for a red and gold version.
It's fun, easy and inexpensive to make.
Take a look at this blue and white version of the fun little curly ribbon ornament.
Then view the how-to-make instructions below for a red and gold version.
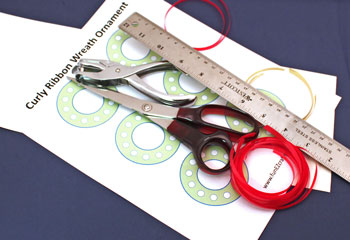
Easy Christmas Crafts: Curly Ribbon Ornament Materials and Tools:
Curly Ribbon Ornament pattern (click to open PDF file)
Curling ribbon 1/4 inch wide
31 pieces 6 1/2 inches long of the primary color
5 pieces 7 inches long of the accent color
1 piece 12 inches long for the hanging loop
Poster board or card stock
Ruler
Scissors
Hole punch
Curling ribbon 1/4 inch wide
31 pieces 6 1/2 inches long of the primary color
5 pieces 7 inches long of the accent color
1 piece 12 inches long for the hanging loop
Poster board or card stock
Ruler
Scissors
Hole punch
The Steps for How to Make the Easy Christmas Crafts: Curly Ribbon Ornament:
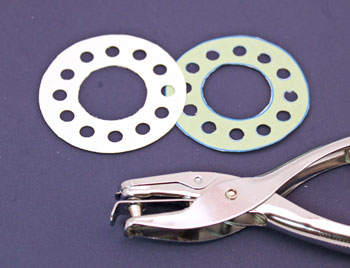
Print the Curly Ribbon Ornament pattern.
Use one of the shapes to cut a poster board doughnut shape.
Use one of the shapes to cut a poster board doughnut shape.

Hold the pattern over the poster board and punch the 12 holes in the poster board.
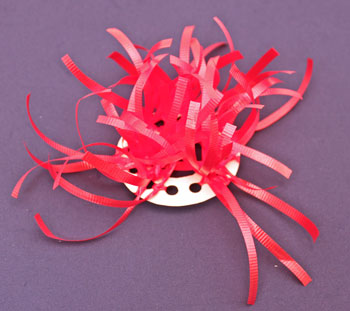
Begin tying the primary color ribbons to the circle.
Use a square or "hard" knot to secure the ribbons.
Ribbons should be tied from each hole to the outside of the circle, from each hole to the inside of the circle and between each hole.
Use a square or "hard" knot to secure the ribbons.
Ribbons should be tied from each hole to the outside of the circle, from each hole to the inside of the circle and between each hole.
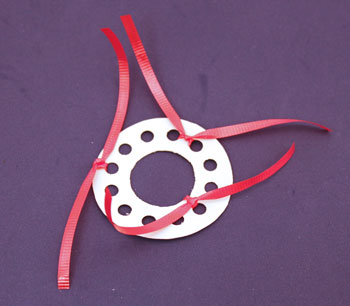
Leave two adjacent holes for the accent ribbons.
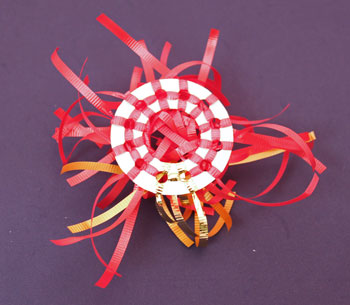
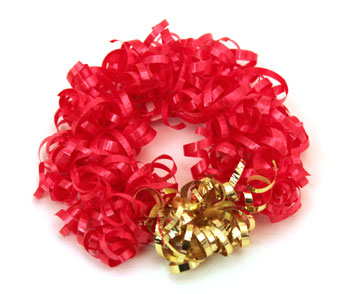
The back view shows how all of the ribbons fit into the holes and around the outer and inner edges of the poster board circle.
Notice the primary ribbons go into the open holes for the accent ribbons.
Notice the primary ribbons go into the open holes for the accent ribbons.

Add the five accent ribbons to the open two holes.
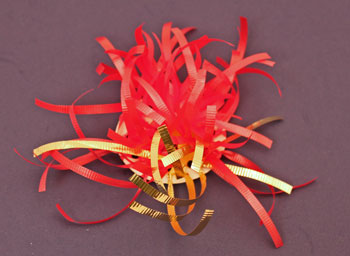
The back view shows all of the ribbons added to the poster board circle.
Use the edge of the scissors to curl each of the ribbon ends.
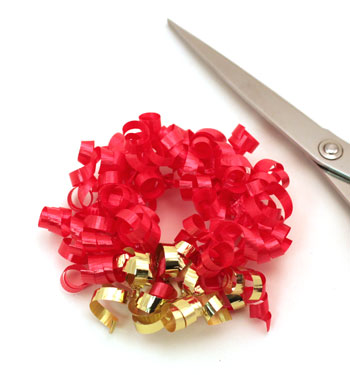
Next, split each ribbon down its length.
This adds fullness and also makes the curly ribbon ornament more attractive.
This adds fullness and also makes the curly ribbon ornament more attractive.
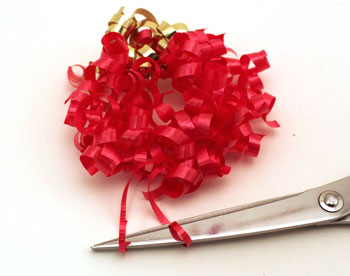
This view shows all of the ribbons split.
If some of the ribbon lose their curl when they are split, use the edge of the scissors to re-curl the ribbon.
If some of the ribbon lose their curl when they are split, use the edge of the scissors to re-curl the ribbon.
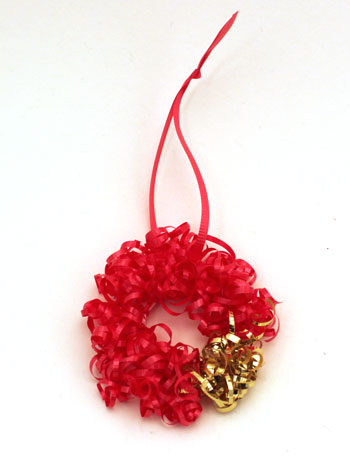
Looking at the 12 holes as the 12 positions on an analog clock face, position the accent ribbons at the 4:00 and 5:00 holes.
Add the 12-inch ribbon through the 12:00 position for the hanging loop.
Tie a knot in the ribbon ends to complete the loop.
Trim the ribbon ends as needed.
Add the 12-inch ribbon through the 12:00 position for the hanging loop.
Tie a knot in the ribbon ends to complete the loop.
Trim the ribbon ends as needed.
Hang the pretty little curly ribbon ornament on a Christmas tree, a door knob, a cabinet pull, an office drawer or where you want to see a fun bit of holiday cheer.
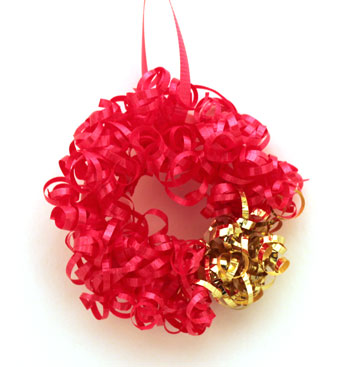
Young or old, people of all ages can enjoy this easy Christmas crafts project for a curly ribbon ornament.
Mix and match ribbons to form many different versions of the pretty little decoration.
These simple and fun ornaments could also be added to packages or used as small keepsake gifts.
Have fun!
A few materials and tools makes this Easy Christmas Crafts Curly Ribbon Ornament simple, fun, and inexpensive for anyone to do.


funEZcrafts
Welcome
Come on in and stay awhile...

funEZcrafts
Welcome
Come on in and stay awhile...