Easy Christmas Crafts: Paper Circles Teddy Bear
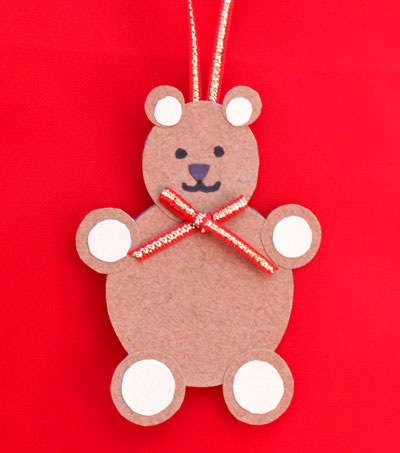
Inexpensive construction paper, narrow ribbon and glue become a fun little teddy bear as a decoration during the holidays or even to add whimsy to a child's room any time of the year.
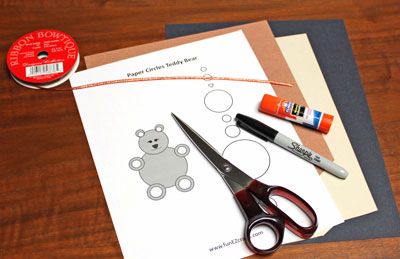
Easy Christmas Crafts: Paper Circles Teddy Bear Materials and Tools:
Construction paper - brown and cream with black optional for the nose
Narrow ribbon
Black pen
Glue
Scissors
Pattern - Paper Circles Teddy Bear
Narrow ribbon
Black pen
Glue
Scissors
Pattern - Paper Circles Teddy Bear
Take a look at the simple materials and tools.
The Steps for How to Make the Easy Christmas Crafts: Paper Circles Teddy Bear:
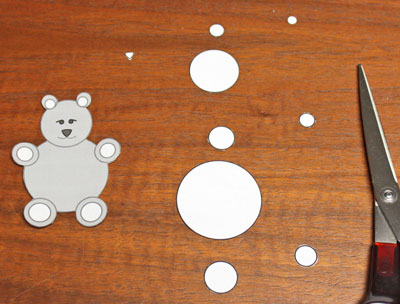
Print the Paper Circles Teddy Bear pattern.
Cut around all of the pattern shapes.
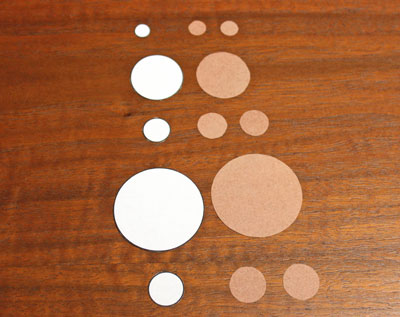
The two largest circles - one for the head and one for the body - will be from the darker construction paper.
For the pairs of smaller circles, the larger ones will be the same color as the body and head with the smaller circles being the contrasting lighter color.
Separate the circles based on the color of paper to be used.
Cut around all of the pattern shapes.
The two largest circles - one for the head and one for the body - will be from the darker construction paper.
For the pairs of smaller circles, the larger ones will be the same color as the body and head with the smaller circles being the contrasting lighter color.
Separate the circles based on the color of paper to be used.
Using the small rounded triangle shape, cut the nose shape out of black construction paper.
Being small, the nose poses a challenge to cut around the small pattern. As an option, use the pattern and the black pen to draw the nose later.
Being small, the nose poses a challenge to cut around the small pattern. As an option, use the pattern and the black pen to draw the nose later.
From the brown construction paper, cut two each of the three small circles.
Cut one each of the head and body circles.
Cut one each of the head and body circles.
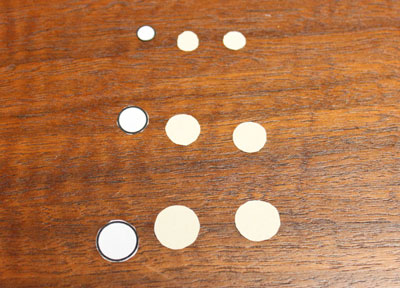
From the cream construction paper, cut two each of the smaller circles for the contrast.
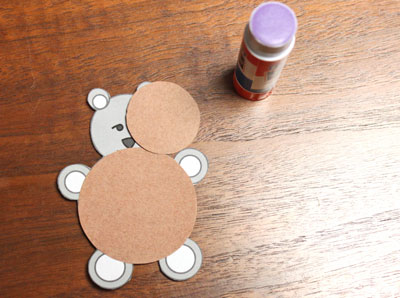
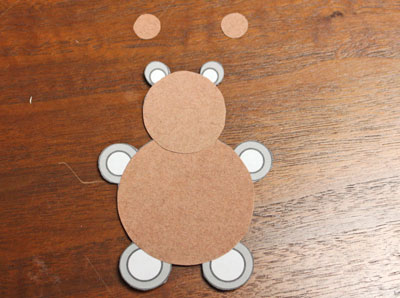
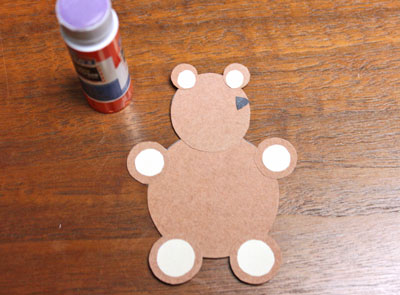
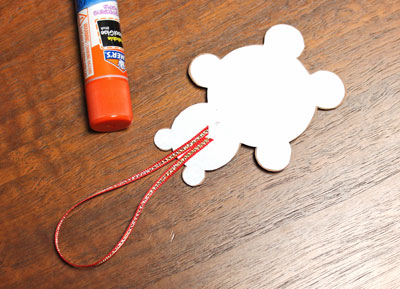
Glue the large body circle to the teddy bear shape.
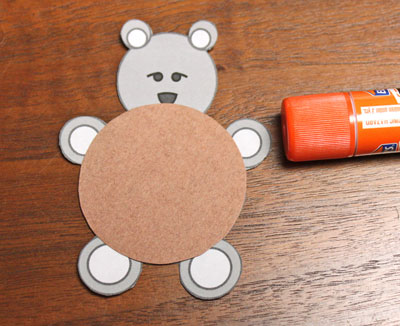
Using glue, add the head circle to the teddy bear.
Match the two small brown circles over the ears on the pattern and glue.
Next, glue the two brown arm circles over the arms on the pattern.
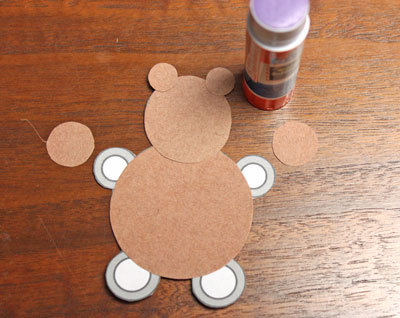
Glue the third set of brown circles over the pattern's legs.
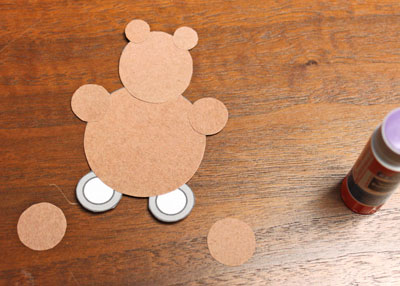
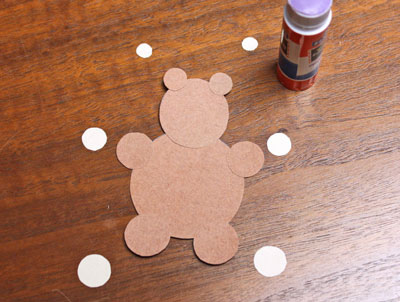
Position the cream colored circles near the ears, arms and legs.
For the ears, glue the cream circles with its edge touching the edge of the brown circle (refer to the pattern for positioning).
For the arms and legs, center the cream circles over the brown circles and glue.
For the ears, glue the cream circles with its edge touching the edge of the brown circle (refer to the pattern for positioning).
For the arms and legs, center the cream circles over the brown circles and glue.
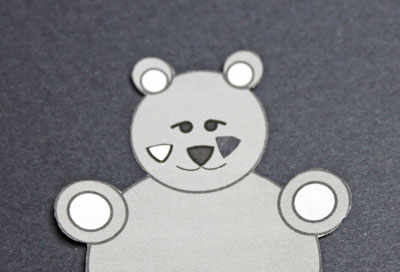
Glue the nose to the teddy bear - not at the edge as shown in the picture - but positioned as shown on the pattern.
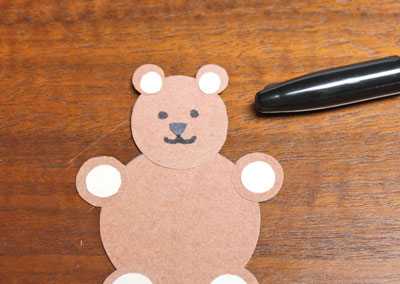
Or, draw the nose based on the pattern.
Or, draw the nose based on the pattern.
Using a black pen, draw the mouth and eyes.
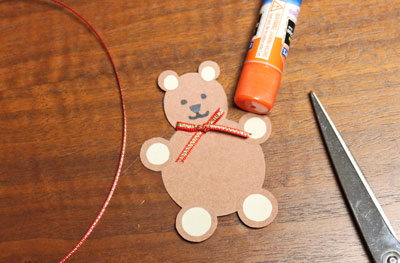
For the bow tie, I make a simple bow in the end of the ribbon and work to get the size right before I cut the ribbon.
Glue the bow to the teddy bear where the head circle overlaps the body circle.
Glue the bow to the teddy bear where the head circle overlaps the body circle.
Cut a length of ribbon 8 to 10 inches long to form the hanging loop.
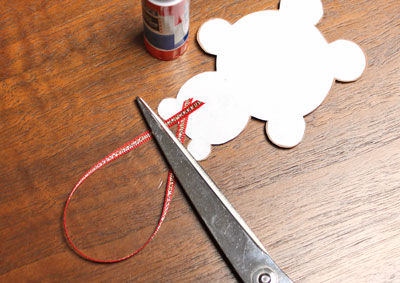
Glue the ends of the ribbon to the back of the teddy bear's head.
The Paper Circles Teddy Bear is finished except the glue needs to dry.
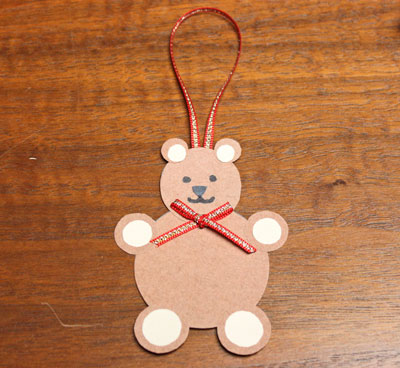
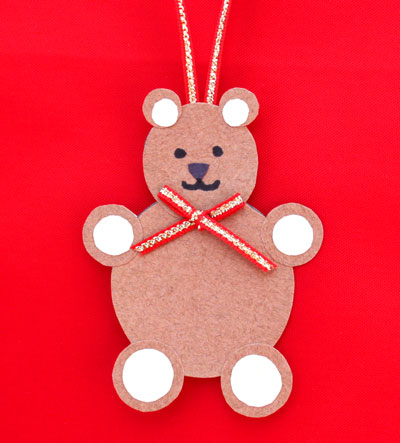
Hang the fun little teddy bear on a Christmas tree, a drawer pull or anywhere he can add smiles to someone's day.
Use "bear" colors of browns and blacks or make the little ornament in orange and yellow, purple and pink, blue and green or any color combination that strikes your fancy.
Be creative and have fun!
The Paper Circles Teddy Bear can be a fun and whimsical addition to holiday decorations or to a child's room any time of the year.
Be creative and have fun!
The Paper Circles Teddy Bear can be a fun and whimsical addition to holiday decorations or to a child's room any time of the year.


funEZcrafts
Welcome
Come on in and stay awhile...

funEZcrafts
Welcome
Come on in and stay awhile...