Easy Christmas Crafts: Felt Basket Ornament
Our Easy Christmas Crafts Felt Basket Ornament uses a small amount of felt and yarn for each ornament.
The steps are simple, fast and easy.
You can make several for your own tree and several to give with treats to family and friends.
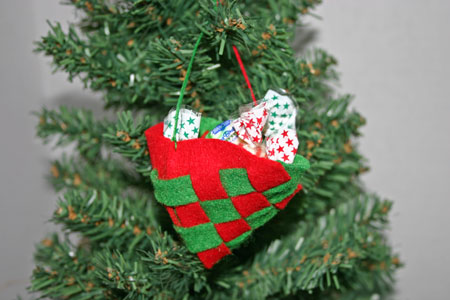
Take a look at a finished Easy Christmas Crafts Felt Basket Ornament filled with candy and hanging on the Christmas tree.
The steps are simple, fast and easy.
You can make several for your own tree and several to give with treats to family and friends.
Take a look at a finished Easy Christmas Crafts Felt Basket Ornament filled with candy and hanging on the Christmas tree.
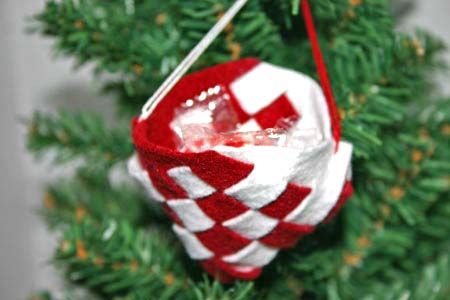
The felt basket's finished size falls between 2.75 and 3.5 inches in height and width (not counting the hanging loop).
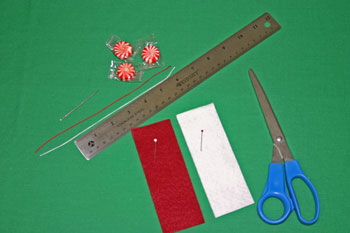
Easy Christmas Crafts: Felt Basket Ornament Materials and Tools:
Craft felt - two pieces cut 2 inches by 6 inches. The felt can be the same or different colors.
Yarn - two pieces 10 inches long (or ribbon)
Straight pins
Ruler
Scissors
Needle (optional, you can use the scissors to cut a small hole)
Treats to fill the cone (candy, nuts, small toys, etc.)
Yarn - two pieces 10 inches long (or ribbon)
Straight pins
Ruler
Scissors
Needle (optional, you can use the scissors to cut a small hole)
Treats to fill the cone (candy, nuts, small toys, etc.)
The Steps for How to Make the Easy Christmas Crafts: Felt Basket Ornament:
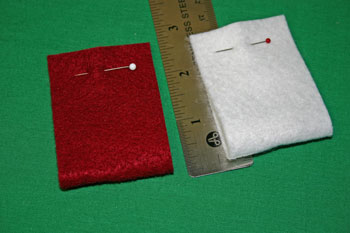
Cut two pieces of craft felt 2 inches by 6 inches and two pieces of yarn (or ribbon) 10 inches long.
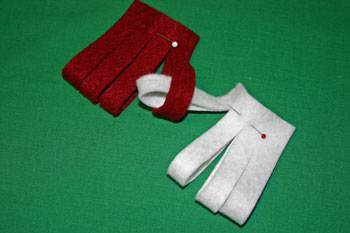
Fold each piece of the felt in half across the length. The new dimensions should be 2 inches by 3 inches.
Pin the ends of felt together.
Fold each piece of the felt in half across the length. The new dimensions should be 2 inches by 3 inches.
Pin the ends of felt together.
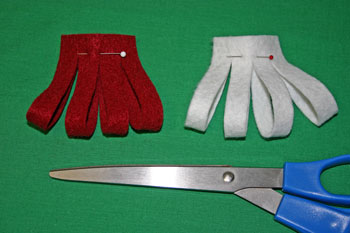
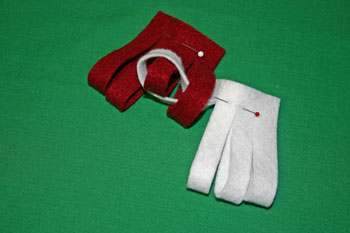
Starting at the folded edge, cut four 1/2 inch wide strips 2 1/8 inches long into each folded shape.
Be careful not to cut longer than 2 1/8 inches.
Be careful not to cut longer than 2 1/8 inches.
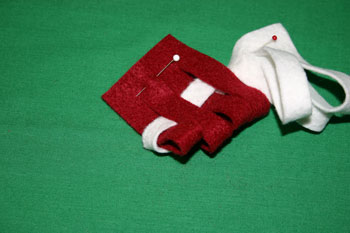
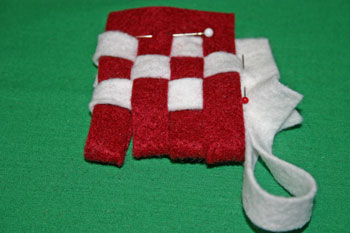
Begin weaving the basket by inserting the first white folded strip of felt into the first red folded strip.
Next, insert the adjacent red strip through the white strip making the white strip go around the red folded felt strip.
Now, push the white folded felt through the third red folded strip of felt.

End the first row by inserting the last red folded strip of felt through the white strip.
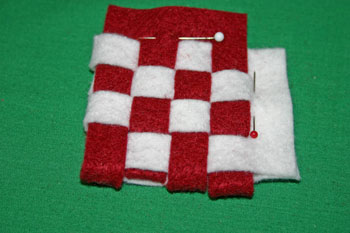
For the second row, follow the same steps but alternate them from the first row to begin forming the woven basket.
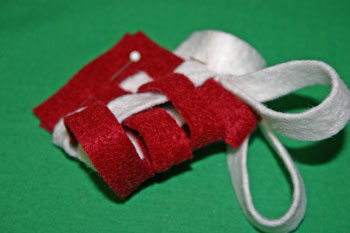
The third row uses the same steps as the first row in the same order.
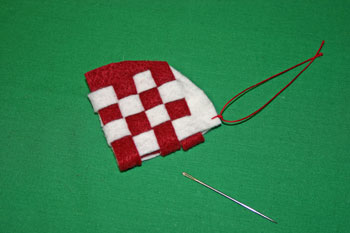
The finished weaving of the Easy Christmas Crafts Felt Basket Ornament shows the alternate rows being the same - first and third then second and fourth rows are woven the same ways around and through.
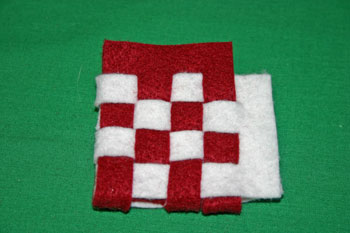
Remove the pins holding the edges together.
Open the Easy Christmas Crafts Felt Basket Ornament and adjust the woven strips if they are uneven.
Open the Easy Christmas Crafts Felt Basket Ornament and adjust the woven strips if they are uneven.
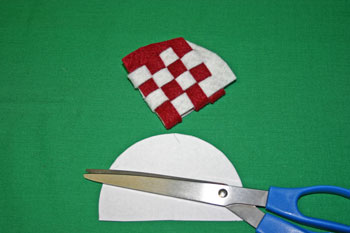
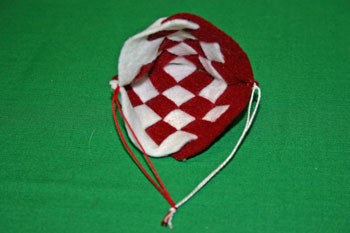
Cut a curve around the opening of the Easy Christmas Crafts Felt Basket Ornament either free-hand or using a semi-circular template.
To make a paper template semi-circle, use a round object such as a can or a dish roughly four inches in diameter.
Draw the edge on a scrap piece of paper and cut around the drawn edge.
Next, use the rounded template edge to cut around the opening of the basket.
To make a paper template semi-circle, use a round object such as a can or a dish roughly four inches in diameter.
Draw the edge on a scrap piece of paper and cut around the drawn edge.
Next, use the rounded template edge to cut around the opening of the basket.
Thread one piece of the yarn through the needle.
Push the needle through the edge of the Easy Christmas Crafts Felt Basket Ornament.
As an alternative, make a small hole with the point of your scissors and push the yarn through the hole.
Push the needle through the edge of the Easy Christmas Crafts Felt Basket Ornament.
As an alternative, make a small hole with the point of your scissors and push the yarn through the hole.

Once through the felt, remove the needle.

Tie a simple knot in the yarn at the edge of the woven basket.
Perform the same steps for the second piece of yarn and the other side of the Easy Christmas Crafts Felt Basket Ornament.
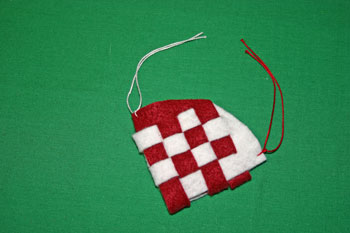
Tie a knot in the ends of the yarn to form the hanging loop.
Fill the Easy Christmas Crafts Felt Basket Ornament with the goodies of your choice.
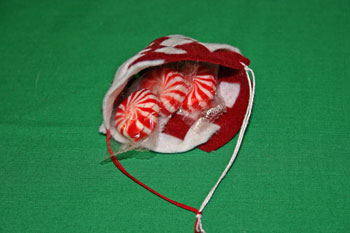
Now, hang your finished goody bag on your Christmas tree.

As an alternative, this picture shows a blue and silver (gray) version of the Easy Christmas Crafts Felt Basket Ornament filled with silver wrapped candies.

Or, instead of two colors, how about a dark red Easy Christmas Crafts Felt Basket Ornament filled with silver candies.

Of course, here's the traditional red and green Easy Christmas Crafts Felt Basket Ornament.
People of all ages can enjoy this easy Christmas crafts project for a felt basket ornament.
This simple project is fun, fast and rewarding for anyone to do.
Have fun!
The inexpensive materials and tools along with the easy steps allow you to make several of the Easy Christmas Crafts Felt Basket Ornament to enjoy in your home or to give away.
This simple project is fun, fast and rewarding for anyone to do.
Have fun!
The inexpensive materials and tools along with the easy steps allow you to make several of the Easy Christmas Crafts Felt Basket Ornament to enjoy in your home or to give away.


funEZcrafts
Welcome
Come on in and stay awhile...

funEZcrafts
Welcome
Come on in and stay awhile...