Easy Felt Crafts: Jewelry Roll
Does your jewelry become a tangled mess?
Do you travel and want to keep your jewelry safely tucked in a corner of your suitcase or perhaps in your purse if you are checking your luggage in an airport.
Here's an easy felt crafts project showing how to make a jewelry roll with pockets to keep your jewelry secure and untangled.
Take a look at this easy felt crafts project that uses simple inexpensive materials and tools.
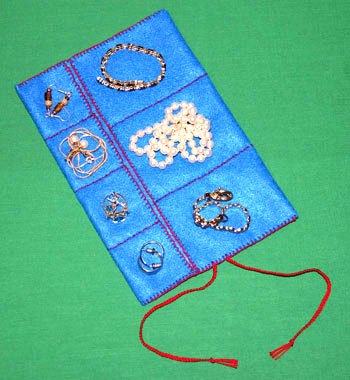
Place the items in the individual pockets:

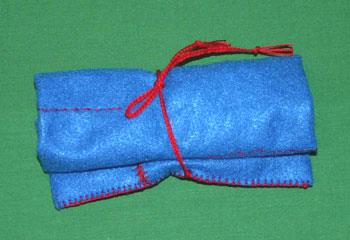
Now, take a look at the jewelry rolled into a secure compact form:
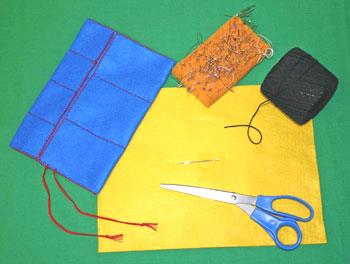
Easy Felt Crafts: Jewelry Roll Materials and Tools:
Craft felt (your favorite color) 9 in x 12 in
Yarn (size 3 or size 10 crochet yarn both work great)
Yarn darner needle (a pack of size 14 to 18 gives you alternatives)
Pins (straight or safety)
Scissors
Yarn (size 3 or size 10 crochet yarn both work great)
Yarn darner needle (a pack of size 14 to 18 gives you alternatives)
Pins (straight or safety)
Scissors
The Steps for How to Make the Easy Felt Crafts: Jewelry Roll:
Choose the colors and collect the materials for your jewelry roll.
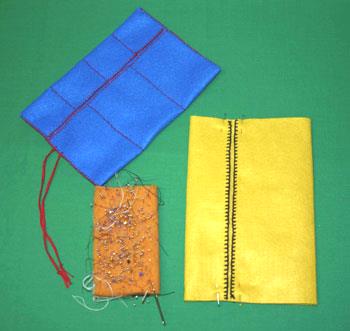
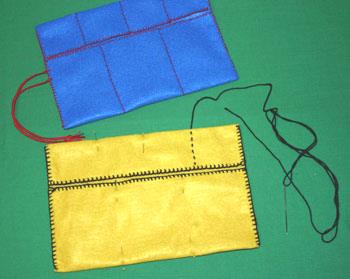
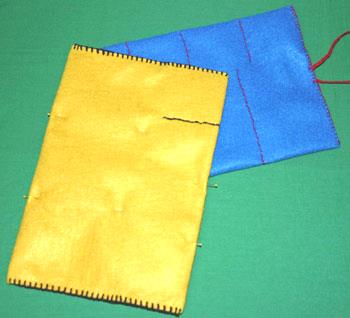
First, sew a blanket stitch across each of the 9 inch ends. (The free e-book of How to Sew Stitches helps with basic stitches.)
Craft felt does not ravel, but the blanket stitch provides both a finished look and a stable edge to the openings where the jewelry will go.
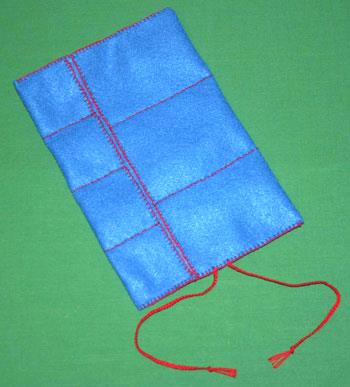
At the end of step 1, the picture below shows the "wrong" side facing up.
Craft felt does not have a right or wrong side, however the beginning knot and the hidden end threads become the "wrong" side.
Make sure you put the knots and hidden threads on the same side as you sew the two ends.
Craft felt does not ravel, but the blanket stitch provides both a finished look and a stable edge to the openings where the jewelry will go.
At the end of step 1, the picture below shows the "wrong" side facing up.
Craft felt does not have a right or wrong side, however the beginning knot and the hidden end threads become the "wrong" side.
Make sure you put the knots and hidden threads on the same side as you sew the two ends.

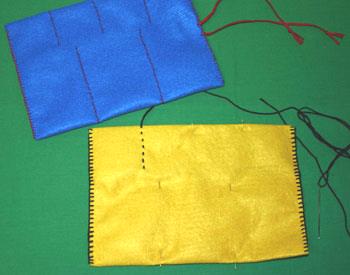
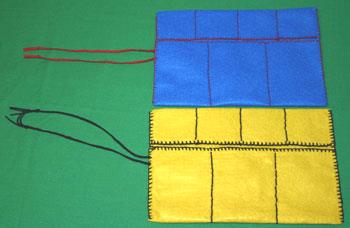
Now, fold the craft felt ends to meet in the middle such that one end is roughly one third of the distance, and the other is roughly two thirds.
Leave a small space, 1/8 to 1/4 inch, between the stitched ends.
If your craft felt is 9 x 12, the one third side will be two inches and the two thirds side will be four inches minus the small gap you leave.
Pin the ends to hold them in place.
Leave a small space, 1/8 to 1/4 inch, between the stitched ends.
If your craft felt is 9 x 12, the one third side will be two inches and the two thirds side will be four inches minus the small gap you leave.
Pin the ends to hold them in place.
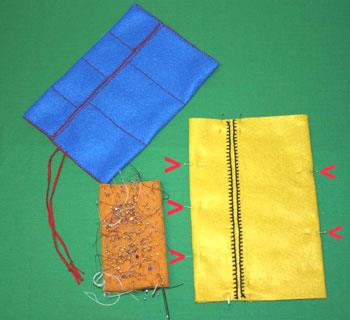
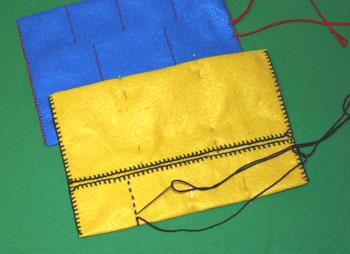
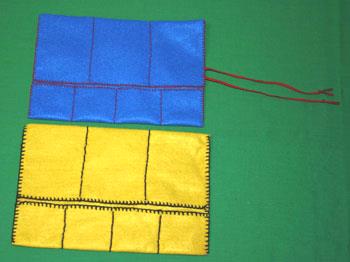
Next, divide the short side into four separate pockets.
Rather than hunt for a ruler or measuring tape, fold the ends to the middle to halve the side, place a pin at the fold point.
Unfold, then fold the end to the pin you just placed at the halfway point.
The new fold point is the quarter point, place a pin at the fold.
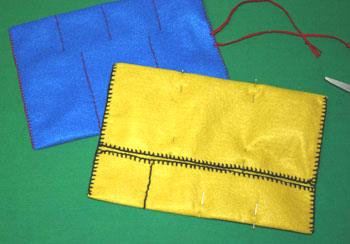
Do the same for the other end. For the large side, perform an accordion fold to divide the area into three equal parts.
Place pins at the two fold points. See the pins in the picture below.
Rather than hunt for a ruler or measuring tape, fold the ends to the middle to halve the side, place a pin at the fold point.
Unfold, then fold the end to the pin you just placed at the halfway point.
The new fold point is the quarter point, place a pin at the fold.
Do the same for the other end. For the large side, perform an accordion fold to divide the area into three equal parts.
Place pins at the two fold points. See the pins in the picture below.
In the next step, blanket stitch across the narrow ends to enclose the end pockets.
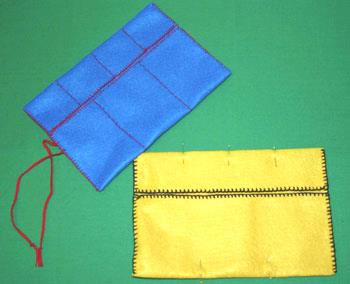
Now, let's make the individual pockets on each side using a double running stitch.
The running stitch is just a simple in and out stitch.
It becomes double when you turn around at the finish in one direction to stitch in the opposite direction overlapping your running stitches.
Take a look at this series of pictures to see the simple stitches:
The running stitch is just a simple in and out stitch.
It becomes double when you turn around at the finish in one direction to stitch in the opposite direction overlapping your running stitches.
Take a look at this series of pictures to see the simple stitches:
This finishes the running stitch in one direction.
Now, start the stitches in the opposite direction.
Make sure you go in and out of the material such that your stitches fill in the blank areas of the first run of stitches - on both the front and back.
Now, start the stitches in the opposite direction.
Make sure you go in and out of the material such that your stitches fill in the blank areas of the first run of stitches - on both the front and back.
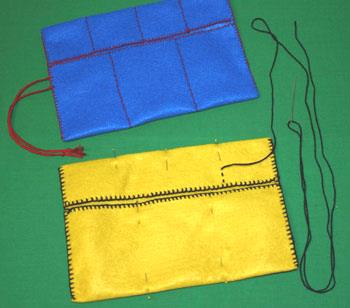
Continue the double running stitch to make all of the individual pockets.
To finish your jewelry roll, attach two ties near the middle of one end.
The ties for these two jewelry rolls include loose strands of yarn securely attached then braided.
The braid is 6.5 inches to the knot and 3/4 inch of fringe at the end for a total of 7.25 inches.
The ties for these two jewelry rolls include loose strands of yarn securely attached then braided.
The braid is 6.5 inches to the knot and 3/4 inch of fringe at the end for a total of 7.25 inches.
Your new jewelry roll will protect your jewelry and keep it from tangling.
Of course, this set of pockets can be used for other things as well.
What about in your briefcase for those small items?
Maybe the pockets need to be different sizes to hold thumb drives and wireless communications devices for your laptop and your phone.
Now that you have the basics, you can get creative to solve your organizational needs.
Enjoy!


funEZcrafts
Welcome
Come on in and stay awhile...

funEZcrafts
Welcome
Come on in and stay awhile...