Easy Christmas Crafts: Ribbon Tree Package Tag
This Easy Christmas Crafts Ribbon Tree Package Tag can add a cute decoration to packages and can serve as a from/to tag as well.
It's fun and easy to make several of these little tags using color paper and 1/4 inch wide ribbon. Add some fun and whimsy to your gifts.
This is a great project to do with children. Adults can cut the shapes, and little fingers can more easily weave the ribbon to make the tree design. Plus, if you don't have color paper, the children can have fun coloring the shapes.
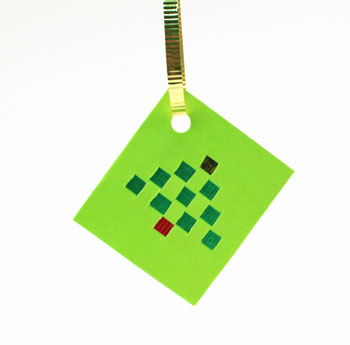
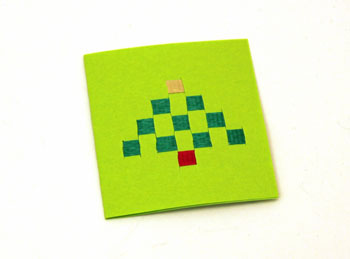
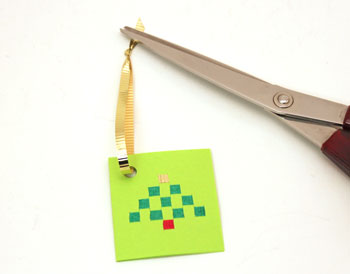
Let's look at a finished package tag.
It's fun and easy to make several of these little tags using color paper and 1/4 inch wide ribbon. Add some fun and whimsy to your gifts.
This is a great project to do with children. Adults can cut the shapes, and little fingers can more easily weave the ribbon to make the tree design. Plus, if you don't have color paper, the children can have fun coloring the shapes.
Let's look at a finished package tag.
This Easy Christmas Crafts Ribbon Tree Package Tag can be made quickly and easily and add a fun touch to gifts for the holidays.
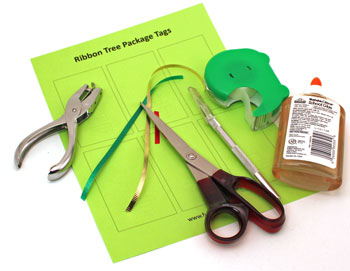
Easy Christmas Crafts: Ribbon Tree Package Tag Materials and Tools:
Paper 8 1/2 by 11 inches
Ribbon - gold 1/4 inch wide ribbon (curling ribbon works great); 10 inches long
Ribbon - green 1/4 inch wide ribbon; 5 inches long
Ribbon - red 1/4 inch wide ribbon; 1 inch long
Glue (stick glue works best)
Tape
Scissors
Craft knife (can use sharp kitchen knife)
Hole punch
Pattern (Easy Christmas Crafts Ribbon Tree Package Tag pattern)
Cutting board or self-healing mat - not shown
Take a look at the simple materials and tools shown here. The paper is inexpensive printer paper, but other papers can be used as well.
Crafty Caution: I show liquid glue in the materials picture. If you use liquid glue, be careful to use only a small amount. I was too generous with the glue and had to throw away the results. I found a simple glue stick to be a much better choice.
Crafty Caution: I show liquid glue in the materials picture. If you use liquid glue, be careful to use only a small amount. I was too generous with the glue and had to throw away the results. I found a simple glue stick to be a much better choice.
The Steps for How to Make the Easy Christmas Crafts: Ribbon Tree Package Tag:
Print the Easy Christmas Crafts Ribbon Tree Package Tag pattern.
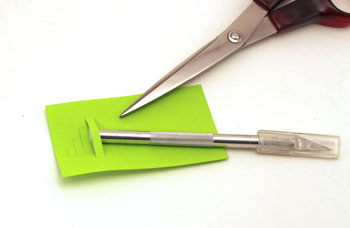
Cut around the rectangular shapes.
Cut along the vertical lines of the tree shape.
Use a cutting board or self-healing mat as a background when making the cuts. A straight edge such as a ruler can help you keep the vertical cuts straight.
Cut around the rectangular shapes.
Cut along the vertical lines of the tree shape.
Use a cutting board or self-healing mat as a background when making the cuts. A straight edge such as a ruler can help you keep the vertical cuts straight.
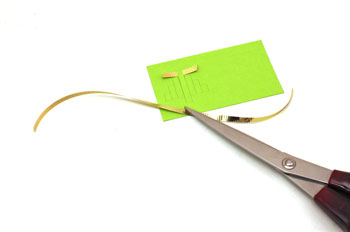
Weave a short piece, 1-inch, of the gold ribbon at the top of the tree shape.
Weave the ribbon on the printed side of the shape.
Weave the ribbon on the printed side of the shape.
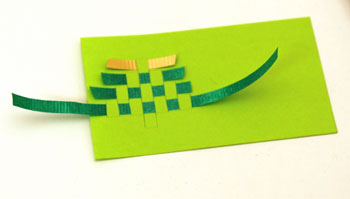
Next, weave the first green ribbon of the tree shape.

Add the second row of green ribbon adjacent to the first by weaving over and under the strips of the paper tree shape.
The third row of the green ribbon is more difficult to weave since it is at the end of several of the vertical cuts.
Bend and push the ribbon as necessary to weave it through the cut lines.
Pull the ribbon through the cuts such that any crumpled ribbon does not show in the weave.
Bend and push the ribbon as necessary to weave it through the cut lines.
Pull the ribbon through the cuts such that any crumpled ribbon does not show in the weave.
Add the short piece of red ribbon to the base of the ribbon tree.
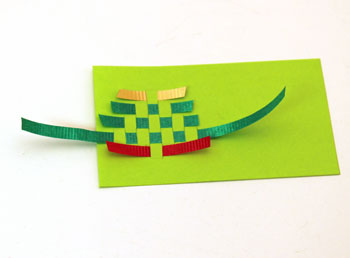
Position the ribbons such that each is parallel to the adjacent ribbons and vertical to the cut paper strips.
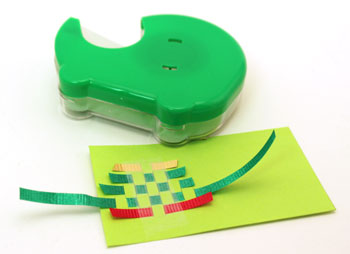
Place a piece of tape across all of the ribbons down the center to hold them in position.
Place a piece of tape across all of the ribbons down the center to hold them in position.
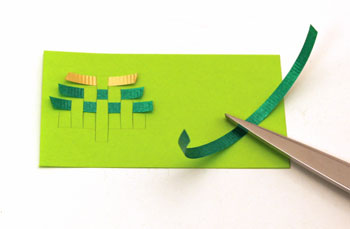
Trim the ends of the ribbons.
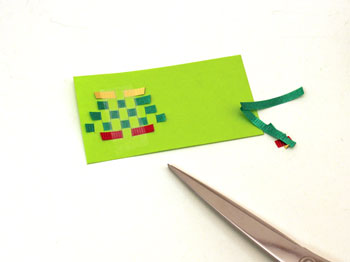
Fold the paper in half. Add glue to the plain half opposite the woven ribbons.
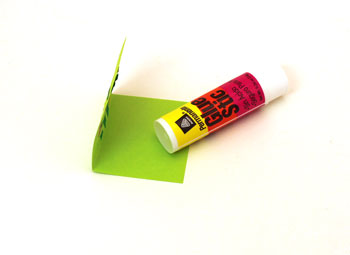
Allow the glue to dry to make the next step easier.
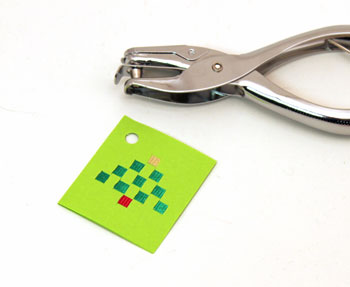
Punch a hole in the upper corner of the package tag.
Add the remaining gold ribbon, or roughly 9 inches, through the punched hole.
Tie a knot in the ribbon ends to form a loop.
Trim the ribbon ends at an angle.
Tie a knot in the ribbon ends to form a loop.
Trim the ribbon ends at an angle.
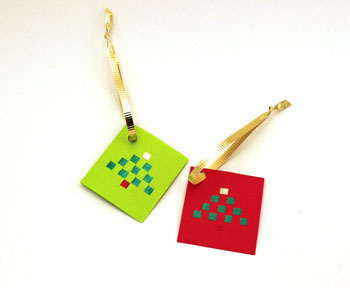
Here, the finished green ribbon tree package tag and a similar one in red are ready to add to a gift.
The back of each easily holds a to/from address or holiday wishes.
The back of each easily holds a to/from address or holiday wishes.
The little woven ribbon tree can also be a simple little holiday decoration for an office, an addition inside a holiday card or even made into a simple little garland.
Simple materials and simple tools makes this a fun and easy project.
Have fun!
The inexpensive and Easy Christmas Crafts Ribbon Tree Package Tag can be fun for families, for church groups and for senior centers.
Simple materials and simple tools makes this a fun and easy project.
Have fun!
The inexpensive and Easy Christmas Crafts Ribbon Tree Package Tag can be fun for families, for church groups and for senior centers.


funEZcrafts
Welcome
Come on in and stay awhile...

funEZcrafts
Welcome
Come on in and stay awhile...