Easy Christmas Crafts: Button and Lace Ornament
A perfect solution for those short bits of lace and odd buttons, make this fun and easy button and lace ornament.
Yes, a needle and thread are involved, but the stitches are "sew" simple to do.
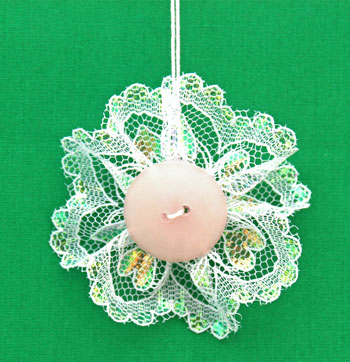
Here's one of the button and lace ornaments on display.
Yes, a needle and thread are involved, but the stitches are "sew" simple to do.
Here's one of the button and lace ornaments on display.
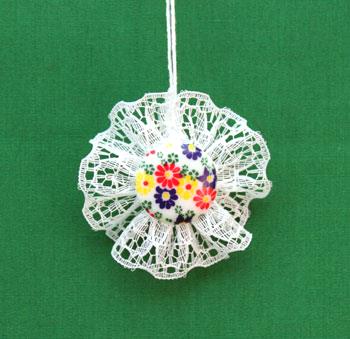
This ornament is small and would add a surprising little touch tucked into a small spot on the Christmas tree.
Or make several different button and lace ornaments and scatter them throughout your decorations.
Or make several different button and lace ornaments and scatter them throughout your decorations.
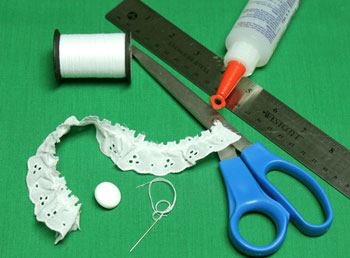
Easy Christmas Crafts: Button and Lace Ornament Materials and Tools:
Lace - 5 to 9 inches long and between 5/8 inch to 1 1/8 inches wide (gathered lace can be shorter in length while flat and or wider lace needs to be longer)
Yarn - 10 inches long (not shown, forgot to include it in the photo)
Button 5/8 inch to 7/8 inch wide
Sewing thread
Needle
Ruler
Scissors
Glue
Yarn - 10 inches long (not shown, forgot to include it in the photo)
Button 5/8 inch to 7/8 inch wide
Sewing thread
Needle
Ruler
Scissors
Glue
Take a look at the simple materials and tools shown here.
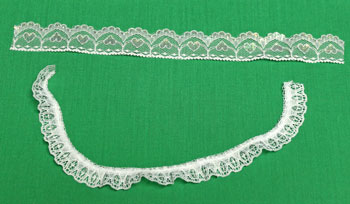
This picture compares gathered lace to flat lace.
One side of the lace should be straight and the other scalloped.
One side of the lace should be straight and the other scalloped.
The Steps for How to Make the Easy Christmas Crafts: Button and Lace Ornament:
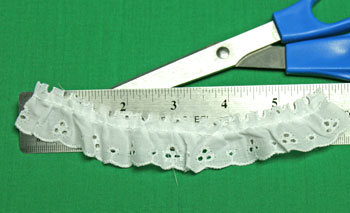
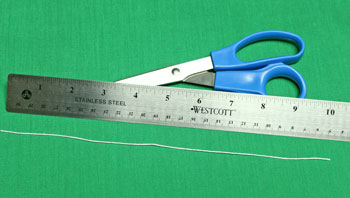
Measure and cut the lace.
This lace is gathered and one inch wide. I used six inches.
This lace is gathered and one inch wide. I used six inches.
Fold the lace in half with the right sides together.
Match the two cut ends from side to side.
Sew the two ends together with a 1/8 to 1/4 inch seam using small running stitches.
Match the two cut ends from side to side.
Sew the two ends together with a 1/8 to 1/4 inch seam using small running stitches.
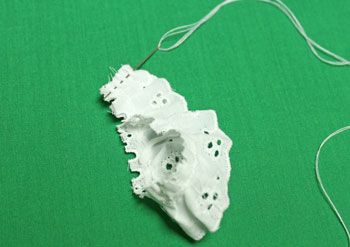
At the end of the short seam, make sure the lace seam lies flat.
Anchor the seam by making several stitches in one place before tying a knot near the lace.
Cut the thread.
Anchor the seam by making several stitches in one place before tying a knot near the lace.
Cut the thread.
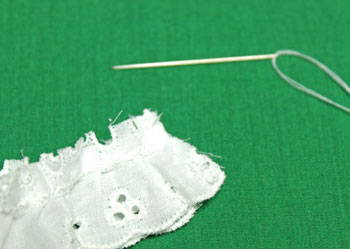
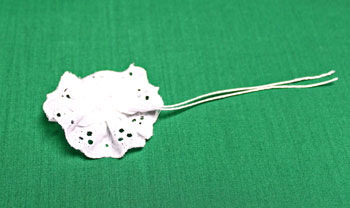
Sew running stitches along the straight edge of the lace.
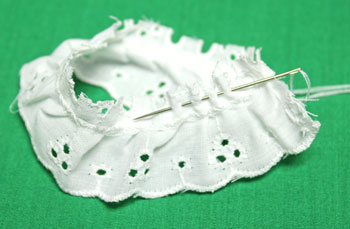
These running stitches should follow the straight edge to complete the circle back at the seam.
The thread ends should be on the back or wrong side of the lace.
These running stitches should follow the straight edge to complete the circle back at the seam.
The thread ends should be on the back or wrong side of the lace.
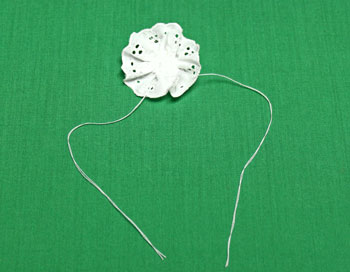
Gently pull the thread ends to form a gathered circle of lace.
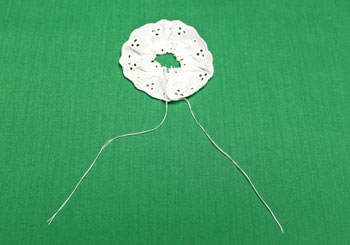
Pull the threads firmly and tie the ends using a square or hard knot. Be careful not to break the thread.
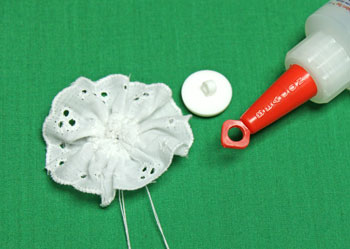
Add glue to the back of the button.
Make sure the glue does not fill the shank or the button's eyes.
Make sure the glue does not fill the shank or the button's eyes.
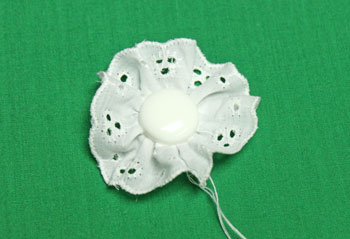
Position the button over the center of the front or right side of the gathered lace circle.
If the button has a shank like this button, push the shank through the center of the lace.
Trim the threads from the gathering step being careful not to cut the knot.
If the button has a shank like this button, push the shank through the center of the lace.
Trim the threads from the gathering step being careful not to cut the knot.
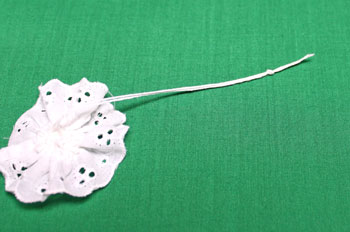
Cut a 10-inch piece of yarn.
Thread the yarn through the button's shank or the button's eyes.
Pull the ends of the yarn on the back side of the ornament until they are even.
Pull the ends of the yarn on the back side of the ornament until they are even.
Tie a knot in the ends of the yarn to form the hanging loop.
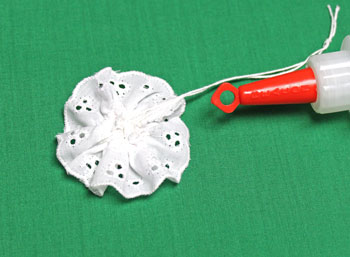
Add a small drop of glue on the seam on the back side of the lace circle.
Pull the yarn along the seam line and press into the glue.
Pull the yarn along the seam line and press into the glue.
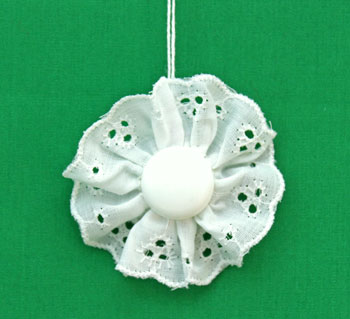
The little Button and Lace Ornament is ready to display.
This one used a flat and wider lace with an iridescent sheen and a two-eyed button.
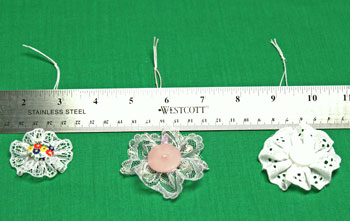
Here, you can see the three different ornaments, their variety and their small size.
The left ornament used five inches of 5/8 inch slightly gathered lace (see photo above). The finished ornament is 1 3/4 inches wide.
The middle ornament used nine inches of 1 1/8 inch flat lace (see photo above). Its finished size is 2 1/4 inches wide.
The right ornament used six inches of 1 inch slightly gathered eyelet lace. It is 2 inches wide.
A bit of lace, an odd button and a short length of yarn quickly turn into a small and charming decoration.
Have fun!
Just a few inexpensive materials and tools and a small amount of time turn into this Button and Lace Ornament. It adds beauty to a tree, to a gift package or to a table setting as napkin rings.
Have fun!
Just a few inexpensive materials and tools and a small amount of time turn into this Button and Lace Ornament. It adds beauty to a tree, to a gift package or to a table setting as napkin rings.


funEZcrafts
Welcome
Come on in and stay awhile...

funEZcrafts
Welcome
Come on in and stay awhile...
© Copyright funEZcrafts, 2008-2023. All Rights Reserved.
Disclaimer: funEZcrafts includes advertisements and links to advertisement and affiliate sites. These sites use cookies. By clicking through to an affiliate site, you understand that cookies could be placed on your computer. funEZcrafts receives a small stipend from these affiliate and advertisement sites. Thank you! Those funds help with the maintenance and addition of funEZcrafts projects.
Disclaimer: funEZcrafts includes advertisements and links to advertisement and affiliate sites. These sites use cookies. By clicking through to an affiliate site, you understand that cookies could be placed on your computer. funEZcrafts receives a small stipend from these affiliate and advertisement sites. Thank you! Those funds help with the maintenance and addition of funEZcrafts projects.
© Copyright funEZcrafts, 2008-2023. All Rights Reserved.
Christmas Project Image Menus: