Easy Christmas Crafts: Felt Cathedral Window Ornament
The Felt Cathedral Window ornament uses a variation of a simple quilting technique and is fun and easy using inexpensive materials and tools.
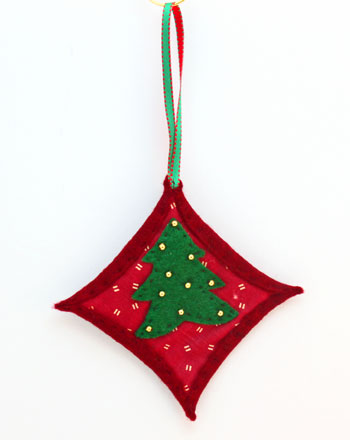
Here's a burgundy and green version with gold beads as ornaments:
Here's a burgundy and green version with gold beads as ornaments:
The Felt Cathedral Window Ornament is "sew" simple to make.
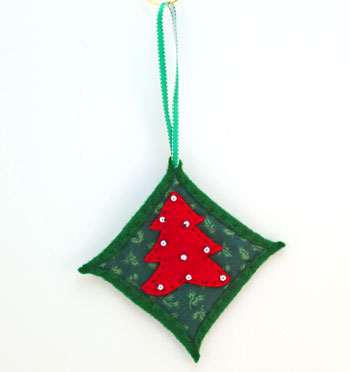
Let's make one using a green background for a red tree.
Let's make one using a green background for a red tree.
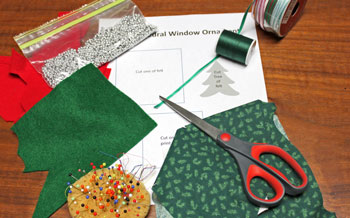
Easy Christmas Crafts: Felt Cathedral Window Ornament Materials and Tools:
Craft felt - one or two colors
Fabric scrap
Small beads (seed beads or slightly larger)
Ribbon, 1/4-inch wide
Thread
Needle
Pins
Scissors
Felt Cathedral Window Ornament pattern (click to open PDF file)
Fabric scrap
Small beads (seed beads or slightly larger)
Ribbon, 1/4-inch wide
Thread
Needle
Pins
Scissors
Felt Cathedral Window Ornament pattern (click to open PDF file)
Take a look at the simple materials and tools shown here.
The Steps for How to Make the Easy Christmas Crafts: Felt Cathedral Window Ornament:
Print the Felt Cathedral Window Ornament pattern.
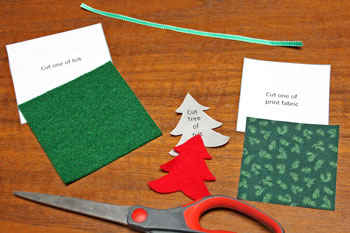
Cut out the shapes from the felt and fabric scraps.
This example uses two different colors of felt, however a version shown further below uses just one color of felt.
Cut the ribbon 8 to 10 inches long for the hanging loop. (I guessed at the length then measured - it was 8 inches long.)
Cut out the shapes from the felt and fabric scraps.
This example uses two different colors of felt, however a version shown further below uses just one color of felt.
Cut the ribbon 8 to 10 inches long for the hanging loop. (I guessed at the length then measured - it was 8 inches long.)
Thread the needle and add a knot in one end of the thread.
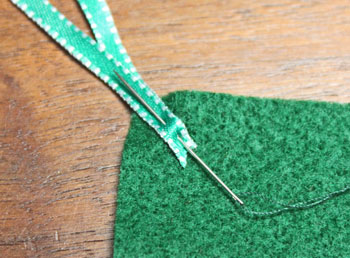
Fold the ribbon in half.
Overlap the cut ends on one corner of the felt square with roughly 1/2-inch from the corner.
Fold the ribbon in half.
Overlap the cut ends on one corner of the felt square with roughly 1/2-inch from the corner.
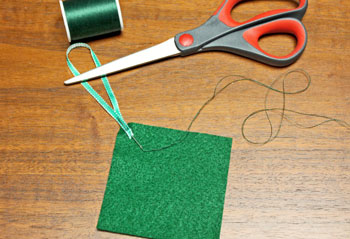
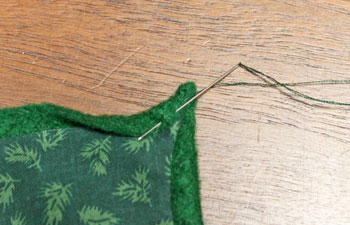
Begin sewing the ribbon ends to the corner of the felt.
Make several (2-3) stitches, one over the other, to hold the ribbon ends.
Run the needle from the last stitch to the outer corner of the felt.
Leave the needle and thread attached.
Make several (2-3) stitches, one over the other, to hold the ribbon ends.
Run the needle from the last stitch to the outer corner of the felt.
Leave the needle and thread attached.
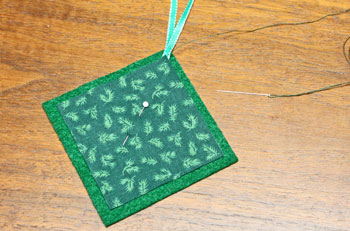
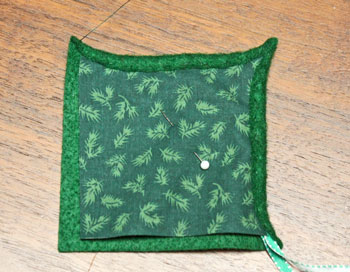
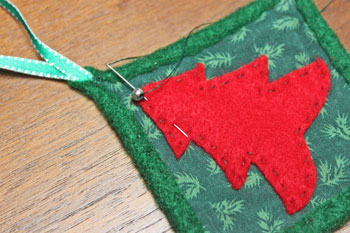
Position the fabric square over the felt with the right side facing upward.
Center the fabric over the felt - doesn't have to be exact.
It helps to use a pin to hold the fabric. Otherwise the fabric moves as you begin to sew.
Center the fabric over the felt - doesn't have to be exact.
It helps to use a pin to hold the fabric. Otherwise the fabric moves as you begin to sew.
This project uses the basic running stitch. It's a fast and easy stitch.
If you would like more help with the running stitch, go to the funEZ How to sew stitches page to get your own free e-book.
Fold over the corner of the felt into a "smile" shape and begin stitching.
If you would like more help with the running stitch, go to the funEZ How to sew stitches page to get your own free e-book.
Fold over the corner of the felt into a "smile" shape and begin stitching.
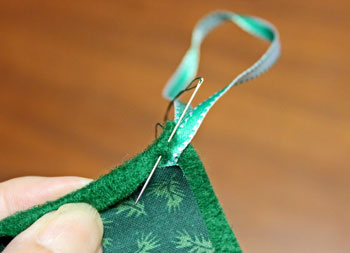
Use smaller stitches at the corners and longer stitches at the center of the "smile."
The resulting felt edge covers the raw edge of the fabric and forms a curve like a cathedral window.
The resulting felt edge covers the raw edge of the fabric and forms a curve like a cathedral window.
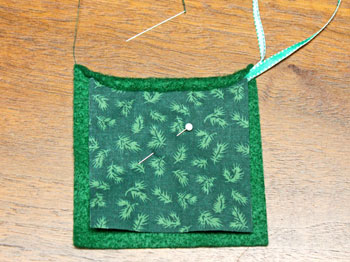
Continue with the second curved edge.
Form the point by making a small angular fold - the corner of the "smile."
Make smaller, closer stitches in the pointed area.
Form the point by making a small angular fold - the corner of the "smile."
Make smaller, closer stitches in the pointed area.
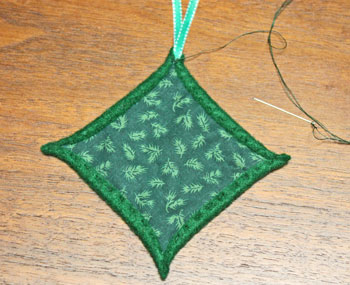
The two sewn edges form two of the curves that will frame the window for the tree.
Continue sewing the next two edges like the first two.
At the ribbon point, sew the felt together over the ribbon making sure to hide any fabric raw edges.
Form a knot in the thread close to the felt but do not cut the thread.
At the ribbon point, sew the felt together over the ribbon making sure to hide any fabric raw edges.
Form a knot in the thread close to the felt but do not cut the thread.
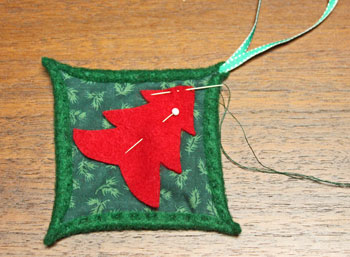
Position the tree shape over the Felt Cathedral Window ornament shape with the top of the tree at the ribbon point.
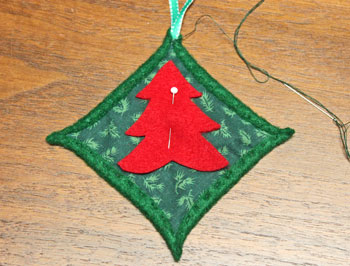
Make a hidden stitch behind the green fabric to position the needle at the top of the tree.
Begin sewing the tree shape to the fabric with small running stitches.
Begin sewing the tree shape to the fabric with small running stitches.
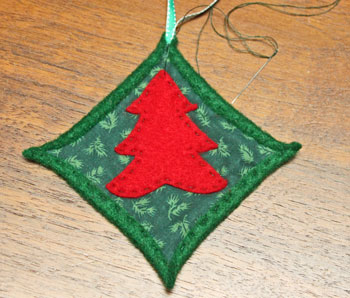
Continue with the running stitches around the tree shape close to its edge.
Knot the thread close to the felt of the tree at the last stitch but do not cut the thread.
Knot the thread close to the felt of the tree at the last stitch but do not cut the thread.
Begin sewing the beads to the tree shape.
Place the first bead at the top of the tree.
Use two stitches through the hole in the bead to hold it to the tree shape.
Push the needle under the tree shape to the position of the next bead.
Place the first bead at the top of the tree.
Use two stitches through the hole in the bead to hold it to the tree shape.
Push the needle under the tree shape to the position of the next bead.
Continue adding beads to the tree as ornaments.
After the last bead is attached, knot the thread close to the bead.
Push the needle between the fabric and felt to leave a tail of thread, 1/2 to 3/4 inch.
Pull the needle out of the project and cut the thread.
After the last bead is attached, knot the thread close to the bead.
Push the needle between the fabric and felt to leave a tail of thread, 1/2 to 3/4 inch.
Pull the needle out of the project and cut the thread.
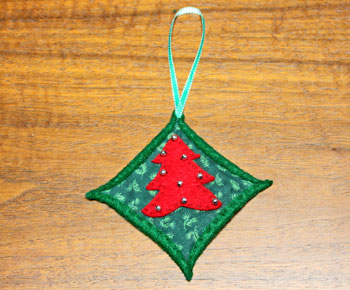
The Felt Cathedral Window ornament is finished and ready to hang on display.
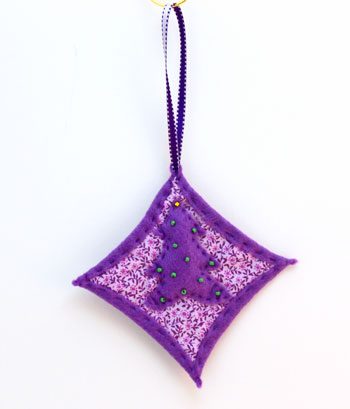
This next version used purple felt for the background and for the tree shape.
I also stuffed a small amount of polyfiberfill behind the tree shape, but I prefer the flat trees in the examples above.
These beads are seed beads, whereas the gold and silver beads in the first two examples are just slightly larger.
I also stuffed a small amount of polyfiberfill behind the tree shape, but I prefer the flat trees in the examples above.
These beads are seed beads, whereas the gold and silver beads in the first two examples are just slightly larger.
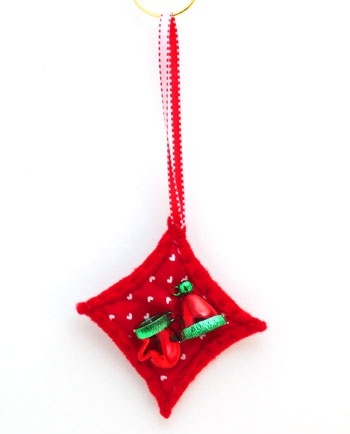
As another alternative, instead of a tree shape, you can attach miniature ornaments inside the "window."
This one includes a small hat and mitten.
This one includes a small hat and mitten.
Inexpensive craft felt, a fabric scrap, a piece of ribbon and some beads can quickly become a fun ornament.
Just a few basic tools and simple sewing steps makes this a fun and easy sewing project - even for the novice sewers.
Have fun!
The Felt Cathedral Window ornament can be fun addition to tree, a cabinet pull, a desk drawer pull or anywhere to brighten someone's day.
Just a few basic tools and simple sewing steps makes this a fun and easy sewing project - even for the novice sewers.
Have fun!
The Felt Cathedral Window ornament can be fun addition to tree, a cabinet pull, a desk drawer pull or anywhere to brighten someone's day.


funEZcrafts
Welcome
Come on in and stay awhile...

funEZcrafts
Welcome
Come on in and stay awhile...