Easy Christmas Crafts: Yarn and Felt Scallop Ornament
This Easy Christmas Crafts Yarn and Felt Scallop Ornament uses small pieces of felt, some wire and beads to make a fun little sea creature decoration.
This little scallop ornament is fun to do and makes a whimsical conversation piece. And, no sewing required.
This little scallop ornament is fun to do and makes a whimsical conversation piece. And, no sewing required.
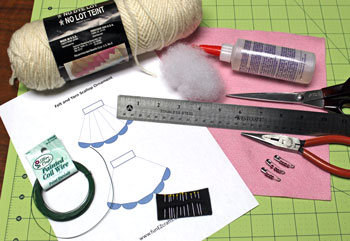
Easy Christmas Crafts: Yarn and Felt Scallop Ornament Materials and Tools:
Craft felt - pink (or color of your choice)
Wire - 24 gauge; four pieces, each 9 inches long
Yarn
Beads - 12 (shown here on safety pins so I won't lose them)
Glue
Poly fiberfill (or cotton ball)
Scissors
Ruler
Pins
Wire cutters or needle nose pliers
Pattern - Easy Christmas Crafts Yarn and Felt Scallop Ornament
Wire - 24 gauge; four pieces, each 9 inches long
Yarn
Beads - 12 (shown here on safety pins so I won't lose them)
Glue
Poly fiberfill (or cotton ball)
Scissors
Ruler
Pins
Wire cutters or needle nose pliers
Pattern - Easy Christmas Crafts Yarn and Felt Scallop Ornament
Take a look at the simple materials and tools shown here.
The Steps for How to Make the Easy Christmas Crafts: Yarn and Felt Scallop Ornament:
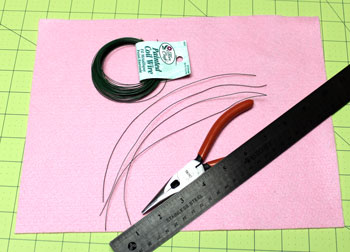
Cut four 9-inch pieces of the 24-gauge wire.
A slightly thicker wire would work. Just make sure the wire is flexible and will go through the felt easily.
A slightly thicker wire would work. Just make sure the wire is flexible and will go through the felt easily.
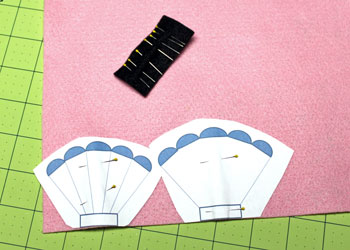
Print the Easy Christmas Crafts Yarn and Felt Scallop Ornament pattern.
Place and pin the shapes to the felt.
Note: The shapes are different sizes. The shape without the interior lines is the back and is slightly larger.
Cut out each of the shapes.
Position the pattern pieces to maximize the leftover felt for other projects.
Place and pin the shapes to the felt.
Note: The shapes are different sizes. The shape without the interior lines is the back and is slightly larger.
Cut out each of the shapes.
Position the pattern pieces to maximize the leftover felt for other projects.
With the pattern still pinned to the felt, insert each of the four wires into the felt shape at each end of the four inside lines.
Insert one end of a wire and add three beads before inserting the second end.
Make sure the wires enter the felt at least 1/8 inch from the scalloped edge of the felt.
Insert one end of a wire and add three beads before inserting the second end.
Make sure the wires enter the felt at least 1/8 inch from the scalloped edge of the felt.
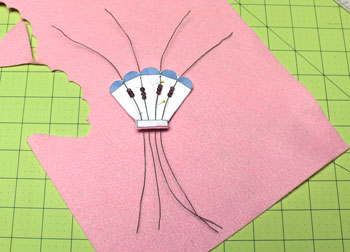
Twist the ends of the wires together to keep them from pulling out while working on the scallop ornament.
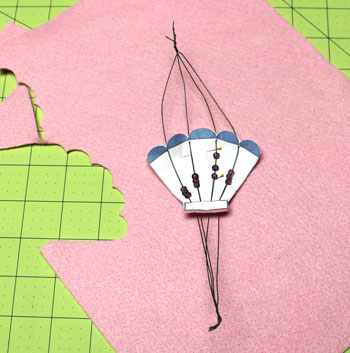
Tear away the paper pattern.
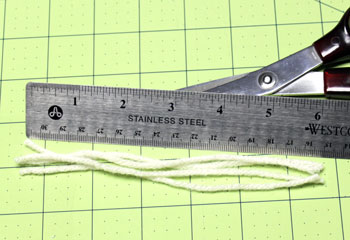
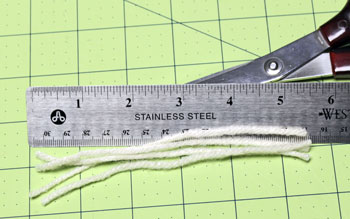
Cut four pieces of yarn six inches long.
Push all of the beads to the small end of the scallop.
Begin wrapping the yarn around the wires.
Being right handed, I worked from right to left.
I placed the yarn over the rightmost wire with 1 1/2 inches to the right.
I wrapped the longer end of the yarn under the wire and moved it over the adjacent wire.
I continued wrapping over and under until the yarn moved over the fourth wire.
However you choose to wrap the wires, just remain consistent as you add the remaining yarns.
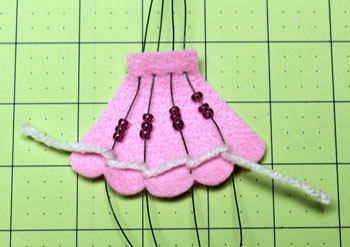
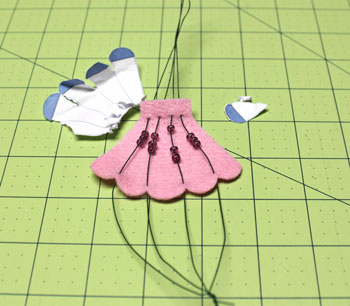
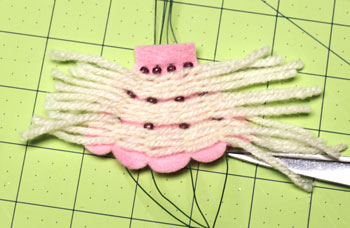
Wrap the next three yarns like the first.
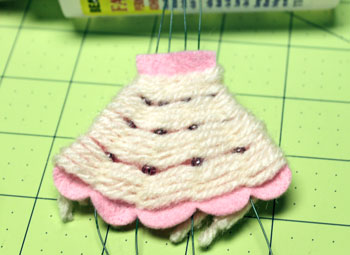
Push the first set of beads down to the wrapped yarn.
Push the first set of beads down to the wrapped yarn.
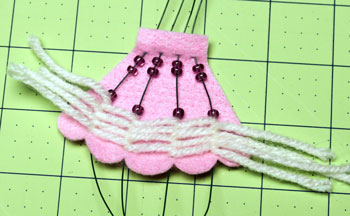
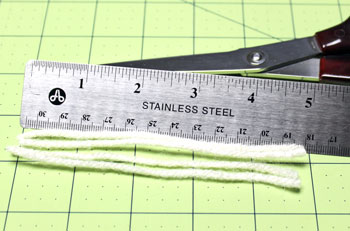
Cut four pieces of yarn five and one-half inches long.
Wrap these yarns around the wires using the same process as the first four.
Move the next set of beads down to the yarn.
Move the next set of beads down to the yarn.
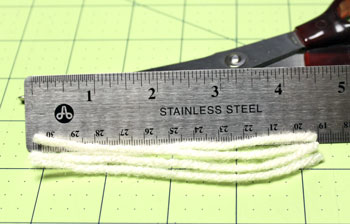
Cut four pieces of yarn five inches long.
Wrap these yarns around the wires in the same way as the earlier yarns.
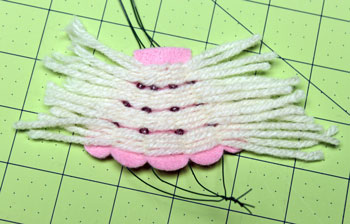
Push the last set of beads down to the yarn.
Push the last set of beads down to the yarn.
Cut the final four set of yarns four and one-half inches long.
Wrap the last four yarns using the same process as the earlier yarns.
Here's where it's important that the wires be flexible.
It's necessary to push the earlier yarns down the wires just to get the last few yarns wrapped.
Here's where it's important that the wires be flexible.
It's necessary to push the earlier yarns down the wires just to get the last few yarns wrapped.
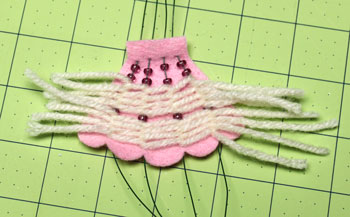
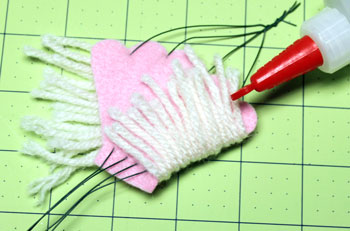
Wrap the yarns around the felt shape along one side.
Glue the yarns in place.
Glue the yarns in place.
Pull gently and wrap the other yarn ends of the yarns to the back.
Glue the yarns firmly in place.
Glue the yarns firmly in place.
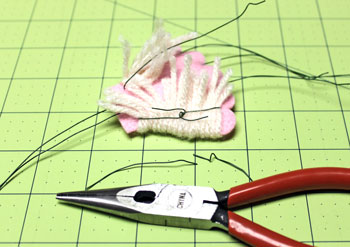
Untwist the wire ends.
Take each wire, one at a time, and fold each end to the back.
Make sure the scallop ornament remains flat when you fold.
Gently twist the wire ends together.
Cut the excess wire. Repeat for the remaining three wires.
Take each wire, one at a time, and fold each end to the back.
Make sure the scallop ornament remains flat when you fold.
Gently twist the wire ends together.
Cut the excess wire. Repeat for the remaining three wires.
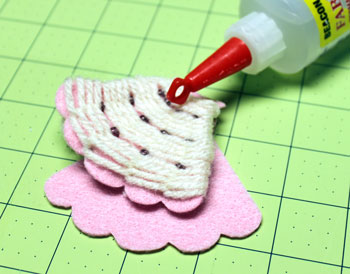
Place the woven scallop ornament over the back scallop.
The back scallop is slightly larger to accommodate the yarn and wires.
Center the scallops on the front over the back scalloped edge.
Glue the scalloped edges together.
Next, glue one of the straight sides together.
The back scallop is slightly larger to accommodate the yarn and wires.
Center the scallops on the front over the back scalloped edge.
Glue the scalloped edges together.
Next, glue one of the straight sides together.
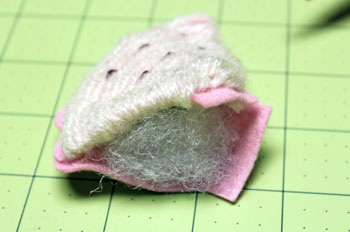
Insert fiberfill (or cotton from a cotton ball) between the wires and the back.
Glue the second set of long sides together.
Glue the second set of long sides together.
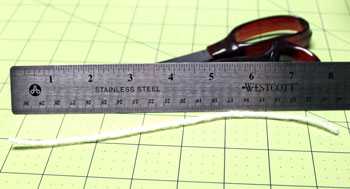
Cut a piece of yarn eight inches long.
Insert the yarn ends into the top of the scallop.
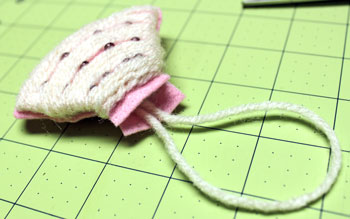
Glue the top edges together.
Make sure the yarn is securely glued.
If desired, you can trim the scalloped edges even with each other.
The layers seem more organic, so I left them uneven.
Make sure the yarn is securely glued.
If desired, you can trim the scalloped edges even with each other.
The layers seem more organic, so I left them uneven.
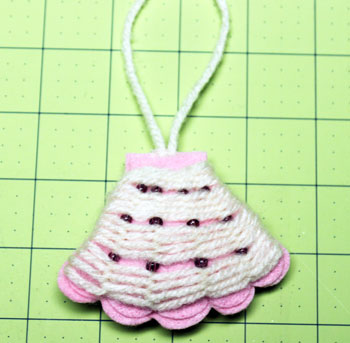
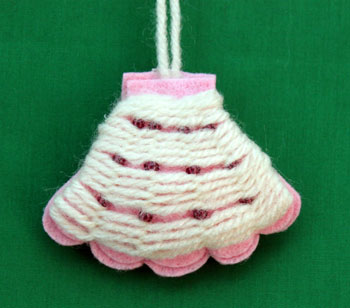
Here's the pretty little Yarn and Felt Scallop Ornament finished and hanging on display.
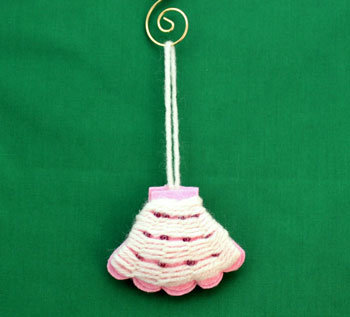
This fun and easy little scallop ornament takes a little time, not a lot, but it becomes a whimsical little sea creature decoration.
Use different colors of felt, beads and yarn to make several ornaments.
Have fun making one or many!
A few inexpensive materials and tools makes this Easy Christmas Crafts Yarn and Felt Scallop Ornament simple, fun, and inexpensive for anyone to do.
Use different colors of felt, beads and yarn to make several ornaments.
Have fun making one or many!
A few inexpensive materials and tools makes this Easy Christmas Crafts Yarn and Felt Scallop Ornament simple, fun, and inexpensive for anyone to do.


funEZcrafts
Welcome
Come on in and stay awhile...

funEZcrafts
Welcome
Come on in and stay awhile...