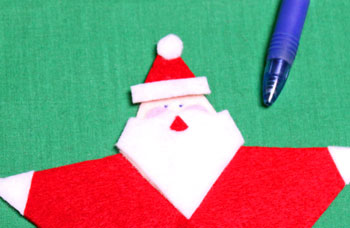
Easy Christmas Crafts: 5 Point Star Santa Ornament
A piece of stiff paper, cardstock or poster board and small pieces of felt become this fun and whimsical 5 point star Santa ornament.
This would be a great group project especially if the goal is several of the ornaments.
This would be a great group project especially if the goal is several of the ornaments.

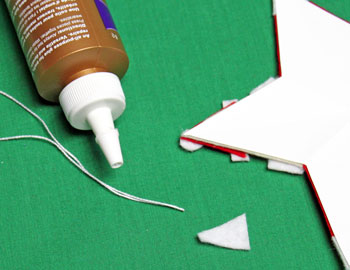
Easy Christmas Crafts: 5 Point Star Santa Ornament Materials and Tools:
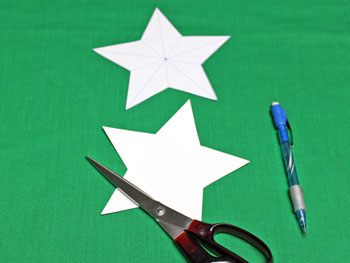
Craft felt - small pieces of red, white, antique white, pink, cashmere and black
Stiff paper, cardstock or poster board (I used 48 pound paper)
White yarn - 10 to 12 inches
Glue (I used a Tacky Glue)
Scissors
Pencil (oops, forgot to include in picture)
Pen (forgot this too)
Pattern - 5 Point Star Santa Ornament
Stiff paper, cardstock or poster board (I used 48 pound paper)
White yarn - 10 to 12 inches
Glue (I used a Tacky Glue)
Scissors
Pencil (oops, forgot to include in picture)
Pen (forgot this too)
Pattern - 5 Point Star Santa Ornament
Take a look at the simple materials and tools shown here.

The Steps for How to Make the Easy Christmas Crafts: 5 Point Star Santa Ornament:
Print the 5 Point Star Santa Ornament pattern.
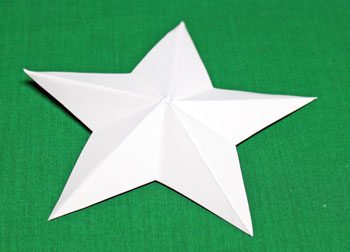
Cut around the plain star shape.
Draw around the star pattern on stiff paper, card stock or poster board.
Cut the star background.
Cut around the plain star shape.
Draw around the star pattern on stiff paper, card stock or poster board.
Cut the star background.
This step is optional depending on how thick the background paper is.
Fold the star with "mountains" along the star points and "valleys" in between the points.
Fold the star with "mountains" along the star points and "valleys" in between the points.
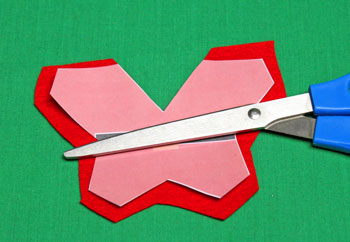
Cut out the beard and mustache from the pattern as one piece and the red suit including the belt as another piece.
For the rest of Santa, use the pattern as a guide.
Cut the red suit from the red craft felt but only be exact on the neck portion.
Cut extra felt around the rest of the pattern.
For the rest of Santa, use the pattern as a guide.
Cut the red suit from the red craft felt but only be exact on the neck portion.
Cut extra felt around the rest of the pattern.
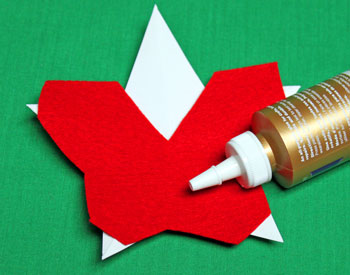
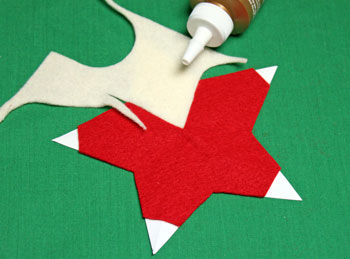
Flatten the star (if you folded it).
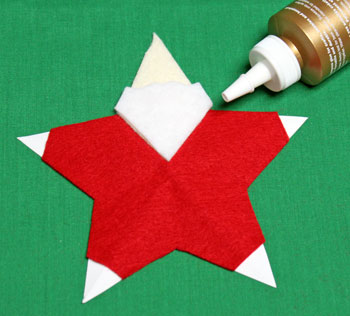
Glue the red suit over the star.
Be careful not to glue all the way to the edge at the "hands" and "feet."
Glue the red suit over the star.
Be careful not to glue all the way to the edge at the "hands" and "feet."
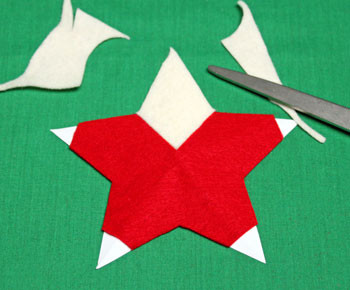
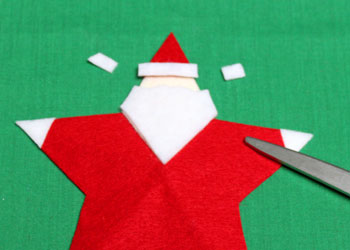
Turn the star over and trim away the excess felt using the edge of the paper star as a guide.

On the right side, use the red suit pattern to trim the edges at the "hands" and "feet."
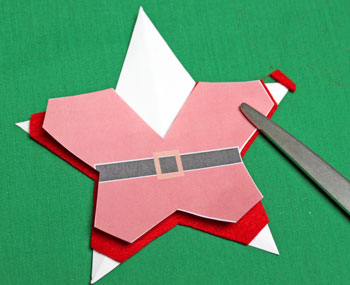
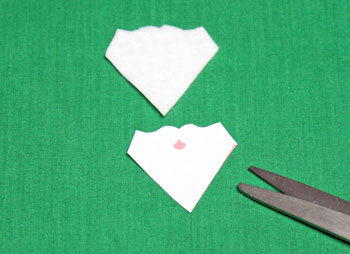
Use the beard and mustache section of the pattern to determine the angle at the bottom of the antique white craft felt for the face.
Just trim the bottom angle.
Just trim the bottom angle.
Glue the antique white craft felt over the whole of the top point of the star.
Turn the star over and trim away the excess felt.
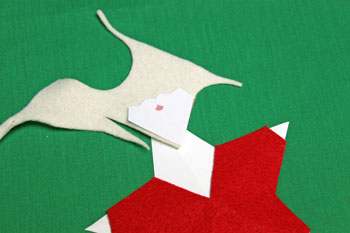
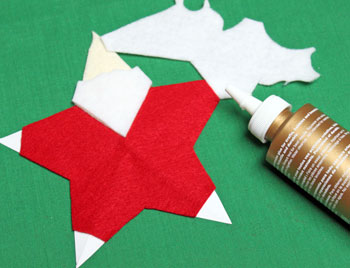
For Santa's beard and mustache, use the pattern to cut the shape from white felt.
Glue the beard and mustache's white felt over the antique white craft felt matching the edges and the point.
Match a straight edge of the white felt to each arm and glue. Turn the star over to cut away the excess felt.
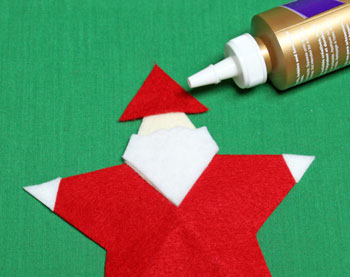
Place a piece of red felt with a straight edge over the top of the "face" for Santa's red hat.
Glue the red felt to the antique white felt.
Turn the star over and trim away the excess red felt.
Glue the red felt to the antique white felt.
Turn the star over and trim away the excess red felt.
Cut a strip of white felt roughly 1/4 inch wide and longer than the hat's bottom edge.
Glue the white felt strip to the edge of the red to make the white band around Santa's hat.
Trim the edges.
Glue the white felt strip to the edge of the red to make the white band around Santa's hat.
Trim the edges.
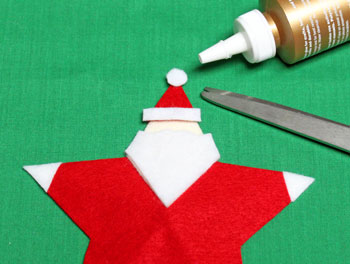
Cut a small circle of white felt and glue it to the top of Santa's hat.
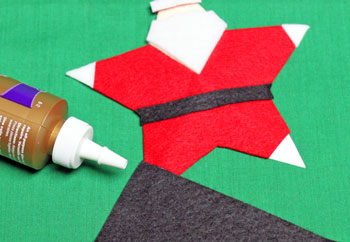
Cut a strip of black felt 3/8 inch wide and longer than the distance across the star for Santa's belt.
Glue the black felt to the red felt.
Glue the black felt to the red felt.
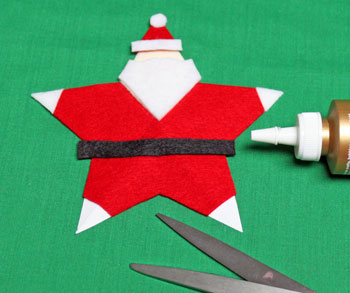
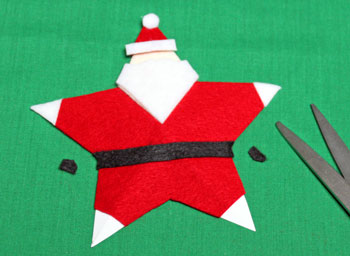
Trim the edges of the black felt.
Place a straight edge of black felt over each of the two legs.
Glue the felt in place.
Turn the star over and trim away the excess felt.
Glue the felt in place.
Turn the star over and trim away the excess felt.
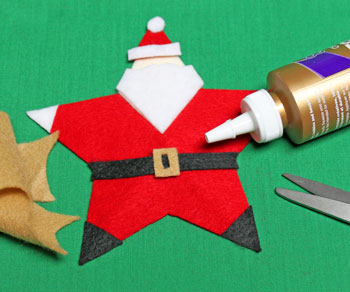
Cut a small rectangle from the cashmere craft felt 3/8 inch wide and 1/2 inch long.
Cut out the center to make the belt buckle.
Glue the belt buckle over the belt.
Cut out the center to make the belt buckle.
Glue the belt buckle over the belt.
Cut a small scrap of red felt for Santa's mouth.
Cut a triangle shape for the top and curve the bottom.
Cut a triangle shape for the top and curve the bottom.
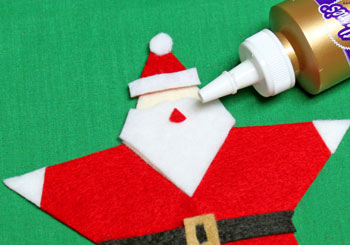
Cut a small circle of pink felt.
Cut the circle in half.
Glue one on either side for Santa's cheeks.
Cut the circle in half.
Glue one on either side for Santa's cheeks.
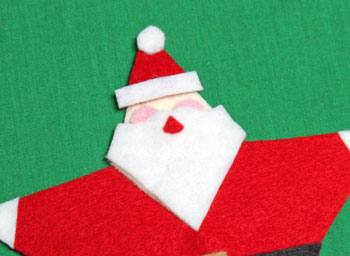
Use a pen to add Santa's eyes.
Turn the star over.
Fold a piece of yarn 10 to 12 inches long in half.
Glue the cut ends to the back of the star behind Santa's hat.
Use a scrap of white felt to help secure the yarn ends in the glue.
Fold a piece of yarn 10 to 12 inches long in half.
Glue the cut ends to the back of the star behind Santa's hat.
Use a scrap of white felt to help secure the yarn ends in the glue.
If you folded the star, reshape the folds to add dimension to Santa.
The thickness of the felt will prevent the folds from being as sharp as the paper by itself.
The thickness of the felt will prevent the folds from being as sharp as the paper by itself.
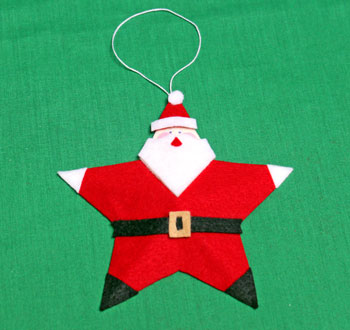
Add the 5 Point Star Santa Ornament to your decorations for a smile or two or three.
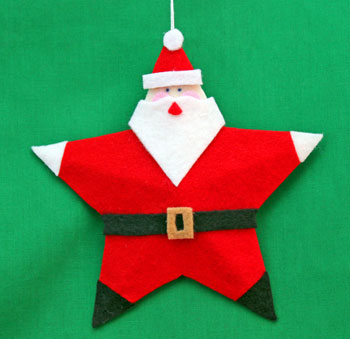
This fun and easy ornament takes very little time, materials and tools.
Have fun making one or many!
The 5 Point Santa Ornament would be a great project to do with children, but it's also great for the young at heart.
Have fun making one or many!
The 5 Point Santa Ornament would be a great project to do with children, but it's also great for the young at heart.


funEZcrafts
Welcome
Come on in and stay awhile...

funEZcrafts
Welcome
Come on in and stay awhile...