Easy Christmas Crafts: Braided Candy Cane Ornament
This Easy Christmas Crafts braided candy cane ornament uses just six chenille wire stems and your fingers.
That's all you need to make this fun and easy ornament.
This easy Christmas crafts project can be fun for young and old alike.
It can be an ornament, an addition to a pretty package or a small keepsake gift.
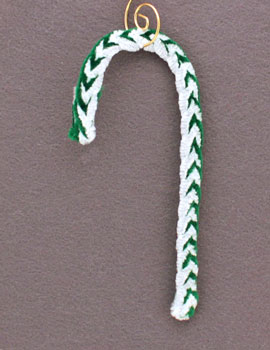
If you prefer, you can add a yarn or ribbon loop for hanging on a tree or attaching to a package.
That's all you need to make this fun and easy ornament.
This easy Christmas crafts project can be fun for young and old alike.
It can be an ornament, an addition to a pretty package or a small keepsake gift.
If you prefer, you can add a yarn or ribbon loop for hanging on a tree or attaching to a package.
If you are fast at braiding, you can make this braided candy cane ornament faster than it takes to look at the instructions below.
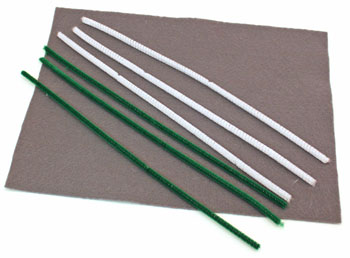
Easy Christmas Crafts: Braided Candy Cane Ornament Materials and Tools:
Chenille stems - six 12-inch - colors of your choice.
I used three of one color and three of a second color in each example.
But, it could be fun to use all one color, three colors, or even six different colors.
But, it could be fun to use all one color, three colors, or even six different colors.
The Steps for How to Make the Easy Christmas Crafts: Braided Candy Cane Ornament:
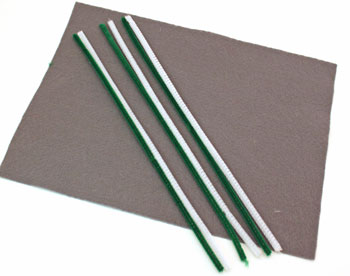
Group the six chenille stems into three pair alternating the colors.
This version uses green and white chenille stems.
Each of the three sections includes a green and a white chenille stem.
This version uses green and white chenille stems.
Each of the three sections includes a green and a white chenille stem.
Securely bend the wires together roughly one-inch from the beginning ends.
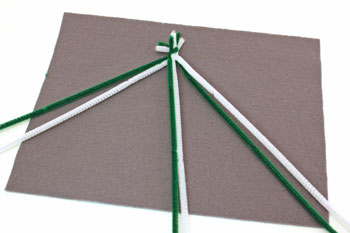
Begin braiding the chenille stems together.
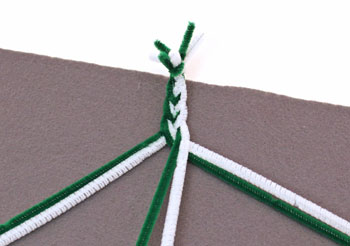
Keep the colors consistent as you braid.
For example, the green chenille wire remained on the left of the white chenille wire throughout the braiding. Note: I mixed them up in one example. The resulting candy cane was not as attractive.
Continue braiding the chenille wires to within 1/2 to 3/4 inch from the end.
For example, the green chenille wire remained on the left of the white chenille wire throughout the braiding. Note: I mixed them up in one example. The resulting candy cane was not as attractive.
Continue braiding the chenille wires to within 1/2 to 3/4 inch from the end.
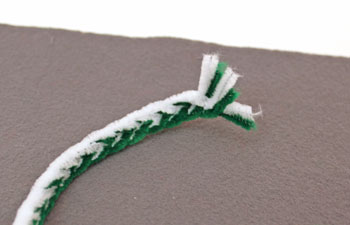
Bend the ends of the chenille wire to secure the ends together and to keep their pointed ends from pricking fingers.
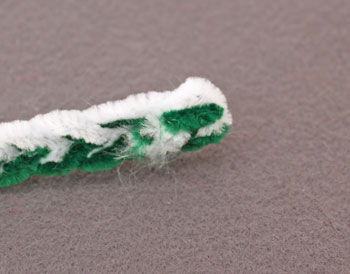
Fold the beginning wires to finish that end and to hide the pointed wires.
Fold the beginning wires back onto the braid in the same direction as the other end.
In other words, the ends of the wires - beginning and last - should be folded to what will become the back of the ornament.
Fold the beginning wires back onto the braid in the same direction as the other end.
In other words, the ends of the wires - beginning and last - should be folded to what will become the back of the ornament.
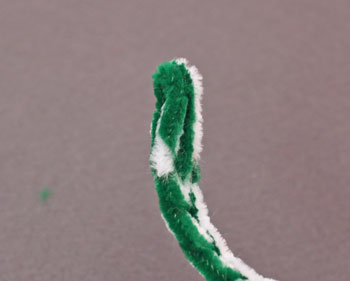
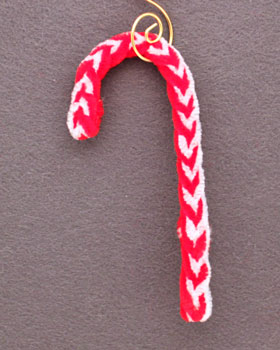
Form the braided candy cane ornament into the cane shape with a hook at the top and a straight leg along the side.
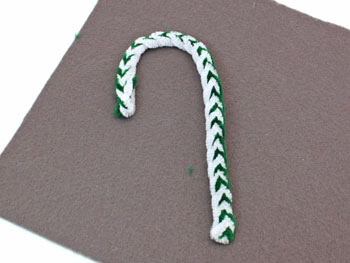
Hang the little candy cane on an ornament hook as shown here or just drape it over a limb of the Christmas tree.
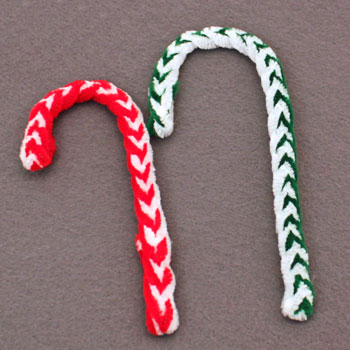
The green and white version of the candy cane is larger than the red and white. I prefer the smaller version which uses the exact same steps.
The only difference is the amount of wire folded to the back of the ornament. You can choose to make the size that you prefer for your decorations.
The only difference is the amount of wire folded to the back of the ornament. You can choose to make the size that you prefer for your decorations.
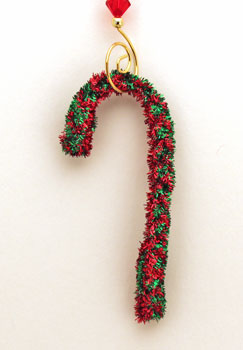
Here's another version of the braided candy cane ornament using red and green metallic chenille stems.
Shiny and pretty!
Shiny and pretty!
This fast, easy and inexpensive project is fun for everyone.
Plus, the results quickly add up for ornaments, package decorations or small remembrance gifts.
And, these little candy canes contain no calories!
Just a few or quite a lot of the little candy canes can be made quickly and inexpensively.
Have fun!
This Easy Christmas Crafts Braided Candy Cane Ornament provides loads of fun for kids, adults and seniors!


funEZcrafts
Welcome
Come on in and stay awhile...

funEZcrafts
Welcome
Come on in and stay awhile...