Easy Christmas Crafts: Round Paper Circles Ornament
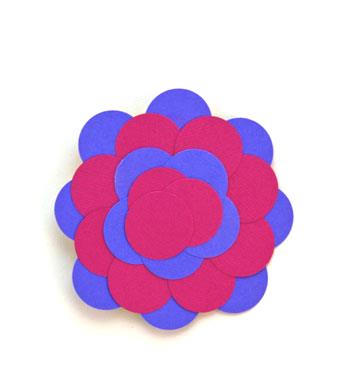
One large circle and several small circles glued together become a pretty Round Paper Circles Ornament.
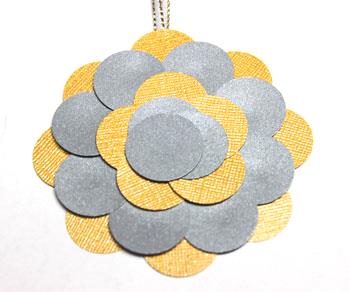
This one is silver and gold with a gold and white ribbon for the hanging loop.
This one is silver and gold with a gold and white ribbon for the hanging loop.

Here's a version in blue and fuchsia with a white yarn loop as a hanger.
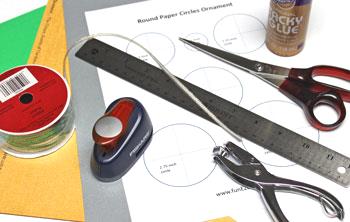
Easy Christmas Crafts: Round Paper Circles Ornament Materials and Tools:
Paper - three different colors - (if the back is cardstock, the small circles can be regular weight paper)
Ribbon or yarn
Ruler
Small hole punch (or other tool to make hole for ribbon)
Glue
Scissors
Pattern - Round Paper Circles Ornament pattern
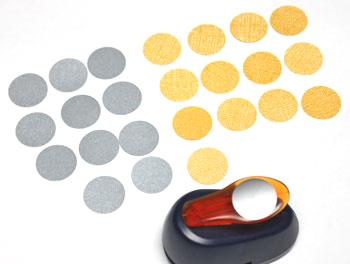
Optional - 1-inch hole punch (or use the 1-inch circle on the pattern)
Ribbon or yarn
Ruler
Small hole punch (or other tool to make hole for ribbon)
Glue
Scissors
Pattern - Round Paper Circles Ornament pattern
Optional - 1-inch hole punch (or use the 1-inch circle on the pattern)
Take a look at the simple materials and tools.
The Steps for How to Make the Easy Christmas Crafts: Round Paper Circles Ornament:
Print the Round Paper Circles Ornament pattern.
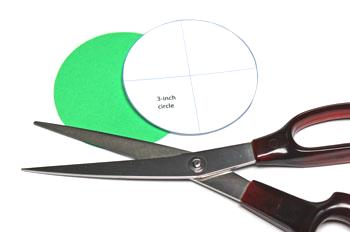
Select the size background circle.
Both examples used the 3-inch circle.
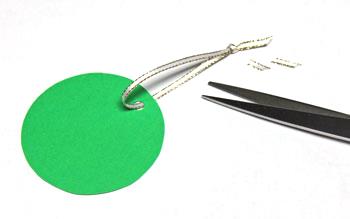
Cut out the large circle from the background paper.
This is green cardstock.
Select the size background circle.
Both examples used the 3-inch circle.
Cut out the large circle from the background paper.
This is green cardstock.
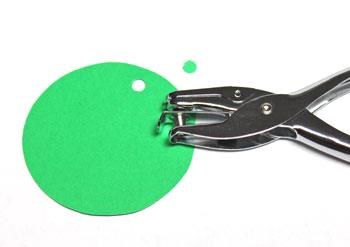
Make a hole in the large circle for the ribbon loop.
The hole should be 1/4 to 3/8 inch from the edge of the circle.
You could also cut a small slit slightly longer than the ribbon is wide. Make sure the cut is not too close to the edge.
The hole should be 1/4 to 3/8 inch from the edge of the circle.
You could also cut a small slit slightly longer than the ribbon is wide. Make sure the cut is not too close to the edge.
Cut a length of ribbon or yarn 8 to 10 inches long.

Push the ribbon through the hole.
Pull the ends even, and tie a knot to form the loop.
Trim off any excess ribbon at an angle.
Pull the ends even, and tie a knot to form the loop.
Trim off any excess ribbon at an angle.
Cut the small 1-inch diameter circles.
For the 3-inch background circle, there should be 11 small circles of one color and 13 small circles of the second color.
For this example, there are 11 silver circles and 13 gold circles.
For the 3-inch background circle, there should be 11 small circles of one color and 13 small circles of the second color.
For this example, there are 11 silver circles and 13 gold circles.
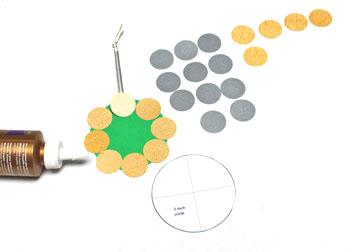
Place a small drop of glue between the ribbon and the background circle.
Start with eight of the 13 small circles.
Position and glue them around the 3-inch circle.
Position four of the circles at the north, south, east and west points of the circle.
The next four fit in between the first four.
The eight small circles should extend beyond the edge of the background such that they just fit without any overlap among the small circles.
Glue Note:
For the blue and fuchsia example, I used a glue stick and added glue to most of the back of the small circles. This made a flatter, more tightly glued ornament.
For the gold and silver example, I used tacky glue and only a small amount in the center of each small circle. This allows a "reveal" around each of the small circles and looks more 3-dimensional.
Next, add eight of the second color of circles.
Position and glue the small circles such that none of the background can be seen at the outer edge.
Space them equally around the circle overlapping as necessary.
Position and glue the small circles such that none of the background can be seen at the outer edge.
Space them equally around the circle overlapping as necessary.

Take the remaining five circles of the first color and glue them over the middle of the circle.
Arrange them evenly and glue.
Arrange them evenly and glue.
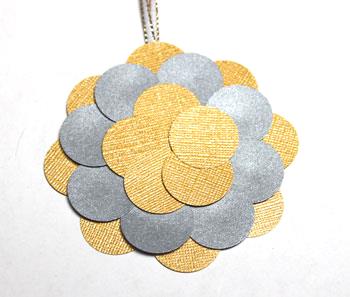
Position and glue the final three circles over the middle of the ornament.
The Round Paper Circles Ornament is finished and ready to display.
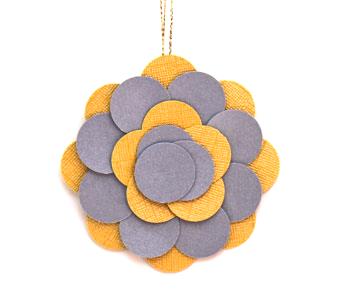
Just look at how pretty a few circles can be. The variety is almost endless with the colorful papers available today.
Be creative and have fun!
The Round Paper Circles Ornament is a fast and fun project for any age and can also be a teaching aid for children learning about circles.
Be creative and have fun!
The Round Paper Circles Ornament is a fast and fun project for any age and can also be a teaching aid for children learning about circles.


funEZcrafts
Welcome
Come on in and stay awhile...

funEZcrafts
Welcome
Come on in and stay awhile...