Easy Angel Crafts: Paper Cone Angel With Wings
Gold wrapping paper turns into a beautiful golden Paper Cone Angel with Wings using the instructions below. Fast, fun and easy, you can make one or two or many very quickly.
Let's look at the materials and the steps for how to make this golden angel:
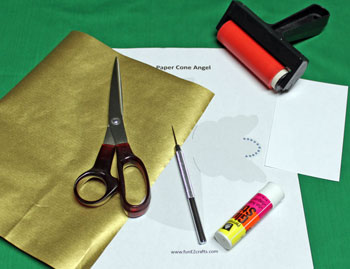
Easy Angel Crafts: Paper Cone Angel With Wings Materials and Tools:
Gold wrapping paper (or paper of your choice) larger than the pattern
Index card or scrap cardstock for stabilizer
Glue
Brayer (optional - helpful, but not necessary)
Scissors
Paper piercer (or pin, needle, thumbtack or t-pin)
Paper Cone Angel With Wings pattern
Index card or scrap cardstock for stabilizer
Glue
Brayer (optional - helpful, but not necessary)
Scissors
Paper piercer (or pin, needle, thumbtack or t-pin)
Paper Cone Angel With Wings pattern
The Steps for How to Make the Easy Angel Crafts: Paper Cone Angel With Wings:
Print the Easy Angel Crafts Paper Cone Angel With Wings pattern.
Glue the back of the paper to the back of the pattern.
Make sure the glue covers all of the pattern shape.
A "dry" glue like a glue stick works better than a liquid glue. Liquid glue seeps into the papers and produces wrinkles.
Glue the back of the paper to the back of the pattern.
Make sure the glue covers all of the pattern shape.
A "dry" glue like a glue stick works better than a liquid glue. Liquid glue seeps into the papers and produces wrinkles.
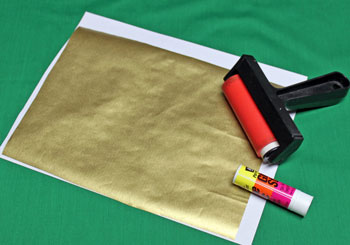
Let the glue dry.
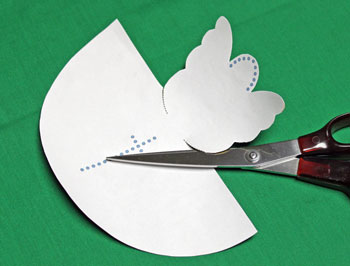
Cut around the pattern shape.
Cut around the pattern shape.
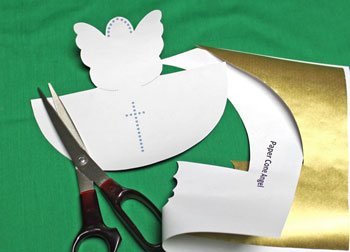
Cut along the dotted lines.
Cut a piece of an index card, card stock or other paper that can add stability to the angel cone.
The size should be 5/8 inch by 2 3/8 inches.
The size should be 5/8 inch by 2 3/8 inches.
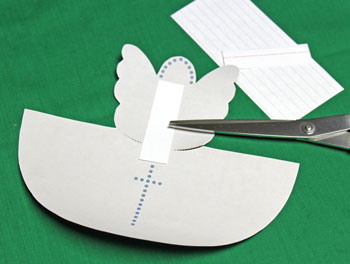
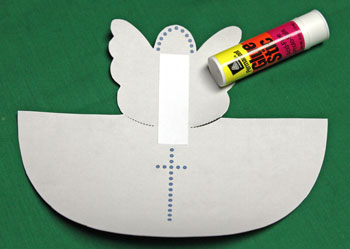
Glue the stabilizer to the shape between the decorations vertically and between the cut lines horizontally.
Make small holes in the middle of each dot with a paper piercer (or pin, needle, thumbtack or t-pin).
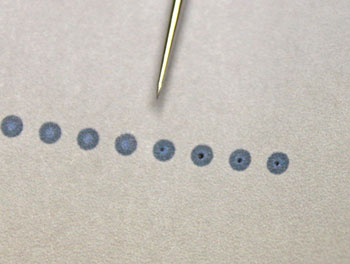
Turn the shape over and enlarge the holes from the front side of the paper.
I wanted the "Braille" side of the holes on the back rather than the front.
You could just make the holes from the back.
I wanted the "Braille" side of the holes on the back rather than the front.
You could just make the holes from the back.

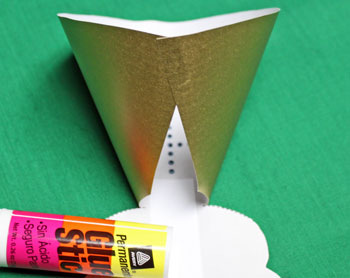
Overlap the bottom edges of the shape to form a cone.
Glue the edges together.
Glue the edges together.
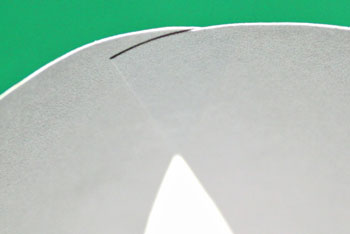
This close-up view shows how the edges overlap.
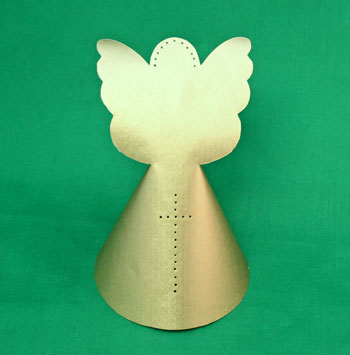
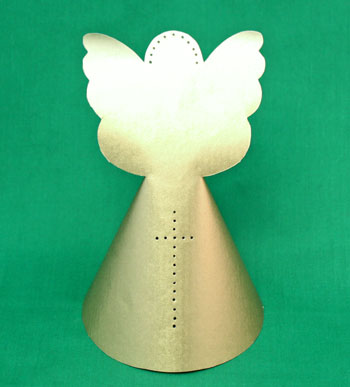
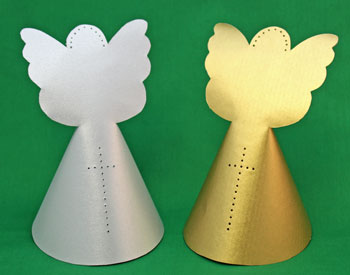
The little golden Paper Cone Angel With Wings just glows.
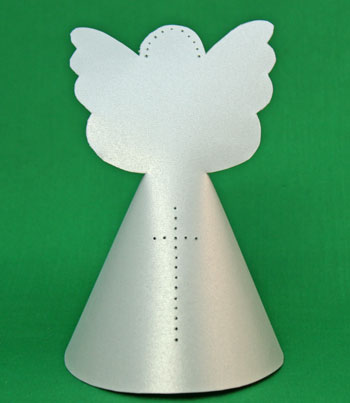
Here's a silver version made with silver cardstock.
With cardstock, the stabilizer is not necessary.
With cardstock, the stabilizer is not necessary.
Simple, yet elegant, these angels will be pretty on a dining table or an end table, in an office or church vestibule or anywhere an angel will add an uplifting smile.
Use different colors of paper to match your decor. Or, make several of different colors to have an angel vignette.
Have fun!
Inexpensive, easy and fun, the Easy Angel Crafts Paper Cone Angel With Wings project can be an enjoyable group project for a family, a church, an office or a senior center.
Have fun!
Inexpensive, easy and fun, the Easy Angel Crafts Paper Cone Angel With Wings project can be an enjoyable group project for a family, a church, an office or a senior center.


funEZcrafts
Welcome
Come on in and stay awhile...

funEZcrafts
Welcome
Come on in and stay awhile...