Easy Christmas Crafts: Felt and Bead Elf Ornament
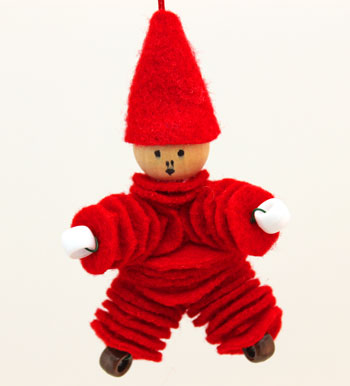
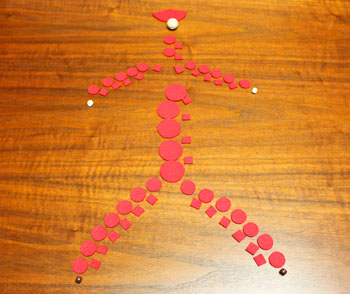
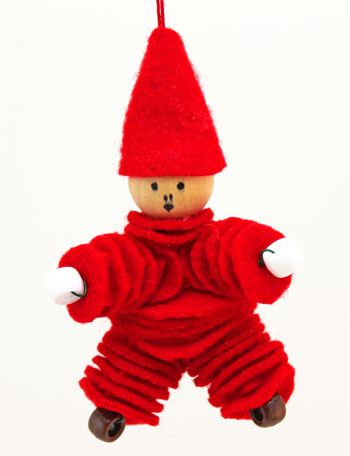
This little Felt and Bead Elf looks like he has been busy working in the toy workshop.
The instructions show how to use simple and inexpensive materials and tools to make the little elf.
Let's make this bright red example with his white "gloves" and brown "boots."
The instructions show how to use simple and inexpensive materials and tools to make the little elf.
Let's make this bright red example with his white "gloves" and brown "boots."
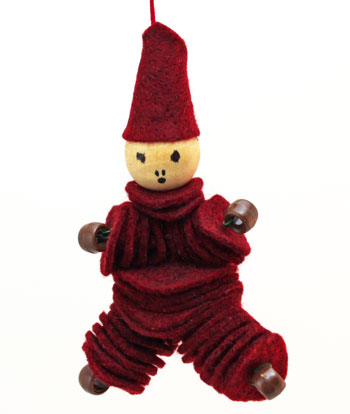
Here's another little elf wearing dark red with brown boots and gloves:
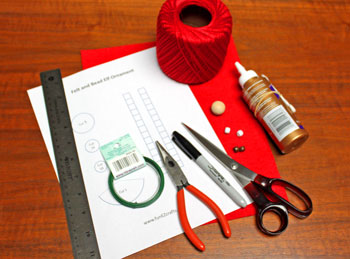
Easy Christmas Crafts: Felt and Bead Elf Ornament Materials and Tools:
Craft felt (takes less than half of one 9x12 piece of felt)
Yarn
Four beads - 2 for gloves, 2 for boots
Wooden bead - one 3/4 inch diameter
Floral wire - 24 gauge
Glue
Ruler
Scissors
Needle nose pliers
Black pen or paint
T-pin or similar sharp pin (not shown but I found it helpful)
Pattern - Felt and Bead Elf Ornament pattern
Yarn
Four beads - 2 for gloves, 2 for boots
Wooden bead - one 3/4 inch diameter
Floral wire - 24 gauge
Glue
Ruler
Scissors
Needle nose pliers
Black pen or paint
T-pin or similar sharp pin (not shown but I found it helpful)
Pattern - Felt and Bead Elf Ornament pattern
Take a look at the simple materials and tools shown here.
The Steps for How to Make the Easy Christmas Crafts: Felt and Bead Elf Ornament:
Print the Felt and Bead Elf Ornament pattern.
Cut all of the materials.
Cut 10 of the small circles - 5 for each arm.
Cut 16 of the medium circles - 7 for each leg and 2 for the neck.
Cut 5 of the large circles for the torso.
Cut one of the partial circle shape for the hat.
Cut the two lengths of felt that will become spacers.
Cut two pieces of wire 5 inches long, one for each leg.
Cut two pieces of wire 4 inches long, one for each arm.
Cut one piece of yarn 10 inches long.
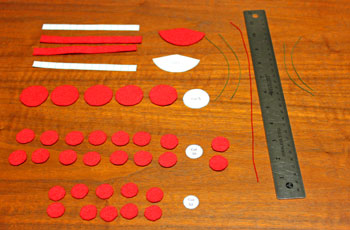
Cut the two lengths of felt into 14 small squares each for a total of 28 spacers.
Position all the materials in the order in which they will be added to the wires.
There are seven medium circles for each leg with six spacers alternating between the circles.
There are five large circles for the torso with four spacers between the circles.
For each arm, there are five circles and five spacers.
For the neck, there are two circles and two spacers.
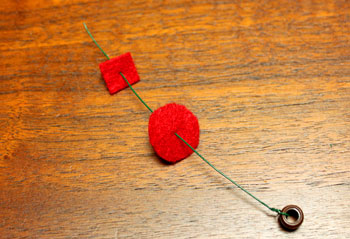
Push a 5-inch wire through one of the "boot" beads.
Twist the wire to secure the bead.
Make the second "leg" the same way.
Use the 4-inch wires to secure the "glove" beads to the end of the "arms."
Twist the wire to secure the bead.
Make the second "leg" the same way.
Use the 4-inch wires to secure the "glove" beads to the end of the "arms."

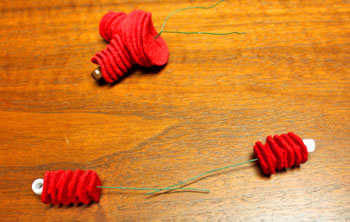
Begin pushing the felt circles and spacers to one of the "leg" wires.
Hint: If the wire is having difficulty going through the felt, use a T-pin or similar sharp pin to make a hole in the felt first.
Hint: If the wire is having difficulty going through the felt, use a T-pin or similar sharp pin to make a hole in the felt first.
Add the felt circles and spacers to both of the leg wires.
Start and end with a circle and insert a spacer between each.
Start and end with a circle and insert a spacer between each.
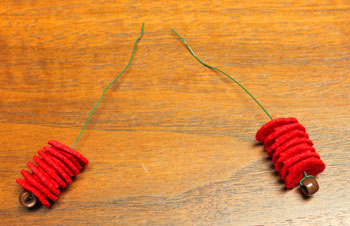
Begin adding the large torso circles.
Insert the leg wires 1/4-inch apart near the center of the circle.
Insert the leg wires 1/4-inch apart near the center of the circle.
Add a spacer with the wires 1/4-inch apart.
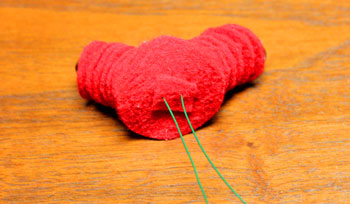
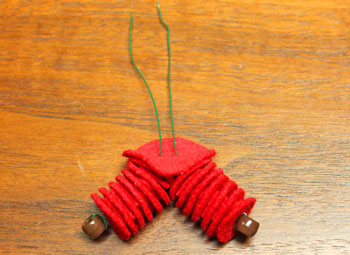
For the torso, begin and end with a large circle placing a spacer between each.
After adding the torso circles and spacers, twist the wires together.
After adding the torso circles and spacers, twist the wires together.
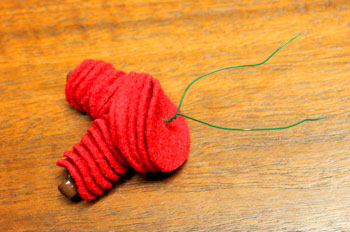
Make the arms the same way as for the legs with one difference.
Begin with a circle. Alternate circles and spacers then end with a spacer.
The end spacer helps hide the wires.
Begin with a circle. Alternate circles and spacers then end with a spacer.
The end spacer helps hide the wires.
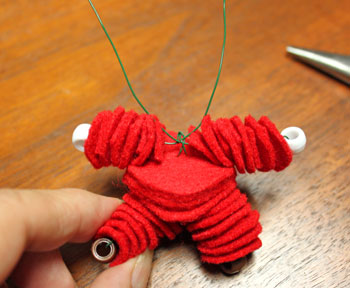
At the top of the torso, cut and crimp the wires.
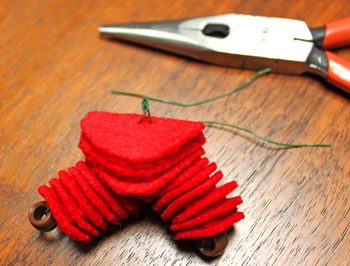
Insert the arm wires through the space in the torso wires beneath the crimped ends.
Thread one of the arm wires front to back and the other back to front.
Pull the wires even.
Thread one of the arm wires front to back and the other back to front.
Pull the wires even.
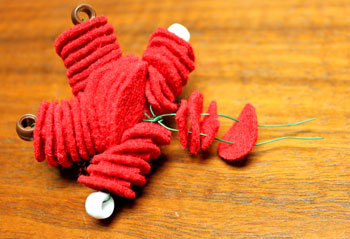
Push the ends of the arm wires through a spacer, a circle, a spacer and the last circle to form the neck.
The wires should be 1/4 inch apart.
The wires should be 1/4 inch apart.
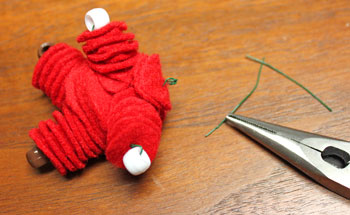
Pull the wires firmly but not so tightly that the felt cannot move.
Twist the wires, cut the excess and crimp the wires downward.
Twist the wires, cut the excess and crimp the wires downward.
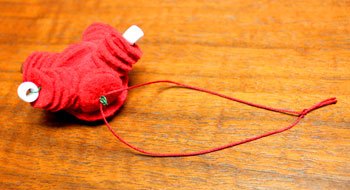
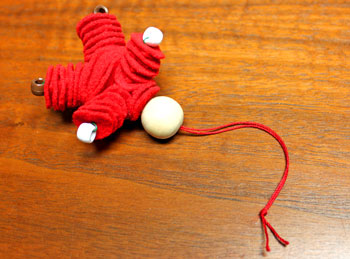
Push one end of the yarn through the wires below the crimped ends.
Pull the yarn ends even, and tie a knot to form a loop.
Pull the yarn ends even, and tie a knot to form a loop.
Push the yarn ends through the 3/4-inch wooden bead.
The T-pin or similar sharp pin helps push the yarn through the hole.
The T-pin or similar sharp pin helps push the yarn through the hole.
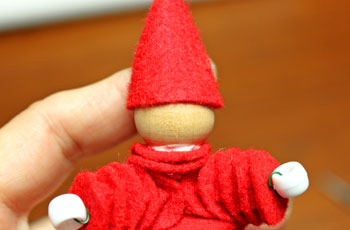
Glue the partial circle around the top of the wooden bead and around the yarn to form the elf's cap.
The back of the felt will overlap roughly 1/2 inch.
The back of the felt will overlap roughly 1/2 inch.
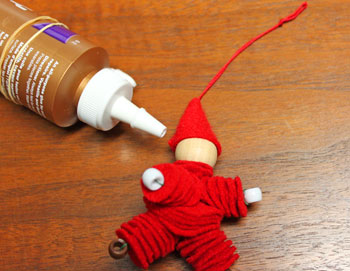
To make sure the little elf does not lose his head, add glue to the top neck circle.
Make sure you hold the bead on the yarn as you add the glue or you will need to add the bead back on the yarn like I did.
Make sure you hold the bead on the yarn as you add the glue or you will need to add the bead back on the yarn like I did.

Hold the yarn firmly and press the hole in the bead over the wire and the base of the bead into the glue.
Use a black pen or paint to add the elf's face.
If you use a Sharpie, make quick and light touches to the wooden bead. The ink quickly bleeds into the wood.
If you use a Sharpie, make quick and light touches to the wooden bead. The ink quickly bleeds into the wood.
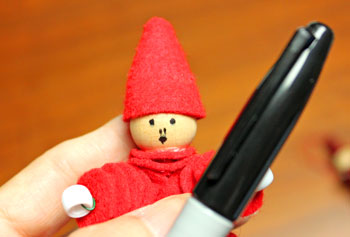
The fun Felt and Bead Elf Ornament is finished and ready to display.
Yes, he does take some time, but he's so cute.
And, doesn't he look like he's been working hard in the toy factory?
Have fun!
Simple and inexpensive materials along with simple tools turn into a fun little Felt and Bead Elf Ornament for holiday decorations, additions to gifts or even as a friend to travel with you in your vehicle.
And, doesn't he look like he's been working hard in the toy factory?
Have fun!
Simple and inexpensive materials along with simple tools turn into a fun little Felt and Bead Elf Ornament for holiday decorations, additions to gifts or even as a friend to travel with you in your vehicle.


funEZcrafts
Welcome
Come on in and stay awhile...

funEZcrafts
Welcome
Come on in and stay awhile...