Easy Felt Crafts: Felt Circles Snowman
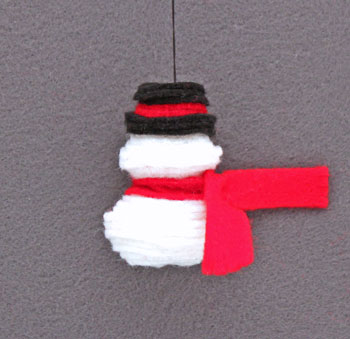
This fun and easy Felt Circles Snowman is an easy crafts project made with pieces of felt.
I use a needle and thread to connect the pieces of felt, but a chenille wire can be used like in the Felt Circles Angel project.
Take a look at this little guy - and no cold fingers either!
I use a needle and thread to connect the pieces of felt, but a chenille wire can be used like in the Felt Circles Angel project.
Take a look at this little guy - and no cold fingers either!
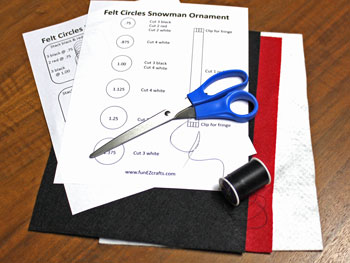
Easy Felt Crafts: Felt Circles Snowman Materials and Tools:
Craft felt in black, red and white (Craft felt can be found in 9x12-inch sizes. This project takes less than one piece of each color.)
Needle and thread -OR- chenille wire in black, red or white
Scissors
Felt Circles Snowman pattern (click here for the Felt Circles Snowman pattern)
Needle and thread -OR- chenille wire in black, red or white
Scissors
Felt Circles Snowman pattern (click here for the Felt Circles Snowman pattern)
The Steps for How to Make the Easy Felt Crafts: Felt Circles Snowman:
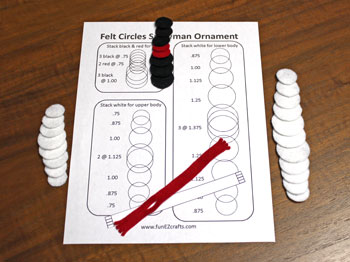
Print a copy of both pages of the Felt Circles Snowman pattern.
One page provides the pattern for each piece along with the number and color of pieces needed.
The second page outlines how to stack the different pieces to form the felt circles snowman.
Cut around each of the pattern pieces such that you have 6 circles and one scarf pattern.
Cut the felt circles as follows (sizes are in inches):
Cut one of the scarf pattern from the red felt.

Use the second page of the pattern to stack the circles for the bottom snowball, the top snowball and the hat.
Work from the bottom of the bottom snowball up to the top of the hat.
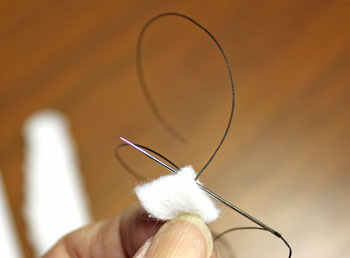
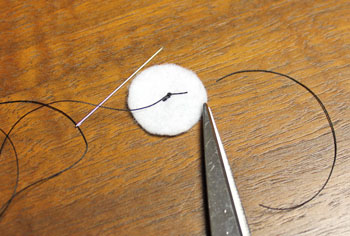
Fold the bottom white felt circle in half and half again to find the center of the circle.
Push the needle through the middle of the corner formed by quartering the circle.
Leave two to three inches of thread.
Push the needle through again in the same place and pull the thread taut.
Fold the bottom white felt circle in half and half again to find the center of the circle.
Push the needle through the middle of the corner formed by quartering the circle.
Leave two to three inches of thread.
Push the needle through again in the same place and pull the thread taut.
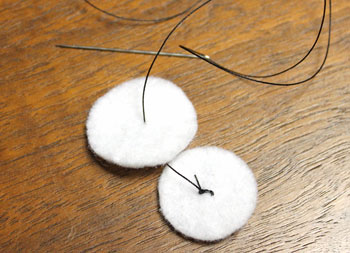
Using the thread tail, tie a square or "hard" knot in the thread close to the felt circle.
Trim the thread tail leaving 1/4 inch of thread above the knot.
Trim the thread tail leaving 1/4 inch of thread above the knot.
Use the quartering process to find the center of the next circle.
Push the needle through the center point.
Push the needle through the center point.
Continue adding the layers for the bottom snowball by pushing the needle and thread through the center of each circle.
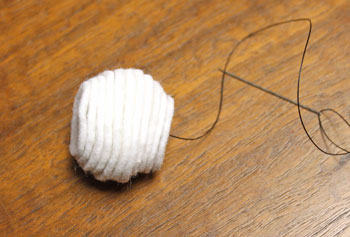
Follow the same steps to add the top snowball.
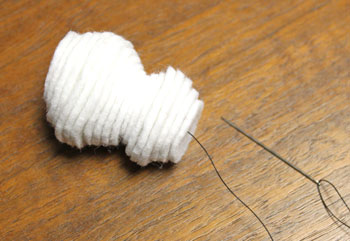
Next, add the layers for the hat starting with the black hat brim, the red hat band and the black top hat portion.
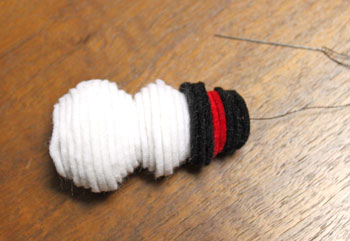
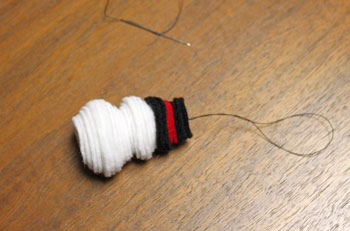
Anchor the thread at the top of the hat with several stitches in one place.
Make a loop in the thread.
Securely knot the thread close to the top of the hat.
Carefully clip the thread.
Make a loop in the thread.
Securely knot the thread close to the top of the hat.
Carefully clip the thread.
Add the scarf by wrapping the felt circles snowman's neck with the red felt.
Insert the opposite end of the red felt through the slit to hold the scarf in place.
Insert the opposite end of the red felt through the slit to hold the scarf in place.
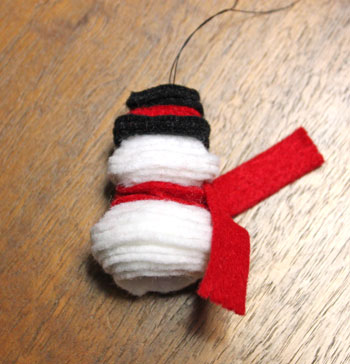
Hang the little felt circles snowman in a window, on a cabinet pull, on a drawer pull, from a lamp or anywhere he can add a smile.
Inexpensive materials, a few common tools and a little time makes one or many of these simple and fun snow people.
These little ornaments can add smiles by hanging in an office, a kitchen, a car or anywhere.
With a few changes, this little snowman could also become a fun little winter key chain.
And, if you have several different sized of circle punches, this could be a fun and easy paper project using construction paper or card stock.
Have fun being creative with your own felt circles snowman!


funEZcrafts
Welcome
Come on in and stay awhile...

funEZcrafts
Welcome
Come on in and stay awhile...
| Size | White | Black | Red |
| 3/4 | 2 | 3 | 2 |
| 7/8 | 4 | ||
| 1 | 4 | 3 | |
| 1 1/8 | 4 | ||
| 1 1/4 | 2 | ||
| 1 3/8 | 3 |