Easy Angel Crafts: Paper Shapes Angel
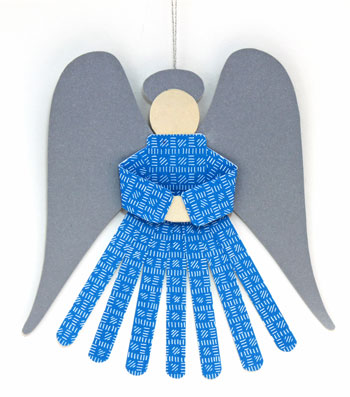
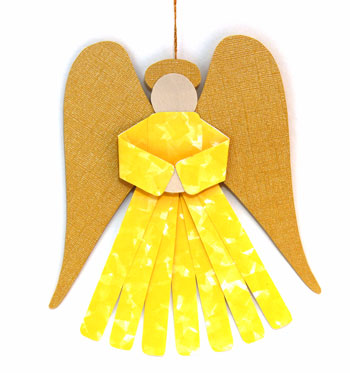
Three different colors of paper along with some glue turn into this simple and fun little Paper Shapes Angel. She can be an ornament on a tree, a fun addition to a gift or other decoration.
This version is blue and silver.
This version is blue and silver.
Let's look at the materials and the steps for how to make this simple and pretty angel:
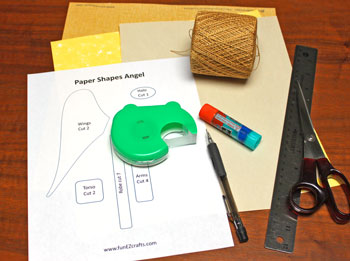
Easy Angel Crafts: Paper Shapes Angel Materials and Tools:
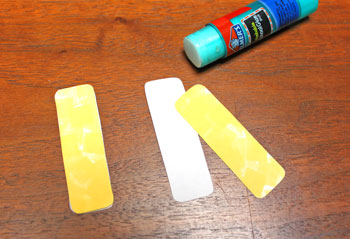
Paper - three colors. I used scraps of light weight 12x12 cardstock for the angel's robe, construction paper for the face and medium weight cardstock for the wings.
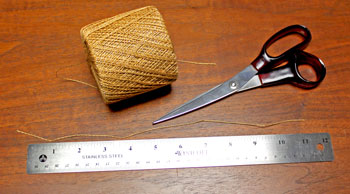
Yarn
Glue
Tape
Scissors
Ruler
Pencil
Paper Shapes Angel pattern
Yarn
Glue
Tape
Scissors
Ruler
Pencil
Paper Shapes Angel pattern
The Steps for How to Make the Easy Angel Crafts: Paper Shapes Angel:
Print the Paper Shapes Angel pattern.
Cut around the printed pattern shapes.
Trace and cut the pattern shapes from the three papers.
If your paper is single-sided, make sure that the wing shapes are mirror opposites and that you don't have either two rights or two lefts.
Cut around the printed pattern shapes.
Trace and cut the pattern shapes from the three papers.
If your paper is single-sided, make sure that the wing shapes are mirror opposites and that you don't have either two rights or two lefts.

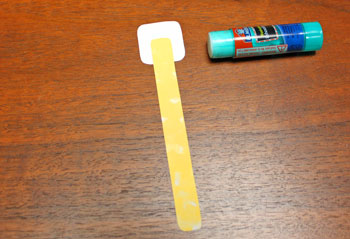
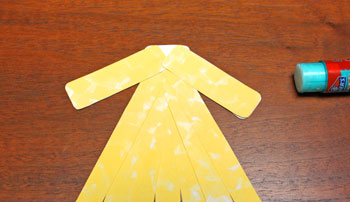
On the back side of one of the torso squares, center and glue the first robe strip of paper.
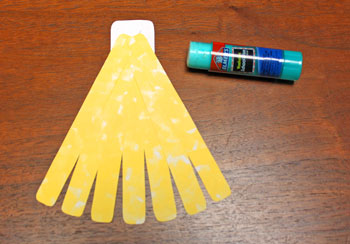
Position and glue the next two robe strips at an angle and overlapping the first strip.

Continue adding the robe strips, gluing them over the previous strips.
Apply glue to the "shoulder" end of the arm strips.
Glue the front and back of the each arm together with wrong sides together.
The "hand" end of the arm strips will be glued with the hand shape later.
Glue the front and back of the each arm together with wrong sides together.
The "hand" end of the arm strips will be glued with the hand shape later.
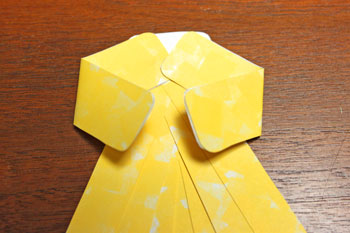
Position and glue the "shoulder" end of the arms over the torso and ends of the robe strips.
Bend the arm shapes and form a soft crease at the "elbows."
Insert the hand shape inside each arm and glue.
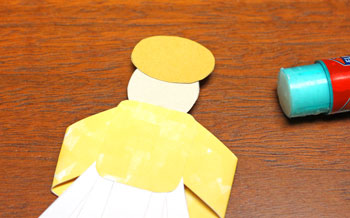
Position and glue the face to the top of the torso.

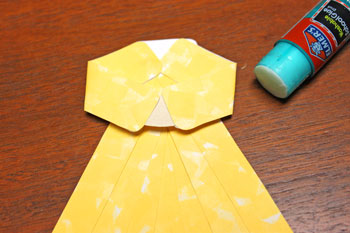
Add glue to the back side of the second torso square.
Position the second torso square over the bottom of the face, the shoulders and the top of the robe strips matching its edges with the back torso square.
Position the second torso square over the bottom of the face, the shoulders and the top of the robe strips matching its edges with the back torso square.

Turn the Paper Shapes Angel over.
Apply glue to the upper portion of the head shape.
Position the front of the halo over the glue.
Apply glue to the upper portion of the head shape.
Position the front of the halo over the glue.
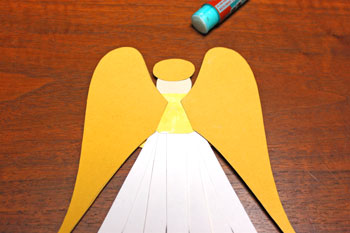
Apply glue to the front edge of the wing shapes.
Position the wings over the back torso with the upper part of the wings framing the face and the tips of the wings at an angle away from the bottom of the robe strips.
Position the wings over the back torso with the upper part of the wings framing the face and the tips of the wings at an angle away from the bottom of the robe strips.
Cut a 12-inch length of yarn.
Fold the yarn in half and glue the ends to the middle of the back torso.
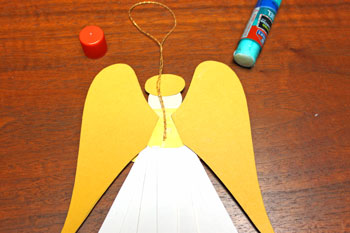
Add tape over the wings and ends of the yarn for additional stability.

The Paper Shapes Angel is finished and ready to display.
Just a few geometric shapes and a couple of graceful wings turn into a fun little angel.
Choose the colors that you prefer for your decoration. Maybe add sparkles and ribbon or draw a face to make this little angel your own.
Have fun!
The Paper Shapes Angel is a fun and easy project using simple materials and tools to become a holiday decoration, whether on a tree or a gift.
Choose the colors that you prefer for your decoration. Maybe add sparkles and ribbon or draw a face to make this little angel your own.
Have fun!
The Paper Shapes Angel is a fun and easy project using simple materials and tools to become a holiday decoration, whether on a tree or a gift.


funEZcrafts
Welcome
Come on in and stay awhile...

funEZcrafts
Welcome
Come on in and stay awhile...