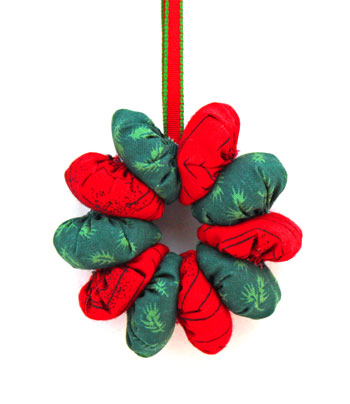
Easy Christmas Crafts: Yo-Yo Wreath Ornament
Some fabric scraps, a short piece of ribbon and some fiberfill or cotton for stuffing the little circles easily become this fun and festive yo-yo wreath ornament.
Yes, a needle and thread are involved, but the stitches are "sew" simple to do.
Take a look:
Yes, a needle and thread are involved, but the stitches are "sew" simple to do.
Take a look:
Use calico fabrics for a more homespun look. Or use shiny fabric circles for a more sophisticated decoration.
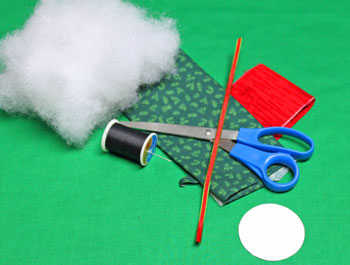
Easy Christmas Crafts: Yo-Yo Wreath Ornament Materials and Tools:
Fabric scraps
Ribbon - 8 to 10 inches long and 1/8 to 3/8 inch wide
Fiberfill or cotton or other stuffing material (I used less than 10% of the amount shown.)
Sewing thread
Needle
Scissors
Circles Pattern (I selected the 2 1/2 inches diameter circle.)
Ribbon - 8 to 10 inches long and 1/8 to 3/8 inch wide
Fiberfill or cotton or other stuffing material (I used less than 10% of the amount shown.)
Sewing thread
Needle
Scissors
Circles Pattern (I selected the 2 1/2 inches diameter circle.)
Take a look at the simple materials and tools shown here.
The Steps for How to Make the Easy Christmas Crafts: Yo-Yo Wreath Ornament:
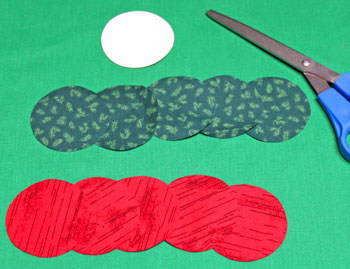
Print the circles pattern or make your own circles template for the size you want.
I used a 2 1/2-inch diameter circle.
The finished yo-yos will be less than half of the diameter.
Thus, the yo-yos based on a 2 1/2-inch diameter circle will be less than 1 1/4 inches in diameter once the stuffing is added.
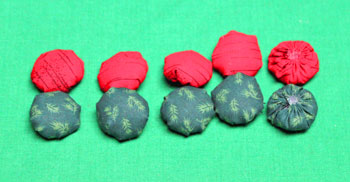
Cut ten circles of fabric.
This example used two different fabrics of five circles each.
I used a 2 1/2-inch diameter circle.
The finished yo-yos will be less than half of the diameter.
Thus, the yo-yos based on a 2 1/2-inch diameter circle will be less than 1 1/4 inches in diameter once the stuffing is added.
Cut ten circles of fabric.
This example used two different fabrics of five circles each.
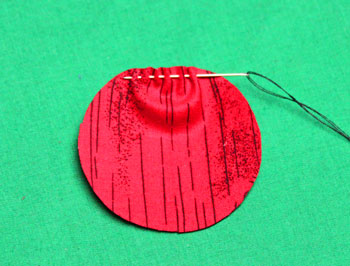
With needle and thread, make small stitches around the circle 1/8 inch from the edge.
Leave a thread tail 3 to 4 inches long at the beginning of the stitches.
To guard against thread breakage, I used a double strand of thread.
Leave a thread tail 3 to 4 inches long at the beginning of the stitches.
To guard against thread breakage, I used a double strand of thread.
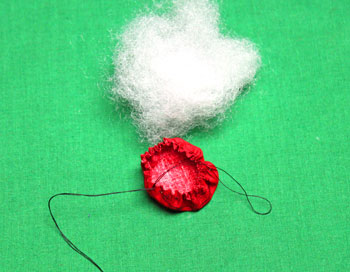
Pull the thread tails at the beginning and ending of the stitches to gather the yo-yo.
Add a small amount of fiberfill, cotton or other stuffing material to the partially gathered circle.
Be careful not to add too much stuffing.
Add a small amount of fiberfill, cotton or other stuffing material to the partially gathered circle.
Be careful not to add too much stuffing.
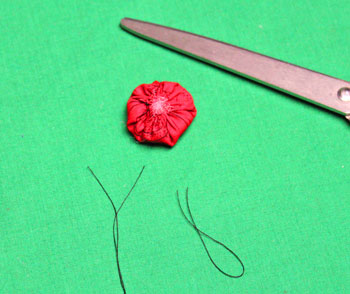
Pull the thread tails firmly to close the fabric circle over the stuffing.
Securely tie the thread ends and trim the thread ends.
Be careful not to cut the threads too close to the knot.
Securely tie the thread ends and trim the thread ends.
Be careful not to cut the threads too close to the knot.
Use the same process to make the remaining yo-yos.
Thread needle with a double strand of thread.
Push needle through the center of each yo-yo to connect them in a line.
Leave a tail of thread at the beginning of the line of yo-yos.
Push needle through the center of each yo-yo to connect them in a line.
Leave a tail of thread at the beginning of the line of yo-yos.
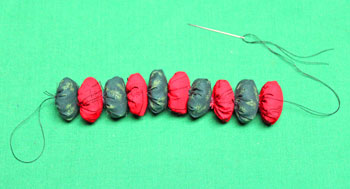
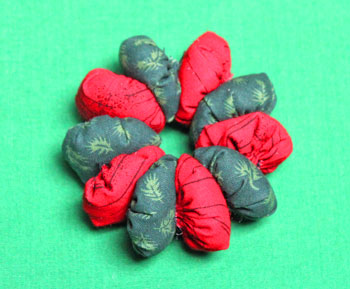
Form a circle of the yo-yos by taking the needle back through the center of the yo-yos again.
Start at the same point as the first pass through the yo-yos.
Make sure to hold the starting end of thread such that it doesn't get pulled through as the needle and thread go through the yo-yos the second time.
Pull both ends of the thread and shape the circle.
Securely tie the thread ends together.
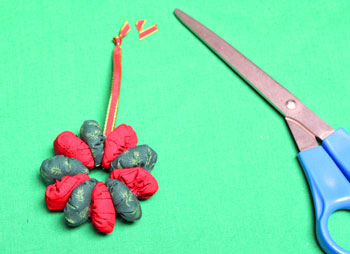
Insert one end of the ribbon through the middle of the circle.
Fold the ribbon over the thread between two of the yo-yos.
Tie a knot in the ends of the ribbon to form the hanging loop.
Trim the ribbon ends at an angle.
Fold the ribbon over the thread between two of the yo-yos.
Tie a knot in the ends of the ribbon to form the hanging loop.
Trim the ribbon ends at an angle.
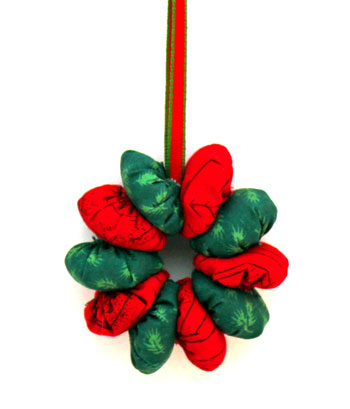
The Yo-Yo Wreath Ornament is ready to display.
Some odd scraps of fabric - too small for anything else - can become a simple yet fun decoration.
Have fun!
Simple stitches, a few fabric scraps and a small amount of time turn into this Yo-Yo Wreath Ornament.
Have fun!
Simple stitches, a few fabric scraps and a small amount of time turn into this Yo-Yo Wreath Ornament.


funEZcrafts
Welcome
Come on in and stay awhile...

funEZcrafts
Welcome
Come on in and stay awhile...