Easy Paper Crafts: Folded Box Ornament
This easy paper crafts folded box ornament can be hung on a hook, on a door knob, on a Christmas tree or on something else.
It can remain empty or it can be filled with a gift or with a potpourri mixture.
As an alternative, you can fold the sections such that the result makes an "X" shape rather than a box.
The how-to steps below are simple and the materials inexpensive.
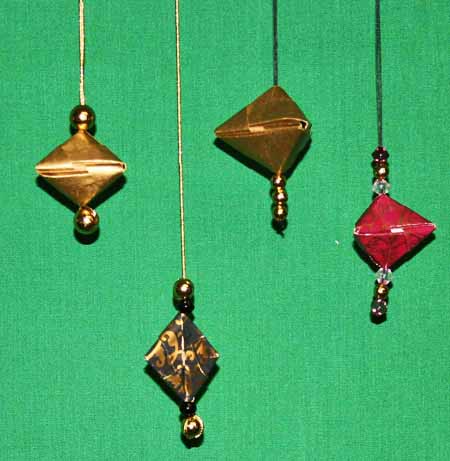
The papers for the ornaments in this picture are gold gift wrapping paper and decorative craft paper in black gold and red with gold.
Two of the ornaments hang from gold lame yarn, and two hang from black yarn.
The beads include a variety of sizes in gold, black and rose.
It can remain empty or it can be filled with a gift or with a potpourri mixture.
As an alternative, you can fold the sections such that the result makes an "X" shape rather than a box.
The how-to steps below are simple and the materials inexpensive.
The papers for the ornaments in this picture are gold gift wrapping paper and decorative craft paper in black gold and red with gold.
Two of the ornaments hang from gold lame yarn, and two hang from black yarn.
The beads include a variety of sizes in gold, black and rose.
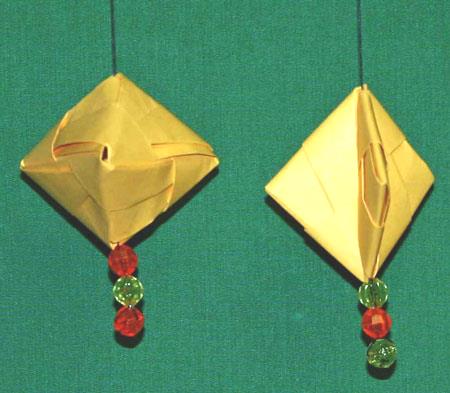
In this picture, you can see the different forms - open box and closed X shape.
The simple process makes both with only one slight change needed.
The simple process makes both with only one slight change needed.
Let's take a look at the materials and tools for this project.
Easy Paper Crafts: Folded Box Ornament Materials and Tools:
Paper - decorative paper, gift wrap paper, or computer printer paper
Scissors
Ruler for measuring and straight edge
Yarn or ribbon for hanging
Beads (optional for embellishment)
Scissors
Ruler for measuring and straight edge
Yarn or ribbon for hanging
Beads (optional for embellishment)
The Steps for How to Make the Easy Paper Crafts: Folded Box Ornament:
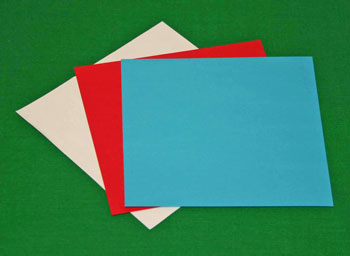
Each folded box ornament requires three pieces of paper.
The paper must be square and of the same size.
The pieces below are 6 x 6 inches.
The smaller gold ornaments above were of paper 3.5 x 3.5 inches.
The paper must be square and of the same size.
The pieces below are 6 x 6 inches.
The smaller gold ornaments above were of paper 3.5 x 3.5 inches.
First, fold the paper in half.
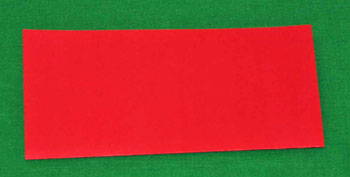
Next, fold each half in half again along the length.
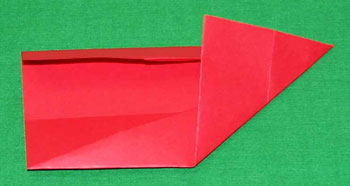
Fold triangular "ears" on the opposite corners, upper left and lower right.
The triangle's point should meet the first fold from the edge.
The triangle's point should meet the first fold from the edge.
Now, make another triangular fold by folding the same corners one more time.
Again, the edge should touch the fold and the triangles should be elongated.
Again, the edge should touch the fold and the triangles should be elongated.

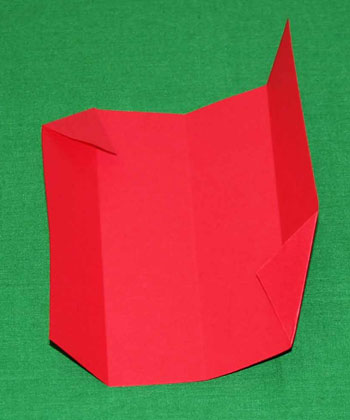
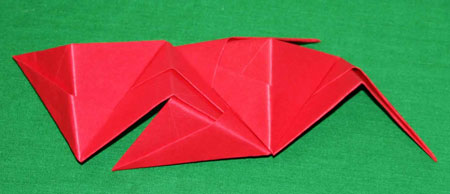
The picture below shows the same folds from a slightly different view.
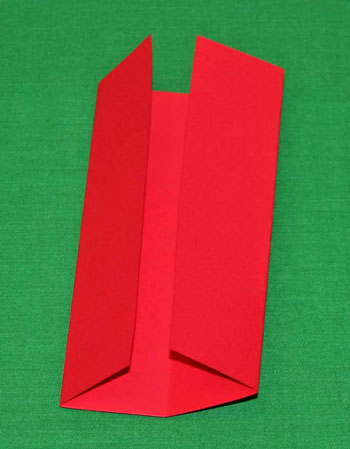
Fold the outer edges back to the center.
Fold the lower right corner to the opposite edge.
Repeat, folding the upper left to the opposite edge.
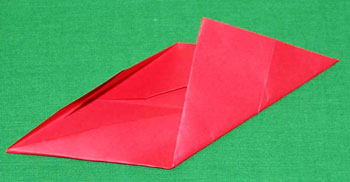
Insert the points under the flap made by the elongated triangular folds.
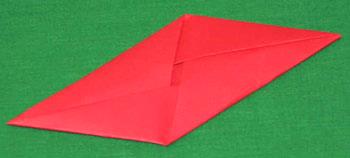
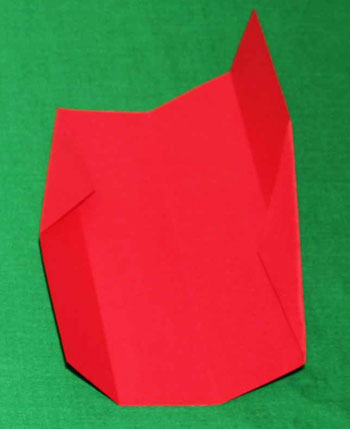
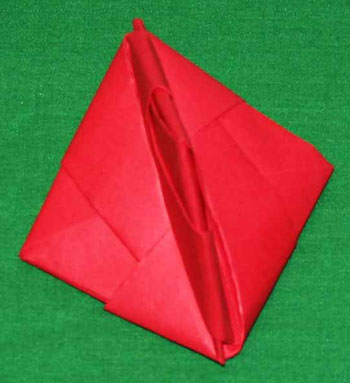
Turn the folded paper over such that the solid side is up.
Fold the points to the corners to make a square.
This shows the left fold.
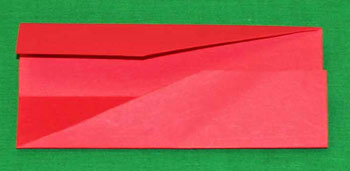
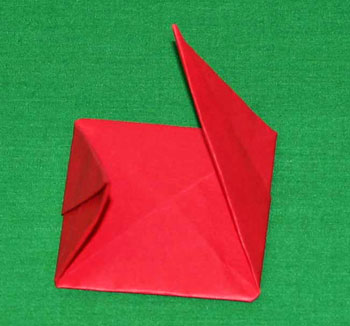
Fold the points to the corners to make a square.
This shows the left fold.

Here is the right fold.
Repeat the steps above for the other two pieces of paper.
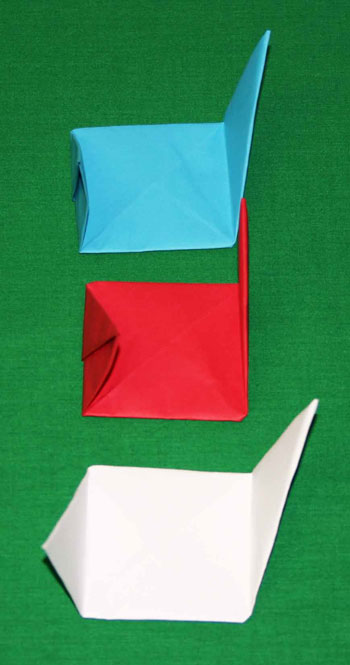
The picture below shows the three folded papers.
Notice that each has two small triangular pockets.
Notice that each has two small triangular pockets.

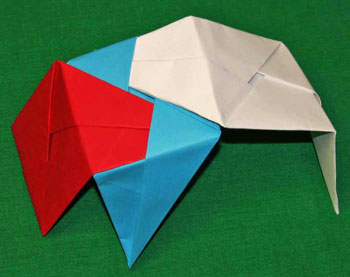
Insert the points into the triangular pockets.
Each folded paper connects one of its points into one of the triangular pockets in each of the other two folded papers.
Here, the red point and the white point go into the blue triangular pockets.
Each folded paper connects one of its points into one of the triangular pockets in each of the other two folded papers.
Here, the red point and the white point go into the blue triangular pockets.
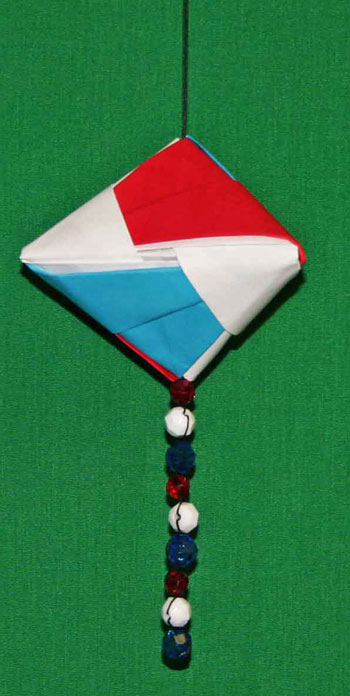
Continue inserting the points until a box is made - blue and red points into white pockets, white and blue points into red pockets.
As you insert the points, make a gentle outward fold along the horizontal line between the two triangular pockets. This helps make the box.
As you insert the points, make a gentle outward fold along the horizontal line between the two triangular pockets. This helps make the box.

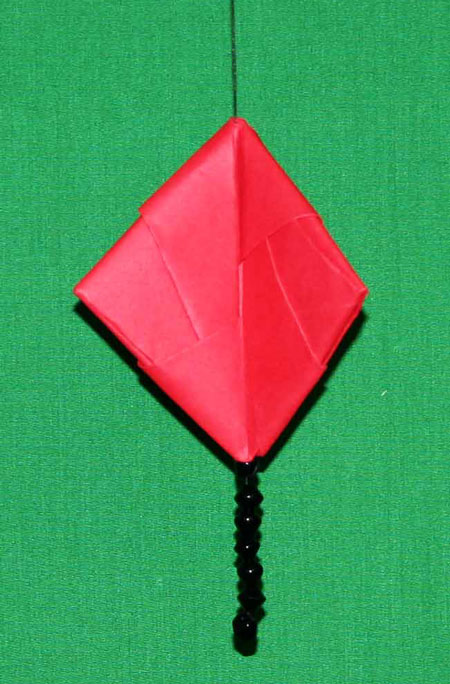
Add beads to a piece of yarn and place through the middle of the folded box ornament to hang.
For the "X" version of the ornament, make the three folded papers the same as above.
However, make an inward fold along the horizontal line between the triangular pockets.
However, make an inward fold along the horizontal line between the triangular pockets.
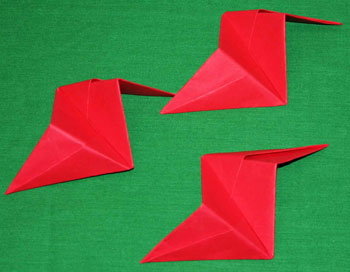
Insert the points of each piece into the pockets of the other two pieces.
The result makes an "X" rather than an open box.
Add beads to a piece of yarn.
Insert the yarn through the middle of the folded ornament to hang.
Insert the yarn through the middle of the folded ornament to hang.
The boxes can be made larger or smaller. (Note, small ones are possible just more challenging to fit the points into the triangular pockets.)
The boxes can be made to hold small gifts and hung to surprise someone.
They can be the gift themselves.
How about a set of embellished ornaments for Christmas?
Or, you could write your gift message on the paper before folding and give the ornament as the gift.
For a children's project, they can color the paper a variety of ways before folding into the ornament shapes.


funEZcrafts
Welcome
Come on in and stay awhile...

funEZcrafts
Welcome
Come on in and stay awhile...