Easy Christmas Crafts: Pyramid Folded Star
The pyramid folded star uses a simple strip of paper and the folding instructions along with a touch of glue to become a variety of different sized stars.
The smaller stars make pretty hanging ornaments while the larger stars add a handsome touch to a tablescape.
First, let's look at some examples.
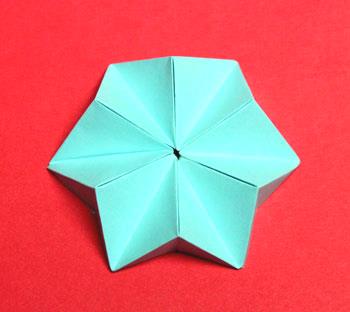
The first one is a blue pyramid folded star made using pale blue 20-pound paper.
The smaller stars make pretty hanging ornaments while the larger stars add a handsome touch to a tablescape.
First, let's look at some examples.
The first one is a blue pyramid folded star made using pale blue 20-pound paper.
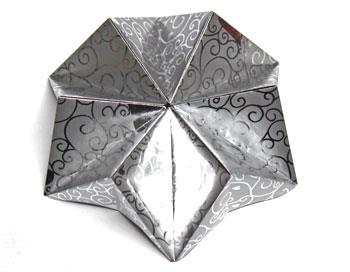
The next version is larger and made using silver foil wrapping paper.
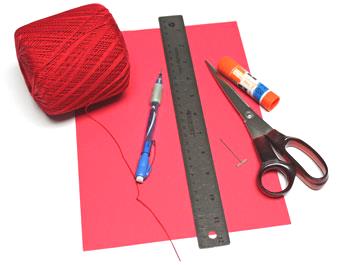
Easy Christmas Crafts: Pyramid Folded Star Materials and Tools:
Paper - regular 20-pound paper, wrapping paper, vellum
Ruler
Pencil
Scissors
Glue
Yarn - optional for a hanging ornament
T-pin or sharp point to make hole for yarn
Ruler
Pencil
Scissors
Glue
Yarn - optional for a hanging ornament
T-pin or sharp point to make hole for yarn
The Steps for How to Make the Easy Christmas Crafts: Pyramid Folded Star:
Decide how large the finished star should be and how many points it should have.
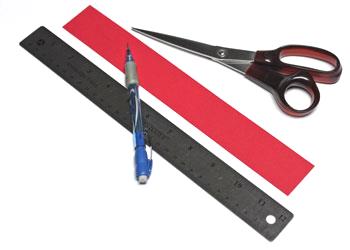
Determine the width and length needed for the paper strip.
For a six-point star, there should be seven pyramids. If you want more points, just make one more pyramid than the number of desired points.
The width of the paper strip is one-half the size of the finished star. For example, a 1.5-inch wide strip makes a 3-inch wide star.
The number of pyramids multiplied by the width of the paper strip determines how long the strip should be.
For the example below, the width of the paper is 1.5 inches. The star is a six-point star needing seven pyramids. 1.5 multiplied by 7 equals 10.5 inches.
I used the full length of the paper - 11 inches - and waited to cut off the excess.
Measure, mark and cut the paper strip.
This diagram shows how the paper should be folded into pyramids for a six-point star.
The paper is folded one way for the solid lines and the opposite way for the dotted lines.
The paper is folded one way for the solid lines and the opposite way for the dotted lines.

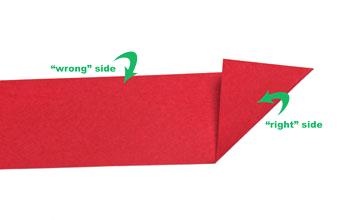
If your paper has a "right" side and a "wrong" side, make sure the right side is on the outside of the diagonal folds.
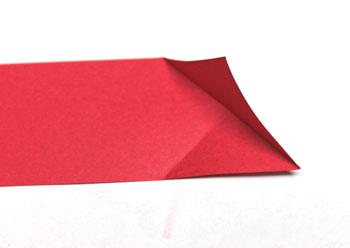
Fold one corner over to meet the opposite long side.
Make sure the edges are even and the diagonal makes a point at the corner.
Fold one corner over to meet the opposite long side.
Make sure the edges are even and the diagonal makes a point at the corner.
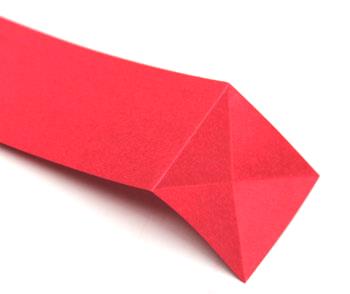
The second fold is like the first except from the opposite corner.
The third fold is a solid line fold and goes in the opposite direction of the diagonal folds.
Fold the paper across at the points the folded diagonals touch the edges of the paper strip.
Fold the paper across at the points the folded diagonals touch the edges of the paper strip.
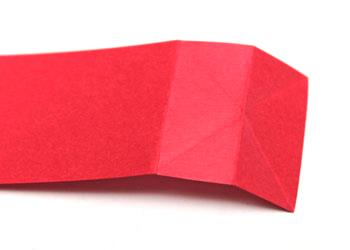
The fourth fold of the pyramid is also a solid line fold and is opposite the diagonal folds.
This fold is across the paper where the two diagonals intersect.
This fold is across the paper where the two diagonals intersect.
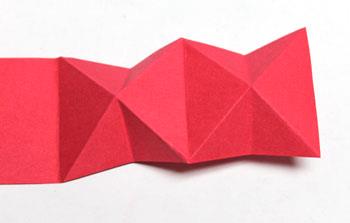
The next image shows the first two pyramid shapes and their fold lines.
The second pyramid shape is folded just like the first.
The crosswise fold at the end of the first diagonals acts like the end of the paper as shown in the first folds.
The second pyramid shape is folded just like the first.
The crosswise fold at the end of the first diagonals acts like the end of the paper as shown in the first folds.
Continue folding the pyramids until the last one is folded.
I left the paper at 11 inches and have extra at the end of the last pyramid.
Note: for the other sizes, I also cut the strip a little long and trimmed off the excess.
I left the paper at 11 inches and have extra at the end of the last pyramid.
Note: for the other sizes, I also cut the strip a little long and trimmed off the excess.
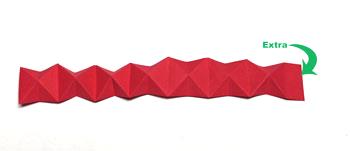
The last diagonal fold determines the excess.
Trim off any paper that is past the edge of the strip.
Trim off any paper that is past the edge of the strip.

Fold all of the pyramids and crease their edges.
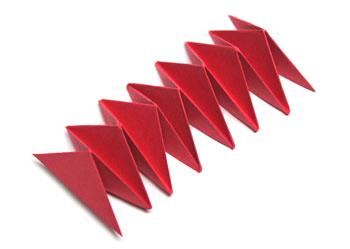
Pull the pyramids into a loose circular shape.
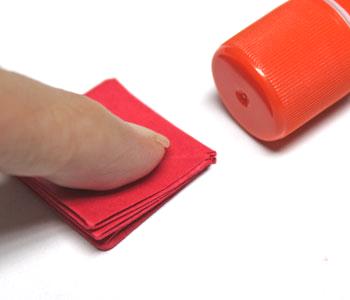
Place glue on the top triangles of one of the end pyramids.
Place glue on the top triangles of one of the end pyramids.
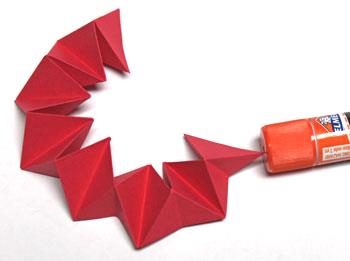
Pull the other end pyramid around and overlap it on top of the glue.

Give the glued surfaces a couple of minutes to set.
Next, add glue on the folds between each of the six points.
Next, add glue on the folds between each of the six points.
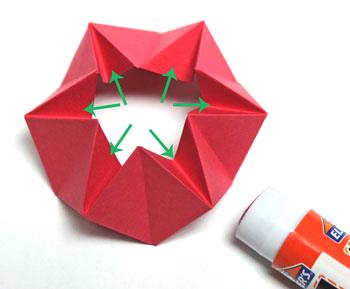
Collapse the pyramids to press the glued surfaces together.
Give the glue a couple of minutes to set.
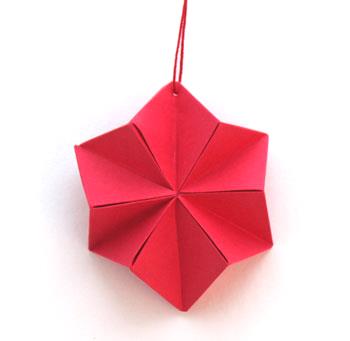
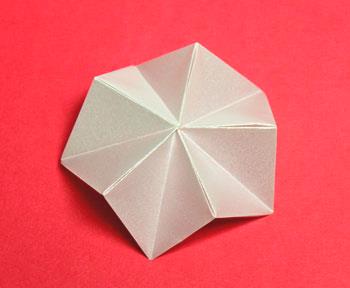
Gently open the pyramids to form the pyramid folded star.
The pretty star is finished and can be placed on a flat surface.
Gently open the pyramids to form the pyramid folded star.
The pretty star is finished and can be placed on a flat surface.
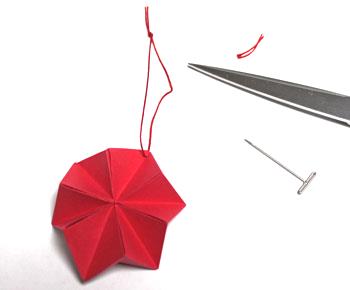
But, for a hanging decoration, let's add a hanging loop.
Cut a piece of yarn 8 to 10 inches long.
Cut a piece of yarn 8 to 10 inches long.
Use a T-pin or other sharp point to make a small hole in one of the star's points.

Push the yarn through the small hole.
Pull the ends even and tie a knot.
Cut off any excess yarn beyond the knot.
Pull the ends even and tie a knot.
Cut off any excess yarn beyond the knot.
The simple, yet interesting pyramid folded star can now be hung on display.
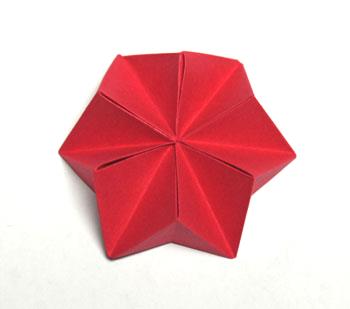
This is a five-point version of the star made with silver vellum.
Vellum makes an elegant star. The five points make a tighter star which is not quite as open as the six-point examples.
The vellum strip was 1.75 inches wide and 11 inches long with a half-inch excess that was cut off.
The finished star was 3.5 inches across.
Vellum makes an elegant star. The five points make a tighter star which is not quite as open as the six-point examples.
The vellum strip was 1.75 inches wide and 11 inches long with a half-inch excess that was cut off.
The finished star was 3.5 inches across.
Here are several versions.
The large silver star used a 4-inch wide strip of paper. For a six-point star, the length needed to be slightly longer than 28 inches (4 times 7).
The smaller silver star was made with a 3-inch wide strip of paper that was slightly longer than 21 inches for the six-point star.
The blue star was made with the same dimensions as the red star.

A variety of colors and sizes to match your decor would be pretty on a runner at a dinner table.
They would also be pretty resting on a foyer table or any flat surface that needs some decoration.
Have fun!
The pyramid folded star makes an inexpensive decoration in a variety of sizes to add to your holiday festivities.
They would also be pretty resting on a foyer table or any flat surface that needs some decoration.
Have fun!
The pyramid folded star makes an inexpensive decoration in a variety of sizes to add to your holiday festivities.


funEZcrafts
Welcome
Come on in and stay awhile...

funEZcrafts
Welcome
Come on in and stay awhile...