Easy Christmas Crafts: Wired Ribbon Christmas Tree
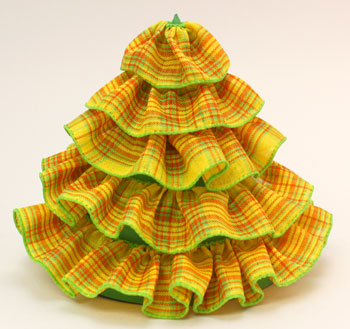
Paper and wired ribbon along with a few simple tools become a fun and interesting Wired Ribbon Christmas Tree to decorate a desk, table or anywhere to add some cheer!
This one is made with yellow and green plaid ribbon over a green paper cone.
This one is made with yellow and green plaid ribbon over a green paper cone.
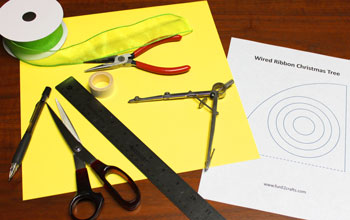
Easy Christmas Crafts: Wired Ribbon Christmas Tree Materials and Tools:
Card stock paper 12x12 inches
Wired ribbon 1 1/2 inches wide
Double-sided tape
Pencil
Ruler
Scissors
Needle nose pliers
Compass (or use pattern to make semi-circle)
Wired Ribbon Christmas Tree pattern (click to open file in Adobe)
Wired ribbon 1 1/2 inches wide
Double-sided tape
Pencil
Ruler
Scissors
Needle nose pliers
Compass (or use pattern to make semi-circle)
Wired Ribbon Christmas Tree pattern (click to open file in Adobe)
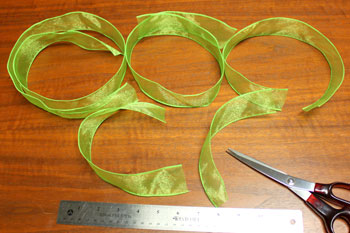
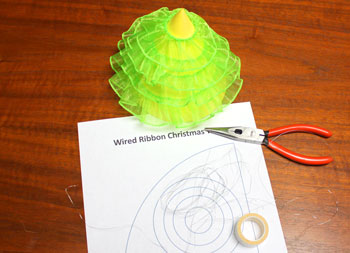
Take a look at the simple materials and tools shown here.
The Steps for How to Make the Easy Christmas Crafts: Wired Ribbon Christmas Tree:
Print the Wired Ribbon Christmas Tree pattern.
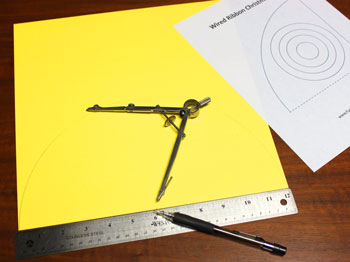
Find and mark the center along one edge of the 12x12 card stock.
Either use the compass or the pattern to draw the semi-circle.
If using a compass, set the distance at 5 7/8 inches. Place the point on the center mark along the edge of the paper and draw the semi-circle.
If using the pattern, cut out the quarter-circle shape.
Place the dotted edge at the center mark perpendicular to the edge with the solid straight edge even with the edge of the card stock.
Mark around the quarter-circle.
Flip the quarter circle over to draw the rest of the semi-circle.
Cut around the curved edge of the semi-circle.
Measure 3 1/8 inches from one end of the straight edge to the edge of the semi-circle. Make a small mark.
Draw a line from the small mark to the center of the straight edge of the semi-circle.
Measure 3 1/8 inches from one end of the straight edge to the edge of the semi-circle. Make a small mark.
Draw a line from the small mark to the center of the straight edge of the semi-circle.

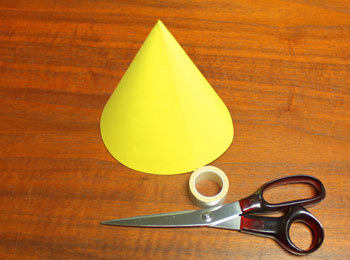
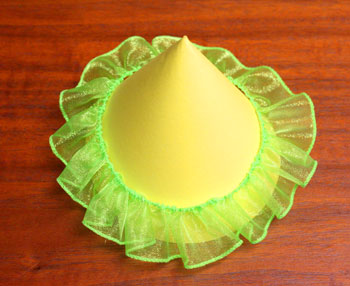
Form a cone shape by wrapping the edge of the semi-circle around and overlapping to the drawn line.
Use several pieces of the double-side tape to secure the cone shape.
Use several pieces of the double-side tape to secure the cone shape.
Cut one of each of the following lengths of the 1 1/2-inch (1.5-inch) wide wired ribbon.
Begin with the longest ribbon.
IMPORTANT, secure each end of one edge's wire to keep it from coming out of the ribbon.
Remove the second wire from the opposite edge of the ribbon.
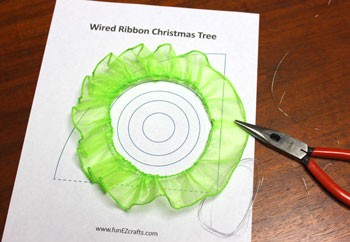
Gather the ribbon along the remaining wire.
Form a circle the size of the largest circle on the pattern.
Twist the wire ends together firmly.
Cut the excess wire.
Make a small bend in the twisted wire to further secure the ends.
IMPORTANT, secure each end of one edge's wire to keep it from coming out of the ribbon.
Remove the second wire from the opposite edge of the ribbon.
Gather the ribbon along the remaining wire.
Form a circle the size of the largest circle on the pattern.
Twist the wire ends together firmly.
Cut the excess wire.
Make a small bend in the twisted wire to further secure the ends.
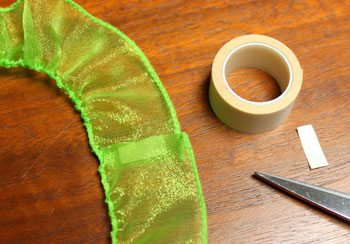
Cut a small piece of the double-sided tape.
Place the tape on one end of the ribbon.
Fold the other end of the ribbon under and press to the sticky tape.
Place the tape on one end of the ribbon.
Fold the other end of the ribbon under and press to the sticky tape.
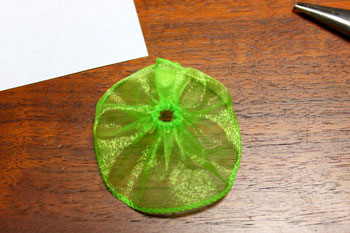
Evenly distribute the ribbon around the circle.
Place the circle over the paper cone with the ribbon seam over the seam in the cone.
Place the circle over the paper cone with the ribbon seam over the seam in the cone.
Use the same steps to make the next three ribbon circles.
Each time, make sure you secure the wire ends of one edge while you pull the opposite wire from the ribbon edge.
It's difficult to push the wire back into the edge of the ribbon (voice of experience).
For the 24-inch, 18-inch and 12-inch lengths, use the decreasing circles on the pattern to form the wire circles.
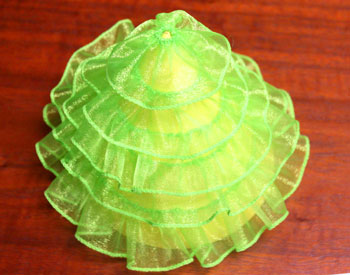
Place the finished circles in decreasing size over the paper cone.
Each time, make sure you secure the wire ends of one edge while you pull the opposite wire from the ribbon edge.
It's difficult to push the wire back into the edge of the ribbon (voice of experience).
For the 24-inch, 18-inch and 12-inch lengths, use the decreasing circles on the pattern to form the wire circles.
Place the finished circles in decreasing size over the paper cone.
For the top layer, make sure you prevent the wire ends of one wired edge from coming out of the ribbon.
Remove the wire from the opposite edge.
Pull the ends of the remaining wire to gather the ribbon as much as possible.
Twist the ends of the wire together, cut the excess and bend the twisted ends to further secure.
Using the double-sided tape, overlap the ends of the ribbon.
Remove the wire from the opposite edge.
Pull the ends of the remaining wire to gather the ribbon as much as possible.
Twist the ends of the wire together, cut the excess and bend the twisted ends to further secure.
Using the double-sided tape, overlap the ends of the ribbon.
Place the top layer on the top of the paper cone.
Note: I intentionally did not tape or glue each layer to the paper cone such that the little tree could be easily disassembled.
For a more permanent tree, use more double-sided tape or glue to secure each layer to the paper cone.
The Wired Ribbon Christmas Tree is finished and ready to display.
For a more permanent tree, use more double-sided tape or glue to secure each layer to the paper cone.
The Wired Ribbon Christmas Tree is finished and ready to display.
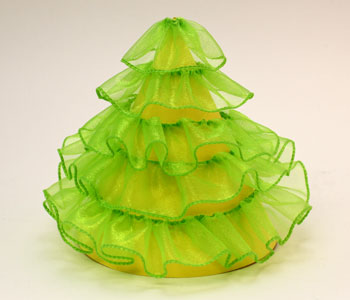
I've got to admit I prefer the solid colored ribbon to the semi-transparent ribbon.
But, the options are almost endless from solid to satin to glitter to semi-transparent wired ribbon in a wide variety of colors with matching or contrasting paper cones underneath.
Plus, this project can easily be translated into a larger tree using brown craft paper for the semi-circle and wider wired ribbon for the layers.
It's a fast, fun and easy project that can easily brighten an office, a hospital room, a small table at home or anywhere to add some cheer.
Have fun!
If many decorations are needed, the Wired Ribbon Christmas Tree is also a great group project for families, senior centers, office groups or church groups.

| 36 inches |
| 24 inches |
| 18 inches |
| 12 inches |
| 8 inches |

funEZcrafts
Welcome
Come on in and stay awhile...

funEZcrafts
Welcome
Come on in and stay awhile...