Easy Paper Crafts: Celtic Design 12 Circles
This Celtic design with 12 circles makes a striking and easy paper crafts project.
With just a few materials and tools, I show you how to make this beautiful project in the pictures below.
Simple and inexpensive construction paper in blue, green, orange, red, purple and black made this eye-catching version of the Celtic Design.
The yellow background is 24-pound 8.5x11 printer paper.

Let's make a version using five bright colors of 24-pound printer paper.
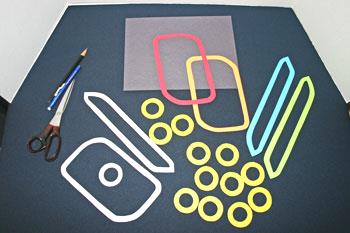
Easy Paper Crafts: Celtic Design 12 Circles Materials and Tools:
Paper - six colors, 8.5 x 11; five to make the design and one for the background
Pencil
Eraser
Scissors
Frame (optional)
Pattern (Click here for the pattern: page 1 and page 2.)
Pencil
Eraser
Scissors
Frame (optional)
Pattern (Click here for the pattern: page 1 and page 2.)
The Steps for How to Make the Easy Paper Crafts: Celtic Design 12 Circles:
Print the patterns and trim around the outer and inner lines.
Cut two of the large shape in two different colors.
Cut two of the long narrow shape in two separate colors.
Cut twelve of the circles out of a fifth color but make them all the same color.
The background can be either 7.5 x 8.5 inches to fit the design, or it can be the size you want. (In the first picture above, the black background is 7.5 x 8.5 inches. In the example below, the black background is 8.5 x 11 inches.)
The modified rectangles and long narrow shapes should remain one continuous shape, however cut each circle in order to weave it over and under the other pieces.
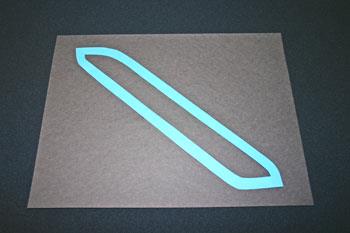
Place the first long narrow shape with the flattened ends at the top and bottom going from the upper left corner to the lower right corner.
Place the next shape, one of the large, modified rectangles, over the first shape in same direction and with the more rounded corners at the top and bottom.
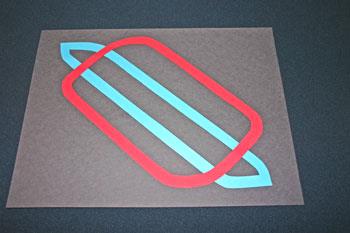
The second large modified rectangle goes over the first, again with the more rounded corners at the top and bottom.
However, this shape should be placed from the upper right to the lower left
However, this shape should be placed from the upper right to the lower left
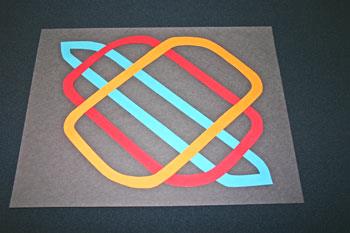
Position the remaining long narrow shape over the other three with the orientation from upper right to lower left.
Place the flattened ends toward the top and bottom.
Place the flattened ends toward the top and bottom.
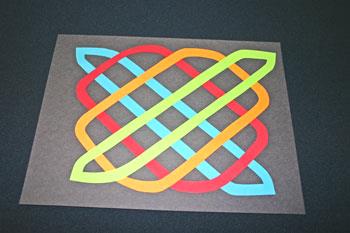
Begin weaving the circles over and under where the modified rectangles cross.
Follow the over and under patterns shown below and hide the cut in the circle under one of the pieces.
Follow the over and under patterns shown below and hide the cut in the circle under one of the pieces.
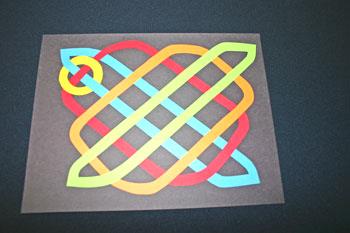
Add the second circle. Notice, not every crossed point in the rectangles has a circle.
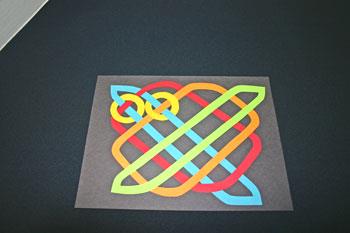
Add the third circle.
As you work with the circles, the shape becomes distorted.
Don't worry, you can re-shape the pieces properly after you add all of the circles.
As you work with the circles, the shape becomes distorted.
Don't worry, you can re-shape the pieces properly after you add all of the circles.
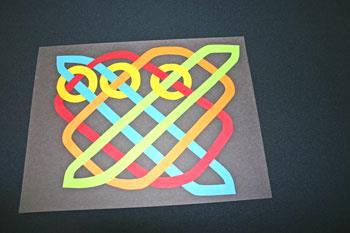
Add the fourth circle. Again, the shape looks out of kilter, but you will fix it later.
Weave the next row of circles over and under the pieces of the modified rectangles.
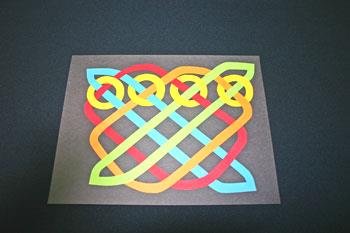
Add the third row of four circles.
To check your weave, make sure each line of the modified rectangles alternates going over and under the circles and other rectangular lines.
Re-position the overall shape into the not-quite-square design.
Make sure the cut portion of each circle is hidden behind a modified rectangle piece.
To check your weave, make sure each line of the modified rectangles alternates going over and under the circles and other rectangular lines.
Re-position the overall shape into the not-quite-square design.
Make sure the cut portion of each circle is hidden behind a modified rectangle piece.
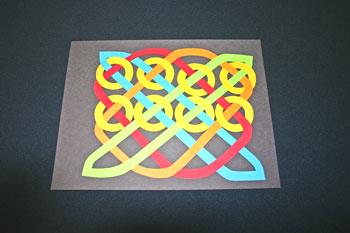
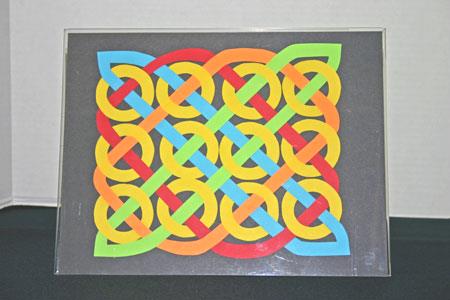
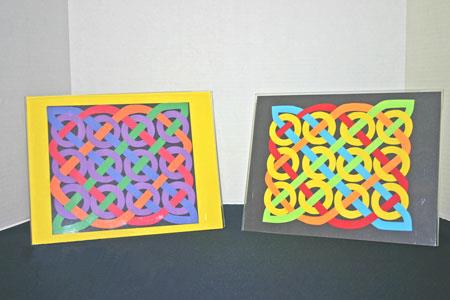
Here's the final shape in a simple 8.5x11 acrylic frame.
Here, the version on the left used construction paper for the design and black background with the yellow, 8.5x11 printer paper "matting" the design.
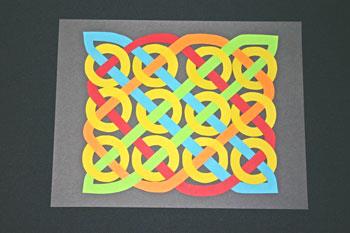
The version on the right used five colors of bright 8.5x11 printer paper for the design on a black construction paper background.
The version on the right used five colors of bright 8.5x11 printer paper for the design on a black construction paper background.
The Celtic Design 12 Circles makes an entertaining and easy paper crafts project for young and old alike.
The materials and tools are inexpensive and the steps for how to make the Celtic design are simple.
The beautiful results can be simply displayed or they can be matted and framed.
Either way, this Celtic Design is easy, fun and unusual.
The colors and the Celtic design attract the eye and intrigue the brain. Enjoy!


funEZcrafts
Welcome
Come on in and stay awhile...

funEZcrafts
Welcome
Come on in and stay awhile...