Easy Christmas Crafts: Tulle and Chenille Christmas Tree
How about a little Tulle and Chenille Christmas Tree to add to your decorations this year? It's fun and easy and only requires a few materials and tools.
And, it does involve a needle and thread, but the stitches are just to gather the edge of the tulle and won't be seen at all. Quick and easy even for the non-sewers.
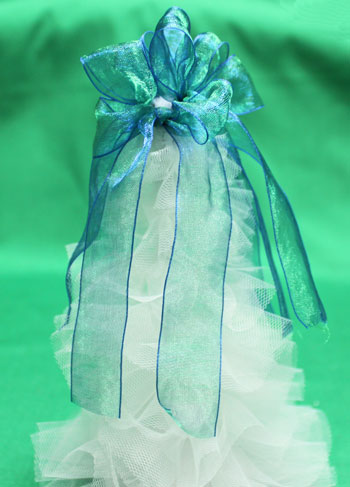
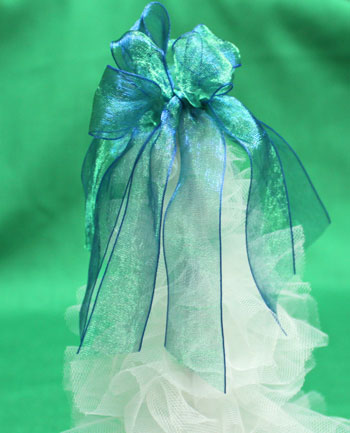
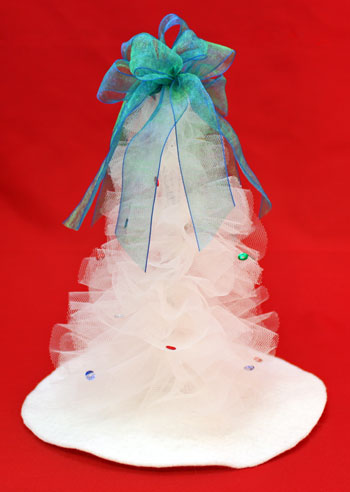
Take a look - isn't it pretty?
And, it does involve a needle and thread, but the stitches are just to gather the edge of the tulle and won't be seen at all. Quick and easy even for the non-sewers.
Take a look - isn't it pretty?
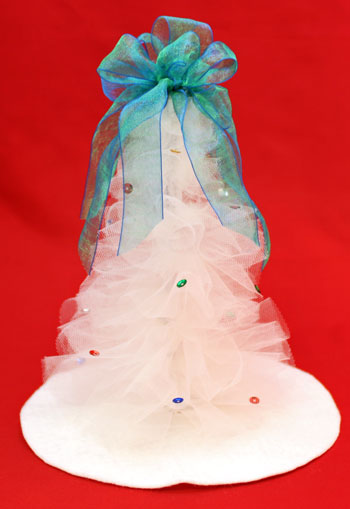
The little tree is "little" and would be lovely as part of a tablescape. Add more sequins if you prefer lots of "ornaments" or leave them off entirely for a simple yet elegant decoration.
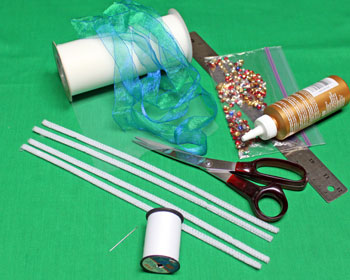
Easy Christmas Crafts: Tulle and Chenille Christmas Tree Materials and Tools:
Tulle or tulle ribbon
Organza ribbon, 7/8 inch wide
Chenille wire stems - four 12-inch long
Sewing thread
Needle
Ruler
Scissors
Sequins (optional for "ornaments")
Glue for sequins
Tweezers to help place sequins (optional but very helpful)
Organza ribbon, 7/8 inch wide
Chenille wire stems - four 12-inch long
Sewing thread
Needle
Ruler
Scissors
Sequins (optional for "ornaments")
Glue for sequins
Tweezers to help place sequins (optional but very helpful)
Optional for tree skirt (not shown in materials photo)
Craft felt - white
Circular object (I used a 6 1/2 inches diameter can)
Pencil to draw circle
Scissors
Or, use the Tulle and Chenille Christmas Tree Skirt pattern
Circular object (I used a 6 1/2 inches diameter can)
Pencil to draw circle
Scissors
Or, use the Tulle and Chenille Christmas Tree Skirt pattern
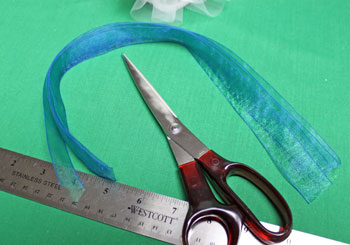
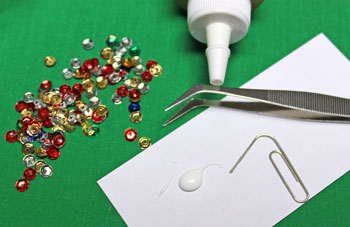
Take a look at the simple materials and tools shown here for the tree.
The Steps for How to Make the Easy Christmas Crafts: Tulle and Chenille Christmas Tree:
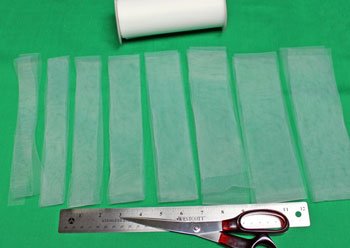
Measure and cut the tulle.
The length for all pieces is 36 inches.
The widths are 2 3/4, 2 1/2, 2 1/4, 2, 1 3/4, 1 1/2, 1 1/4 and 1 inch.
If using 6-inch wide tulle ribbon, cut three pieces each 36 inches long.
Cut the first piece into the 2 3/4, 2 1/4 and 1-inch widths.
Cut the second piece into 2 1/2, 2 and 1 1/2-inch widths.
Cut the remaining 1 3/4 and 1 1/4 widths from the third length.
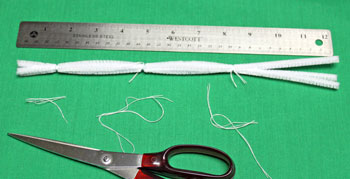
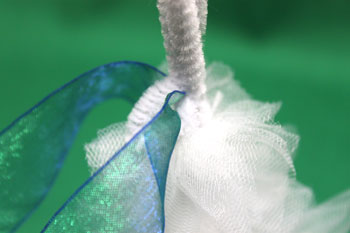
Group the four chenille wires together.
Use lengths of doubled thread to tie the wires together at the 8-inch mark, the 1 1/4 inch mark and roughly halfway between those two.
Use lengths of doubled thread to tie the wires together at the 8-inch mark, the 1 1/4 inch mark and roughly halfway between those two.
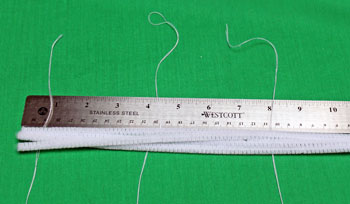
Wrap the wires securely with the thread, tie knots and trim the threads.
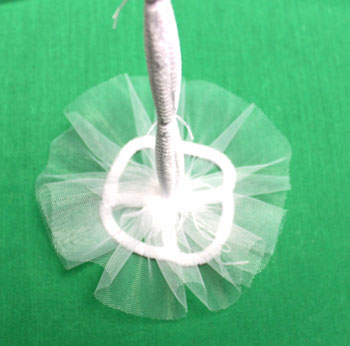
Separate the loose ends of the wires.
Bend them into four supporting wires for the "tree trunk."
Bend them into four supporting wires for the "tree trunk."
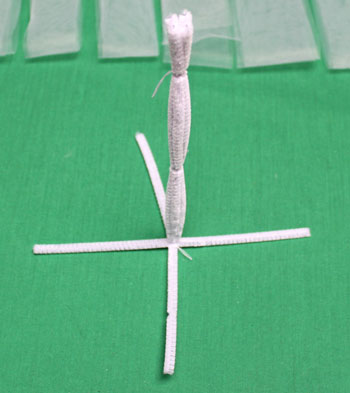
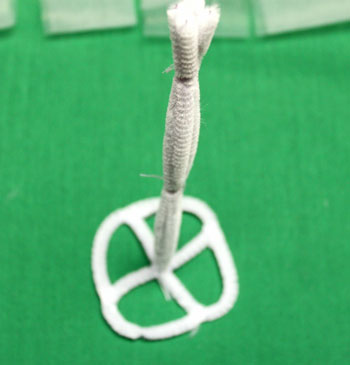
Connect the ends of the supporting wires to form a rough circular support.
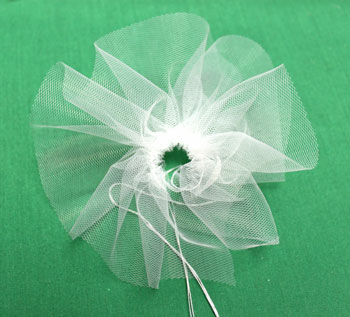
Thread the needle with doubled thread.
Make in and out running stitches along the length of one side of the 2 3/4 inch width of tulle.
Make in and out running stitches along the length of one side of the 2 3/4 inch width of tulle.
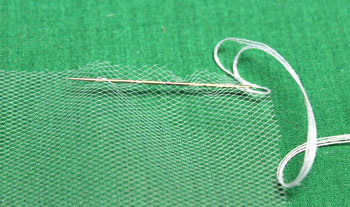
Pull the thread ends to gather the tulle.
Tie the thread ends around the chenille wires just above the support.
Pull firmly, but not too tightly. You want to be able to spread the gathers evenly around the wire "tree trunk."
Pull firmly, but not too tightly. You want to be able to spread the gathers evenly around the wire "tree trunk."
Gather and add the remaining tulle sections in decreasing sizes.
I left the threads for demonstration purposes. It's easier to trim the thread ends after you add each section. Leave ~1/2 inch thread beyond the knot.
I left the threads for demonstration purposes. It's easier to trim the thread ends after you add each section. Leave ~1/2 inch thread beyond the knot.
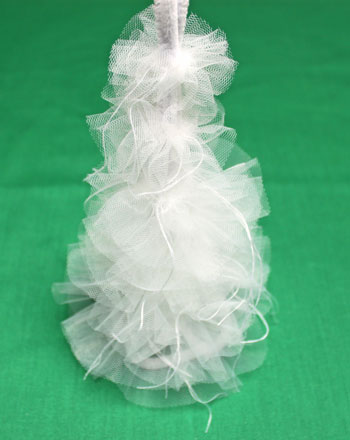
Distribute the layers evenly along the "tree trunk" with the top layer just below the top tied thread around the chenille wires.
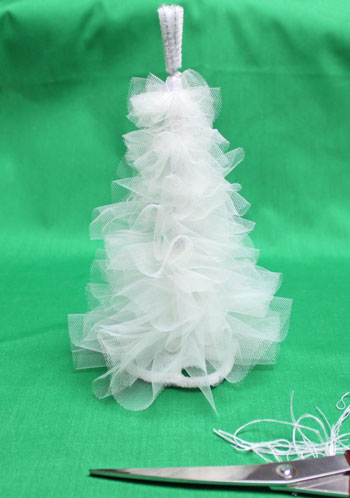
Measure and cut the organza ribbon into four lengths of 16 inches each.
Form a loop in one of the top chenille wires.
Thread one organza ribbon through the loop.
Thread one organza ribbon through the loop.
Tie the ribbon into a bow.
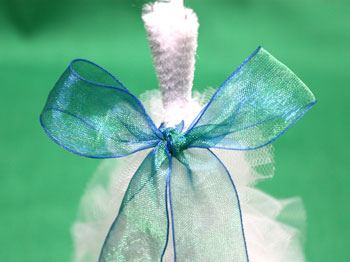
Perform the same steps for the other three chenille wires and three organza ribbons.
Trim the ribbon ends at an angle.
Add sequins to the tulle.
I use a scrap piece of paper to hold a drop of glue and the end of a wire paper clip to put the glue on the back of each sequin.
The tweezers help position the sequins on the tulle.
I use a scrap piece of paper to hold a drop of glue and the end of a wire paper clip to put the glue on the back of each sequin.
The tweezers help position the sequins on the tulle.
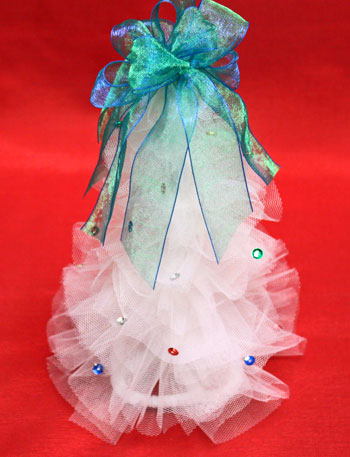
Add as many or as few sequins as you desire.
I chose to add a few just for a hint of sparkle under the lights.
I chose to add a few just for a hint of sparkle under the lights.
You can use tissue paper, handkerchiefs, a t-shirt or a piece of fabric for a tree skirt.
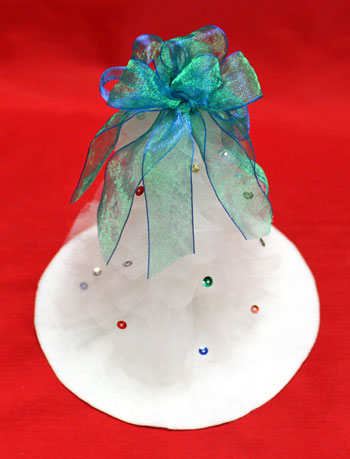
This tree skirt is a piece of white craft felt.
Use a circular object of 6 to 6 1/2 inches diameter as a pattern.
Place the object over the felt and draw around the circle.
Cut out the circle.
Fold the circle of felt in half and in half again for a pie-slice shape.
Cut 1/2 inch off the point to form an open area that will fit around the "tree trunk."
Cut a slit from the edge of the circle to the open center area.
Or, print and use the Tulle and Chenille Christmas Tree Skirt pattern.
Slide the felt over the bottom support and underneath the bottom layer of tulle.
Overlap the cut edge in your display.
Display the fun and easy and pretty Tulle and Chenille Christmas Tree among your decorations this year.
Just a few materials and a little time turns into a pretty decoration for a table, an office, a nursing home or wherever a little tree could add some sparkle.
Have fun!
A few inexpensive materials and tools can make a whole forest of these pretty Tulle and Chenille Christmas Tree decorations.
Have fun!
A few inexpensive materials and tools can make a whole forest of these pretty Tulle and Chenille Christmas Tree decorations.


funEZcrafts
Welcome
Come on in and stay awhile...

funEZcrafts
Welcome
Come on in and stay awhile...