Easy Christmas Crafts: Snowman of Craft Yo Yos
Scraps of white fabric along with some padding and cardboard for stability make most of this Easy Christmas Crafts Snowman of Craft Yo Yos. Embellish with beads for the coal and a small piece of black for his hat and a scrap for his scarf adds character to the little snowman.
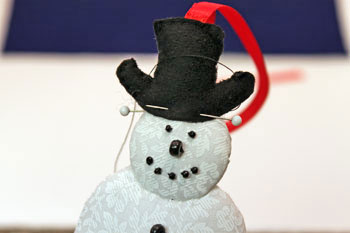
Take a look at Mr. Snowman without any cold.
Take a look at Mr. Snowman without any cold.
This Easy Christmas Crafts Snowman of Craft Yo Yos is fun and easy to make. He can decorate a tree, hang in an office or kitchen and even be a small gift for holiday guests to take home as a keepsake.
Easy Christmas Crafts: Snowman of Craft Yo Yos Materials and Tools:
Easy Christmas Crafts Snowman pattern (click to open PDF file)
Fabric scraps - white, black and plaid
Ribbon (1/4 inch by 8 inches)
Beads - seven seed beads and four slightly larger beads (optional - can also use French knots)
Thread - black and white
Needle
Pins
Poly fiberfill (can also use cotton balls)
Cardboard or chip board
Scissors
Fabric scraps - white, black and plaid
Ribbon (1/4 inch by 8 inches)
Beads - seven seed beads and four slightly larger beads (optional - can also use French knots)
Thread - black and white
Needle
Pins
Poly fiberfill (can also use cotton balls)
Cardboard or chip board
Scissors
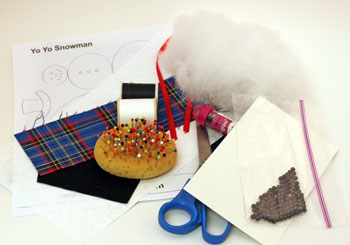
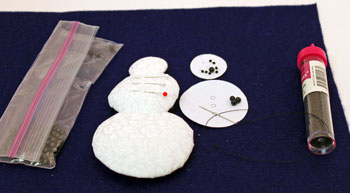
Take a look at the simple materials and tools shown here. If you don't have scraps of fabric from other projects, you can use clothing that is being discarded.
But, I did try an old white cotton t-shirt thinking it would be perfect. It wasn't, too stretchy.
You could also use fabric quarters from the craft store or find inexpensive clothing or material at a thrift store.
But, I did try an old white cotton t-shirt thinking it would be perfect. It wasn't, too stretchy.
You could also use fabric quarters from the craft store or find inexpensive clothing or material at a thrift store.
The Steps for How to Make the Easy Christmas Crafts: Snowman of Craft Yo Yos:
Print the Easy Christmas Crafts Snowman pattern.
Cut out each of the pattern pieces.
The three circles showing the snowman shape should be cut separately.
Also, cut along the lines of the three circles that are one inside another.
The center circle will be solid and the two outer circles will have holes in their middles.
Cut out each of the pattern pieces.
The three circles showing the snowman shape should be cut separately.
Also, cut along the lines of the three circles that are one inside another.
The center circle will be solid and the two outer circles will have holes in their middles.
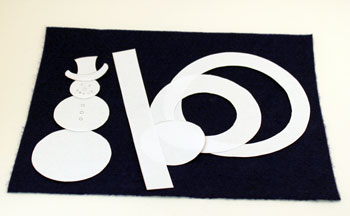
Cut three white fabric circles using each of the three concentric circle pattern pieces.
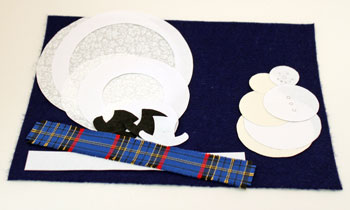
Cut two of the hat shape from black fabric
Use the snowman shape circles as pattern pieces for the cardboard (or chip board). Cut one of each sized circle.
Cut one of the plaid fabric using the long rectangular pattern. You could also use a scrap piece of felt for the scarf and snip the ends for fringe.
If you prefer, follow the lines in the fabric's design to determine the length and width of the scarf. Use the pattern as a general guide for width and length.
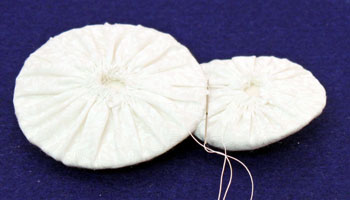
Thread the needle. Make small running stitches near the edge of the circle. (The free e-book of How to Sew Stitches helps with basic stitches.)
Leave a 2-inch tail of thread at the beginning of the stitches. This will be used to gather the resulting yo yo.
I suggest using a double thickness of thread. I thought my thread was strong enough, but it broke when I pulled to close the yo yo.
Leave a 2-inch tail of thread at the beginning of the stitches. This will be used to gather the resulting yo yo.
I suggest using a double thickness of thread. I thought my thread was strong enough, but it broke when I pulled to close the yo yo.
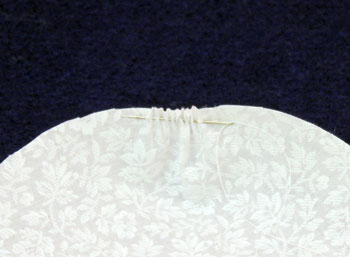
Continue the small stitches around the outer perimeter of the circle.
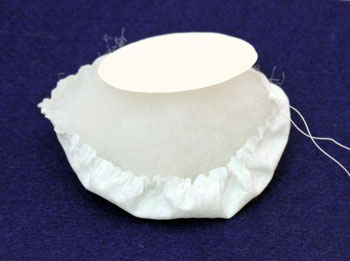
Hold the beginning end of the thread and pull the needle and thread to begin gathering the edge of the fabric circle.
Insert a small amount of fiberfill inside the circle.
Place the corresponding cardboard circle on top of the fiberfill.
Hold the beginning end of the thread and pull the needle and thread to begin gathering the edge of the fabric circle.
Insert a small amount of fiberfill inside the circle.
Place the corresponding cardboard circle on top of the fiberfill.
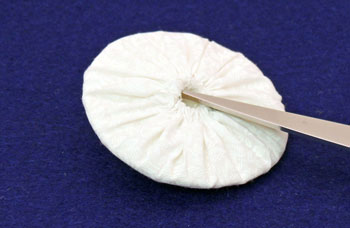
Hold the cardboard inside the circle and pull the threads to gather the fabric over the cardboard circle.
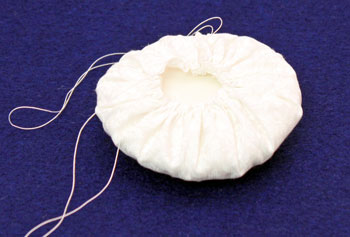
Pull the threads as tightly as you can without breaking them.
Holding the thread ends firmly, tie the two ends together in a square knot.
Trim the ends of the thread roughly two inches from the knot.
Holding the thread ends firmly, tie the two ends together in a square knot.
Trim the ends of the thread roughly two inches from the knot.
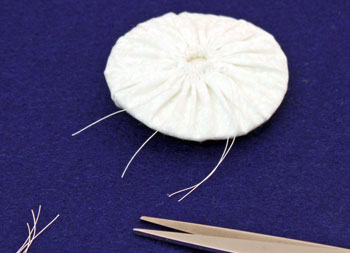
Use the tips of the scissors to push and hide the thread tails inside the gathered fabric.
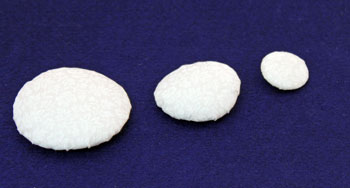
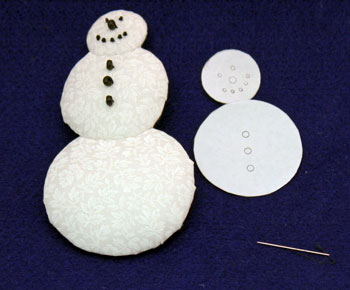
Complete the middle and top circles using the same steps.
Overlap the middle circle 3/8 to 1/2 inch over the large bottom circle.
Pin to hold in place.
Pin to hold in place.
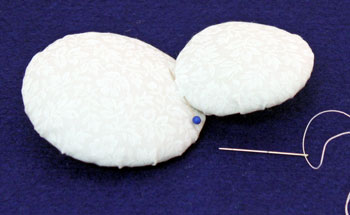
Use a hidden stitch (see How to Sew Stitches for more details) to sew the middle circle to the bottom circle on the front of the snowman shape.
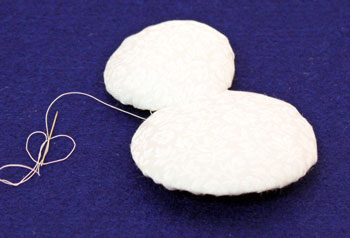
Do the same stitch across the back to hold the two shapes together.
Add the small circle over the middle circle in the same way.
Position the top circle over the middle circle directly above where the middle overlaps the bottom.
Use the snowman circles to identify where the beads should be positioned. (Or use French knots instead - see the How to Sew Stitches e-book for details.)
Use pins to mark where the beads should be placed.
Add the beads to the Easy Christmas Crafts Snowman's face and tummy.
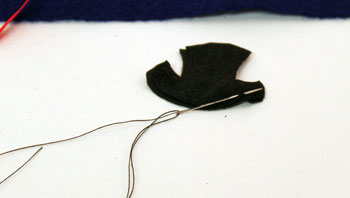
Thread needle with black thread for sewing the hat.
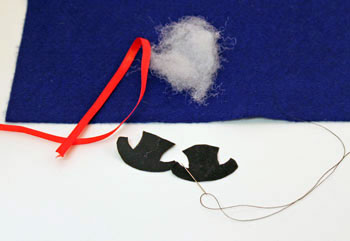
Begin sewing the hat near the edge roughly 3/8 inch from one side.
The bottom of the hat should remain open for adding filling and for attaching to the snowman's head.
The bottom of the hat should remain open for adding filling and for attaching to the snowman's head.
When the stitches get to the top of the hat, trim the ribbon to the length desired - roughly 8 inches.
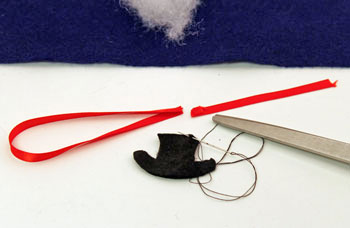
Insert the cut ends of the ribbon into the top of the hat.
Sew across the top of the hat making sure to sew stitches through the ribbon.
Sew across the top of the hat making sure to sew stitches through the ribbon.
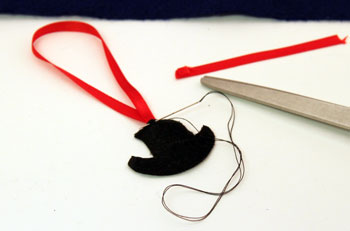
At the bottom of the hat, gently stuff a small amount of fiberfill into the hat shape.
A toothpick or wooden skewer can help get a tiny amount of filling into the sides of the hat.
A toothpick or wooden skewer can help get a tiny amount of filling into the sides of the hat.
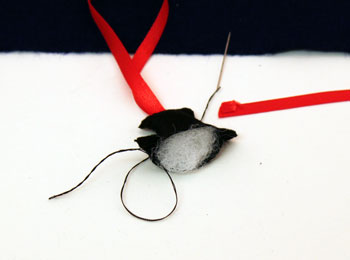
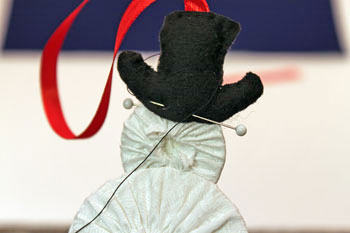
Sandwich the hat around the top of the snowman's head.
Pin the edge of the hat in place and sew to the top of the snowman's head.
Pin the edge of the hat in place and sew to the top of the snowman's head.
Pin and sew the back of the hat to the back of the small circle.
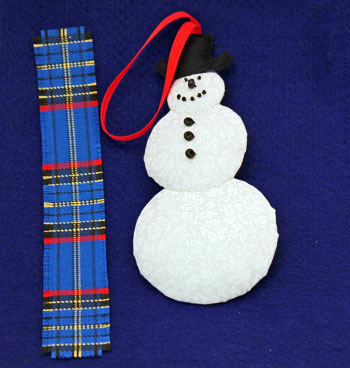
Prepare the snowman's scarf.
I cut this piece of plaid fabric using the lines on the plaid as a guide along with the pattern piece for general sizing.
I cut the plaid fabric slightly larger and pulled several threads from each side and each end forming a "fringed" scarf.
I cut this piece of plaid fabric using the lines on the plaid as a guide along with the pattern piece for general sizing.
I cut the plaid fabric slightly larger and pulled several threads from each side and each end forming a "fringed" scarf.
Fold the center portion of the scarf to make it easier to form around the snowman's neck.
Tie the scarf loosely on one side.
Sew it in place with a few hidden stitches.
Tie the scarf loosely on one side.
Sew it in place with a few hidden stitches.
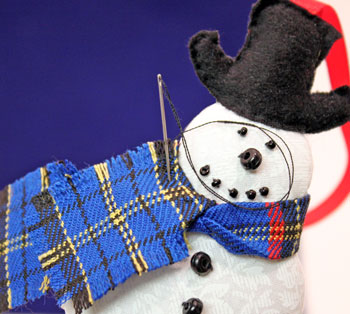
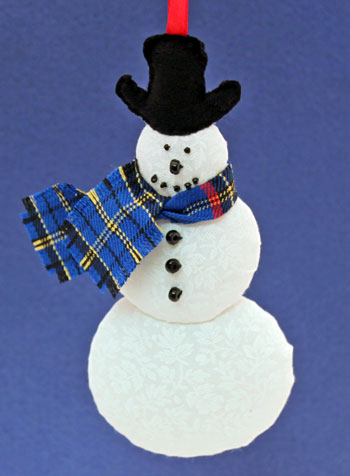
Just look at the finished Easy Christmas Crafts Snowman of Craft Yo Yos. Isn't he a cutie?
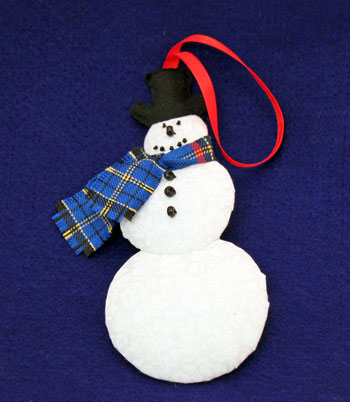
This little snowman hangs from his bright red ribbon showing off his black top hat, his plaid scarf and his beaded smile.

A few materials, basic tools and simple steps makes this Easy Christmas Crafts Snowman of Craft Yo Yos a fun and easy project.
One can be completed relatively quickly. Make several with different hats, scarves and beads to decorate your home or office.
Have fun!
The inexpensive and Easy Christmas Crafts Snowman of Craft Yo Yos can also be a great group project for a family, a craft party, a community center or an office party.


funEZcrafts
Welcome
Come on in and stay awhile...

funEZcrafts
Welcome
Come on in and stay awhile...