Easy Paper Crafts: Buddy the Owl
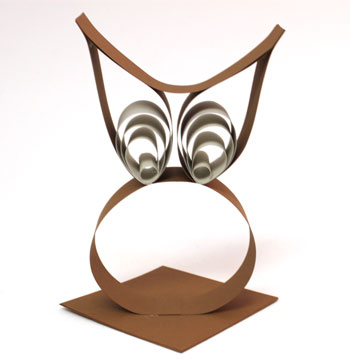
Two colors of paper and some glue turn into a fun little Buddy the Owl project that can add smiles to a table or other flat surface. Look at him, doesn't he look wise?
Take a look at the simple steps below for how to make this fun little owl.
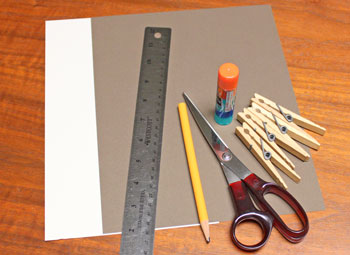
Easy Paper Crafts: Buddy the Owl Materials and Tools:
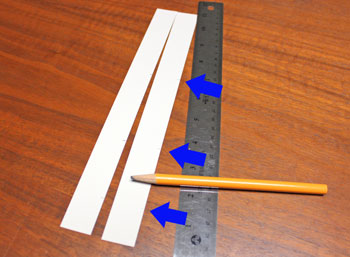
Cardstock - two colors of medium weight paper
Pencil
Round object for curling, roughly 3/8 inch in diameter (can be same pencil)
Scissors
Ruler
Clothespins (for holding pieces until glue sets)
Glue
Pencil
Round object for curling, roughly 3/8 inch in diameter (can be same pencil)
Scissors
Ruler
Clothespins (for holding pieces until glue sets)
Glue
The Steps for How to Make the Easy Paper Crafts: Buddy the Owl:
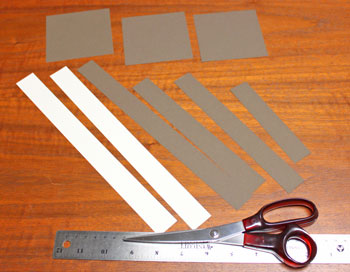
Measure and cut the following shapes from the paper.
Darker color:
Darker color:
1 piece 1-inch by 11-inch
1 piece 1-inch by 5-inch
2 pieces 1-inch by 8-inch
3 pieces 3.5-inch by 3.5-inch
1 piece 1-inch by 5-inch
2 pieces 1-inch by 8-inch
3 pieces 3.5-inch by 3.5-inch
Lighter color:
2 pieces 1-inch by 11-inch
2 pieces 1-inch by 11-inch
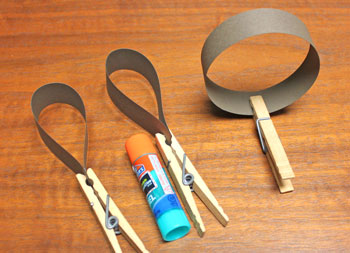
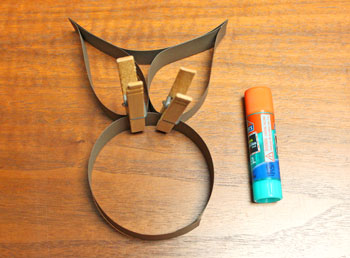
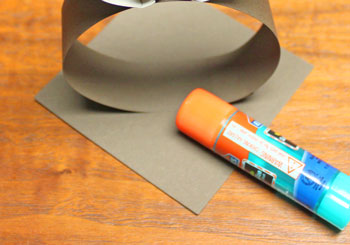
Make a circle of the darker 1-inch by 11-inch paper strip by adding glue and overlapping the ends by 3/4-inch.
Add glue to one end of one 1-inch by 8-inch piece.
Pull the opposite end to meet the edge of the first.
Be careful not to fold or crease the paper.
Do the same for the second 1-inch by 8-inch strip.
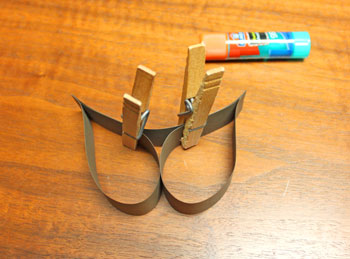
Use clothespins (or binder clips) to hold the edges together until the glue sets.
Add glue to one end of one 1-inch by 8-inch piece.
Pull the opposite end to meet the edge of the first.
Be careful not to fold or crease the paper.
Do the same for the second 1-inch by 8-inch strip.
Use clothespins (or binder clips) to hold the edges together until the glue sets.
Stack the three 3.5-inch by 3.5-inch pieces on top of each other matching edges.
Glue the top and bottom pieces to the middle square.
Glue the top and bottom pieces to the middle square.

Make small marks on each of the lighter 1-inch by 11-inch strips at 1.25 inches, 3.5 inches and 6.75 inches.
Use the round object to curl the end of the lighter strips near the first 1.25 mark.
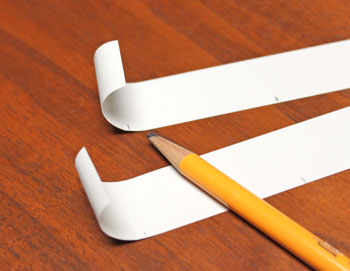
Perform the next steps for both of the lighter colored strips.
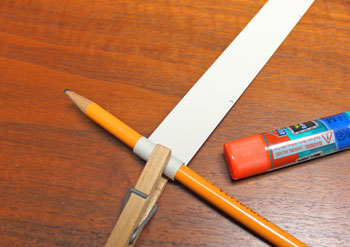
Place a small stripe of glue across the strip at the first 1.25 mark.
Wrap the strip around the round object and use a clothespin to hold the area until the glue sets.
Place a small stripe of glue across the strip at the first 1.25 mark.
Wrap the strip around the round object and use a clothespin to hold the area until the glue sets.
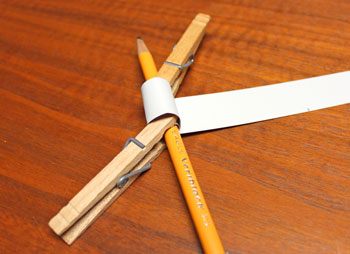
Add another stripe of glue across the paper at the second, 3.5-inch mark.
Wrap the paper around the round object until the second mark is approximately over the first mark.
There will be an open area opposite the marks.
Use clothespins to hold the strip until the glue sets.
Wrap the paper around the round object until the second mark is approximately over the first mark.
There will be an open area opposite the marks.
Use clothespins to hold the strip until the glue sets.
Add glue to the third mark at 6.75 inches and at the end of the strip.
Wrap the paper matching the third mark to the first two, hold it in place.
Finish wrapping the strip with the glue on the end matching the earlier three marks.
Hold the glued area until the glue sets.
Wrap the paper matching the third mark to the first two, hold it in place.
Finish wrapping the strip with the glue on the end matching the earlier three marks.
Hold the glued area until the glue sets.
Place glue on the 1-inch by 5-inch strip for roughly 1.75 inches from each end as shown by the blue arrows in the picture.
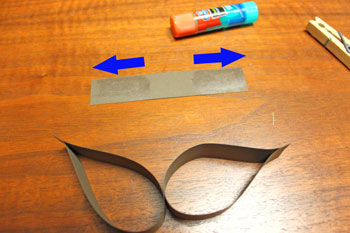
Match the cut ends of the glued 1-inch by 8-inch pieces to each end of the 1-inch by 5-inch piece.
Use clothepins to hold the glued areas until set.
Use clothepins to hold the glued areas until set.
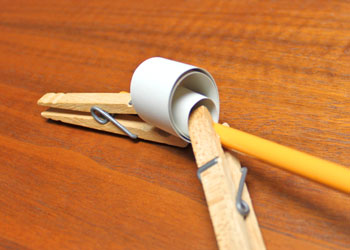
Place glue on the bottom of the 1-inch by 8-inch pieces and press to the top of the dark circle.
Clip with clothespins to hold until the glue sets.
Clip with clothespins to hold until the glue sets.
Place glue on the seam of each of the eyes, the lighter colored spirals.
Press the glued area into the bottom of the opening of the 1-inch by 8-inch strips above where they are glued to the bottom circle.
Press the glued area into the bottom of the opening of the 1-inch by 8-inch strips above where they are glued to the bottom circle.

After the glue on the eyes has set, apply glue diagonally in the middle of the base.
Press the middle of the bottom of the circle into the glue.
Press the middle of the bottom of the circle into the glue.
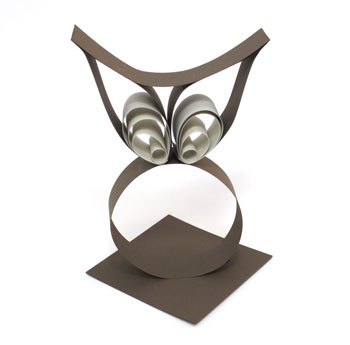
This darker version of Buddy the Owl is finished and ready to display on a table, desk or wherever he can add some owl wisdom.
Just two colors of paper cut into basic rectangular shapes turn into this fun little guy.
Make him in natural colors or go wild with different colors. How about purple with lime green eyes? Or, maybe red with pink eyes.
Have fun!
The Buddy the Owl project can be fun for anyone and makes a great grandparent - grandchild project for cold or rainy days.
Make him in natural colors or go wild with different colors. How about purple with lime green eyes? Or, maybe red with pink eyes.
Have fun!
The Buddy the Owl project can be fun for anyone and makes a great grandparent - grandchild project for cold or rainy days.


funEZcrafts
Welcome
Come on in and stay awhile...

funEZcrafts
Welcome
Come on in and stay awhile...